Configure Hooks
Add entry and exit hooks to workflow stages. Hooks are tool calls that run automatically before a stage starts (entry) or after it completes (exit), without consuming agent cycles.

This page shows how to do it manually. The faster, more common way is to describe what you want to the Workflow Assistant — it builds the team, stages, agents, and assignments for you, then you fine-tune by hand using the steps below.
Prerequisites
- A workflow with at least one stage (see Add Stages)
- Tool definitions configured in your project
Steps
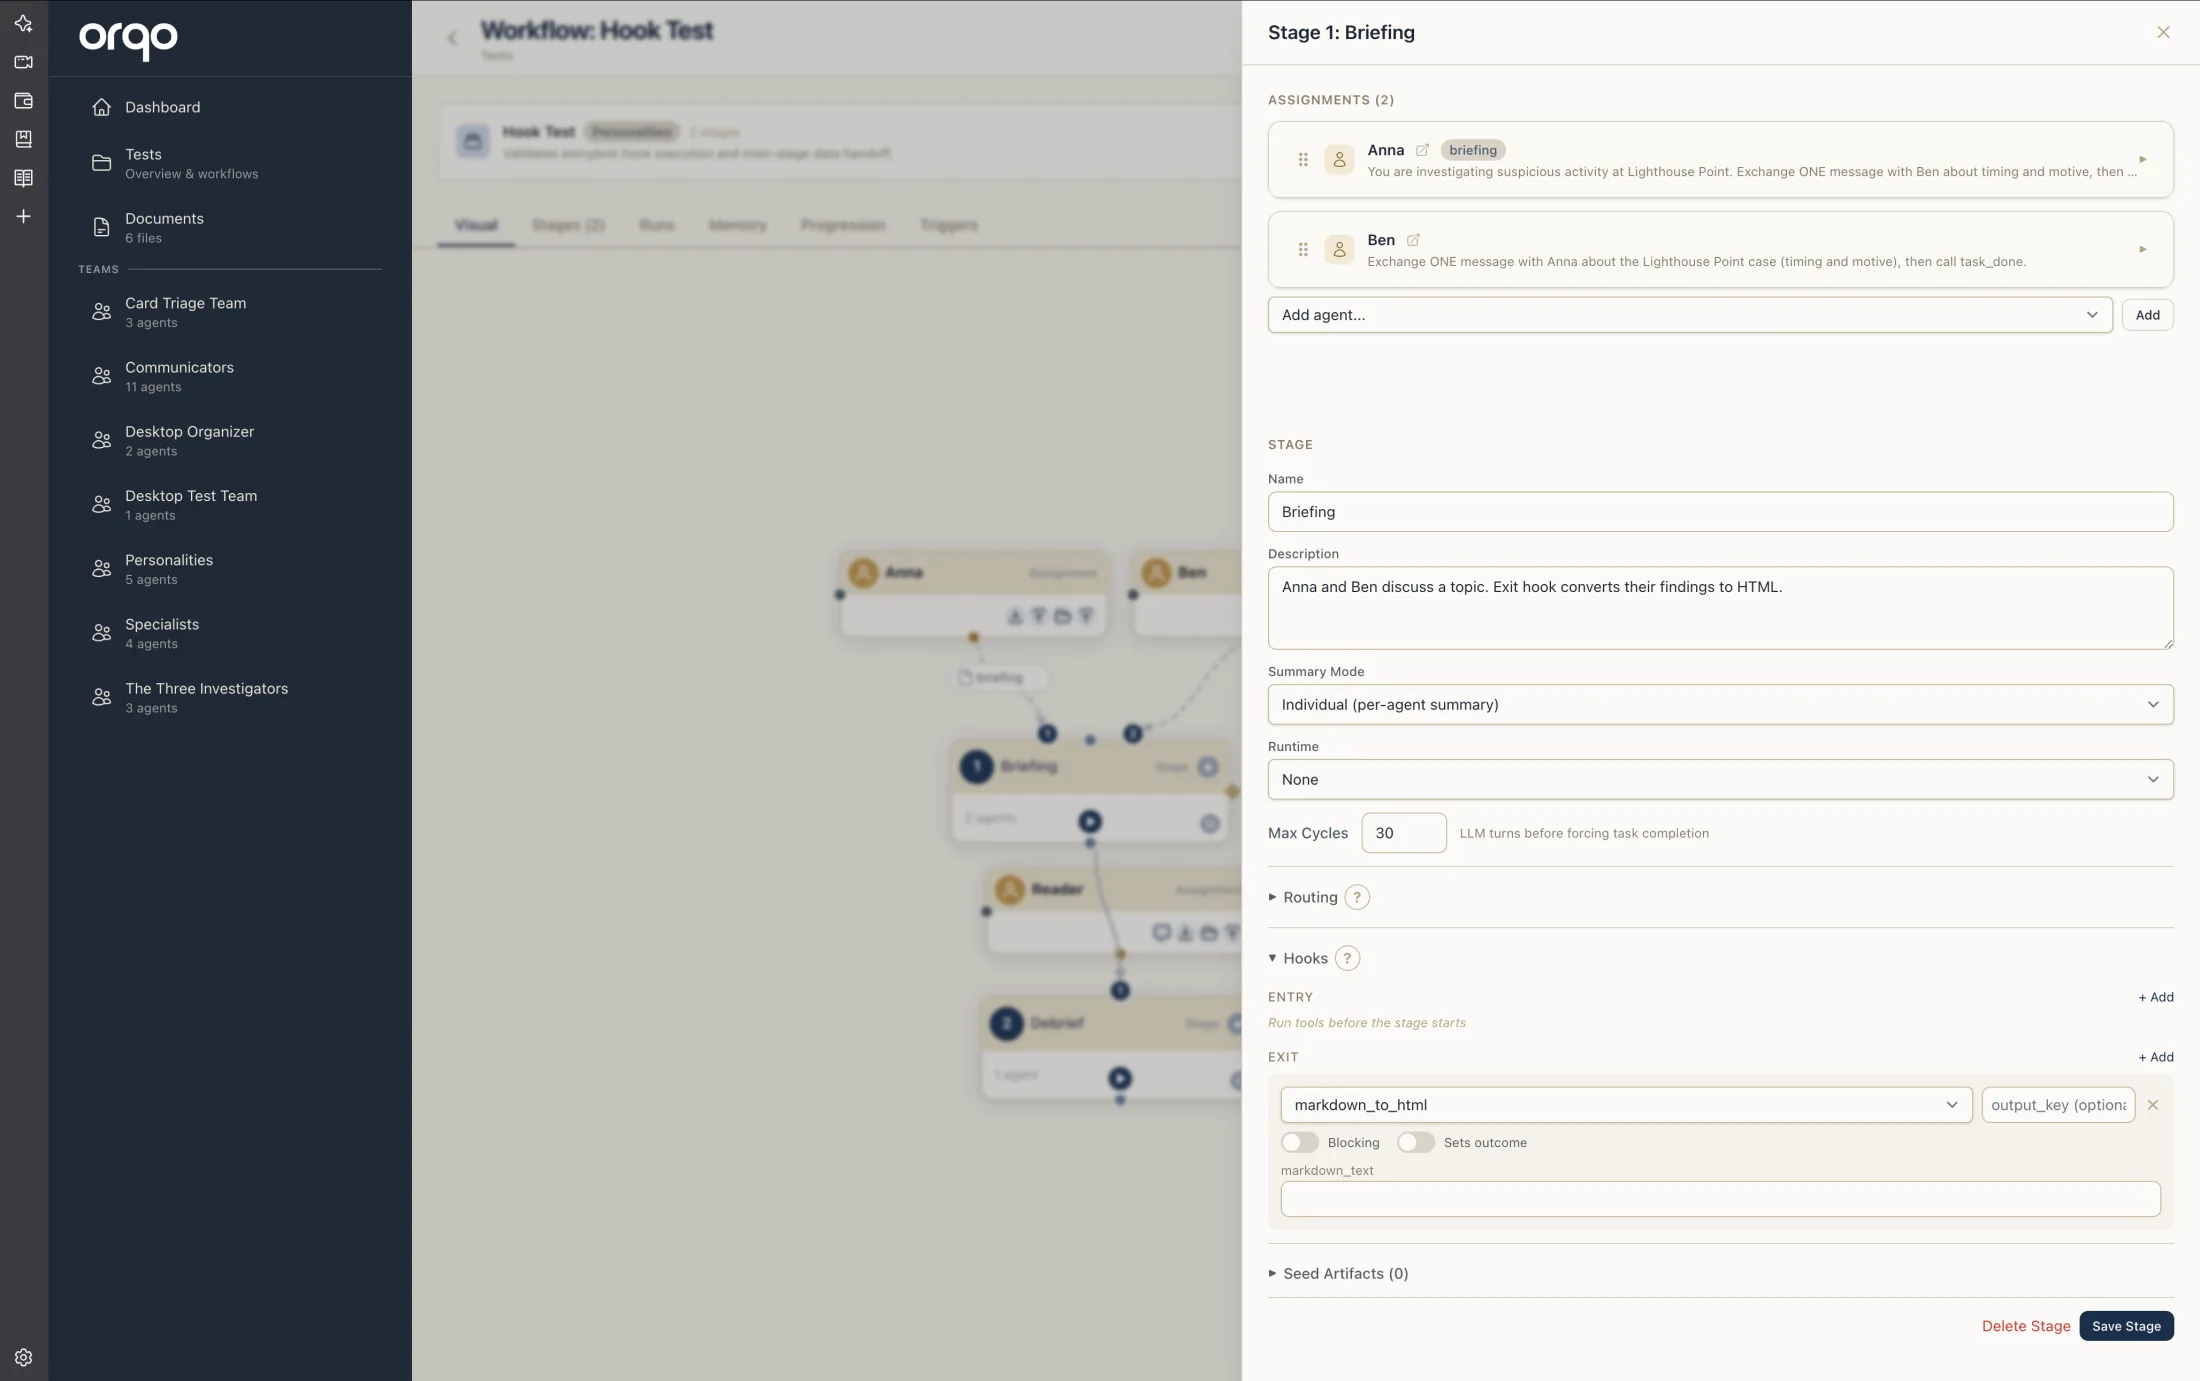
1. Open the stage edit drawer
Navigate to your workflow's Visual Builder. Click a stage node to open the edit drawer, then open the Hooks tab.
2. Understand entry vs. exit hooks
| Hook type | When it runs | Common use cases |
|---|---|---|
| Entry hook | Before any agent in the stage executes | Load data, validate preconditions, fetch external state |
| Exit hook | After all agents in the stage complete | Save results, send notifications, update external systems |
3. Add an entry hook
In the Entry list of the Hooks tab, click Add. Select a tool from the dropdown -- this lists all tool definitions available in the project.
Configure the hook:
- Tool -- Which tool to execute
- Output Key -- A key name under which the hook's output is stored, making it accessible to agents in the stage
Entry hooks are ideal for loading data that multiple agents need. Set an output key so agents can reference the data without each making their own tool call.
4. Add an exit hook
In the Exit list, click Add. The configuration is the same:
- Tool -- Which tool to execute
- Output Key -- A key name for the hook's output (available to downstream stages)
Exit hooks commonly persist stage results to external systems, trigger notifications, or clean up temporary resources.
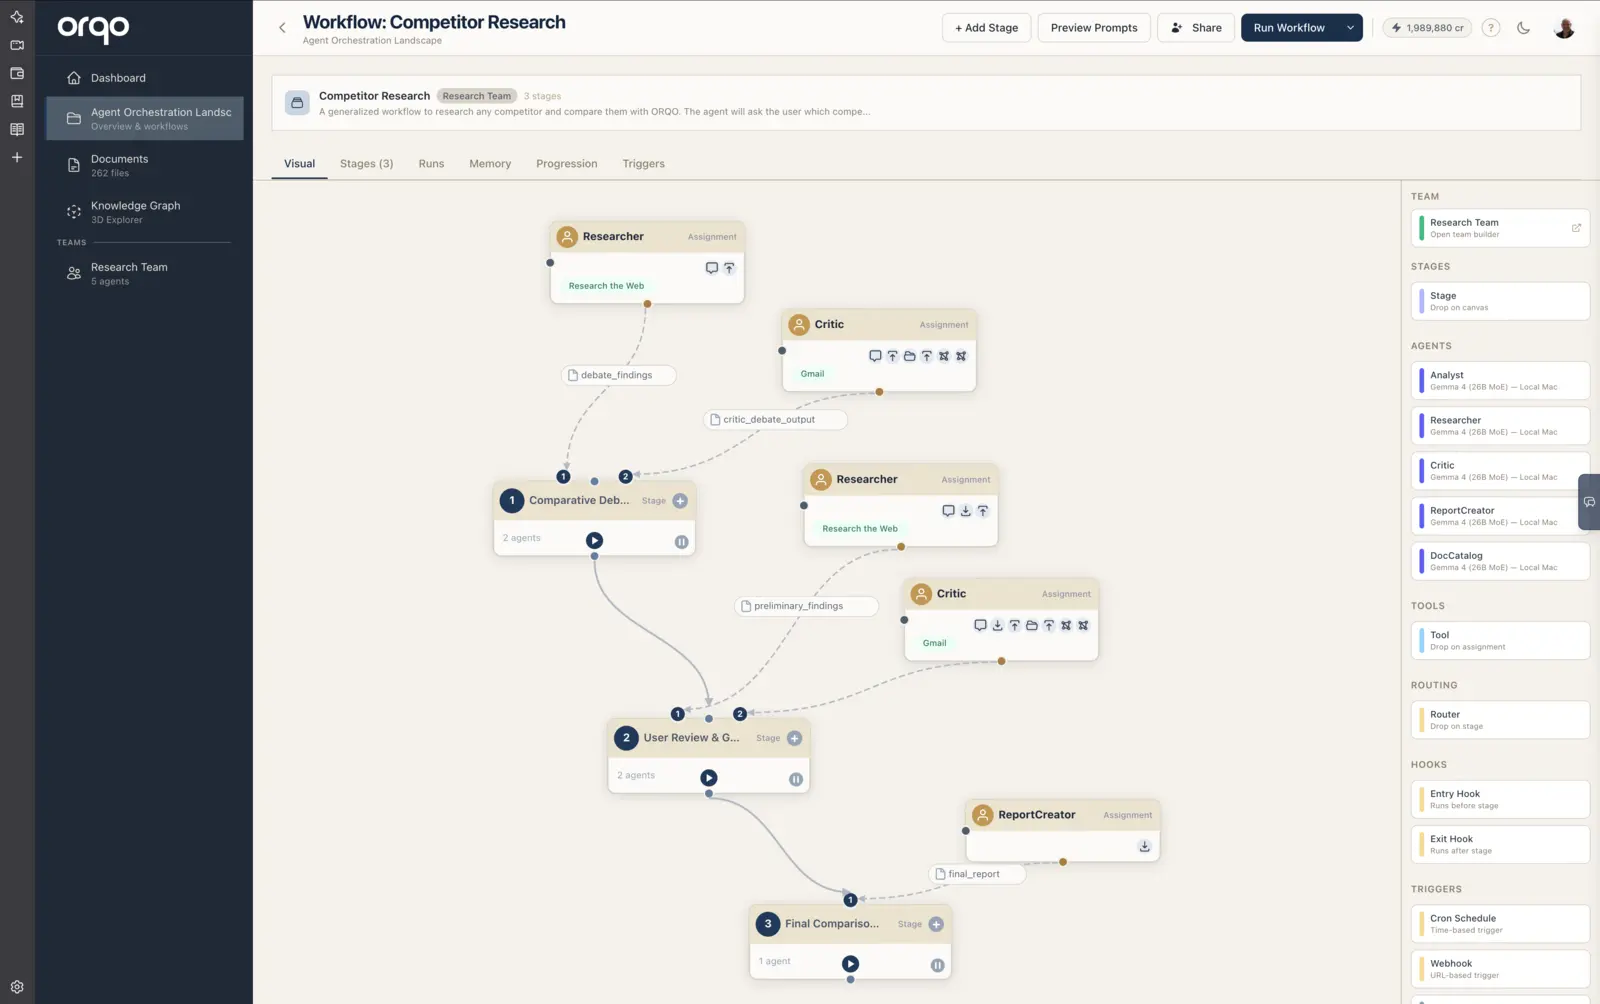
5. View hooks in the Visual Builder
After saving, the Visual Builder shows hooks as nodes flanking the stage:
- Entry hooks appear to the LEFT of the stage, connected by a dashed line
- Exit hooks appear to the RIGHT of the stage, connected by a dashed line
Small diamond indicators on the stage's left and right edges indicate that hooks are configured.
6. Add hooks via drag-and-drop
Alternatively, drag a hook card from the Hooks section of the sidebar palette onto a stage node:
- Drag "Entry Hook" onto a stage to open the Hooks tab with the entry list focused
- Drag "Exit Hook" onto a stage to open the Hooks tab with the exit list focused
7. Remove a hook
Open the stage's Hooks tab and click the remove button next to the hook you want to delete. Save the stage form to persist the change.
8. Chain multiple hooks
You can add multiple entry hooks and multiple exit hooks to a single stage. They execute in the order listed. Each hook's output is available under its output key.
Hooks execute synchronously. A slow entry hook delays the entire stage. Keep hook operations lightweight or use them for essential setup and teardown only.
What's next
- Use Outcome Routing to add branching based on stage results
- Set Up Assignments to configure agent task directives
- Run a Workflow to see hooks in action