Use Outcome Routing
Configure stage outcomes to create branching and looping patterns in your workflow. Outcome routing lets a stage direct execution to different stages based on its result.

This page shows how to do it manually. The faster, more common way is to describe what you want to the Workflow Assistant — it builds the team, stages, agents, and assignments for you, then you fine-tune by hand using the steps below.
Prerequisites
- A workflow with at least two stages (see Add Stages)
- Agents assigned to stages (see Set Up Assignments)
Steps
1. Open the stage's Routing tab
Navigate to the Visual Builder and click a stage node. In the edit drawer, open the Routing tab.
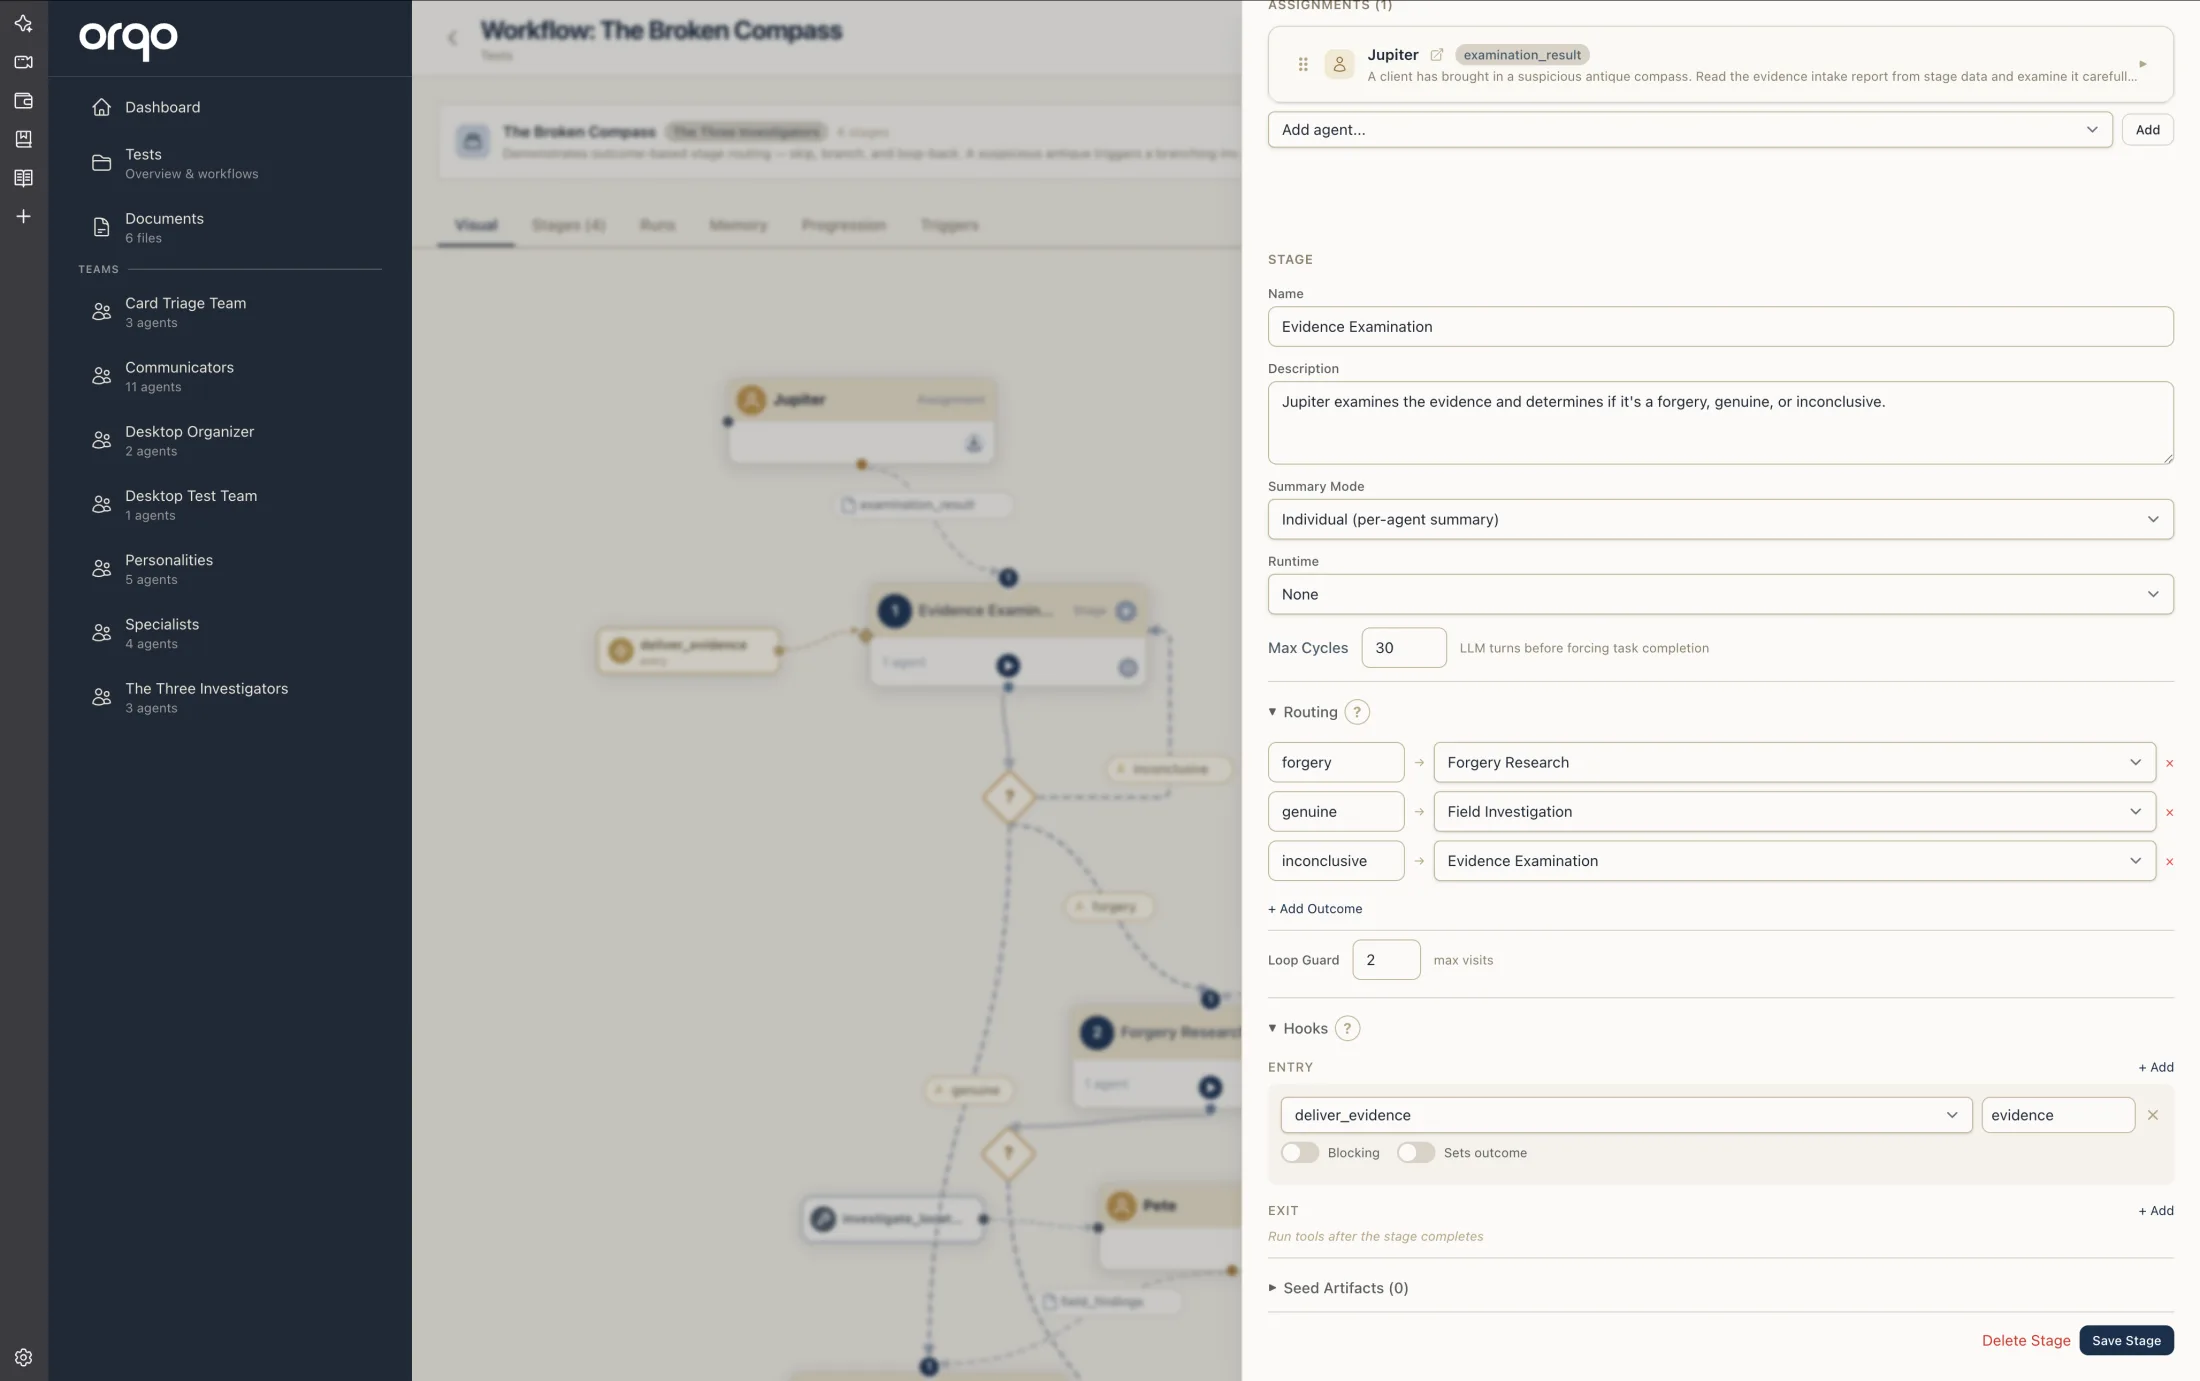
2. Define outcomes
Add outcome names that the stage can produce. Outcomes are strings that the finalizer agent (or the last agent to produce output) sets as the stage's result.
Example outcomes for a review stage:
approved-- Content passes quality reviewneeds_revision-- Content requires changesrejected-- Content is fundamentally flawed
Click Add Outcome and type each outcome name. Outcomes are case-sensitive.
Keep outcome names short and descriptive. They appear as labels on routing links in the Visual Builder.
3. Configure outcome routing
For each outcome, select the target stage from the dropdown. This determines where the workflow goes when that outcome is produced.
| Outcome | Target Stage | Effect |
|---|---|---|
approved | Publish (stage 3) | Skips ahead to publishing |
needs_revision | Draft (stage 1) | Loops back to redraft |
rejected | (none) | Falls through to the next sequential stage |
Each outcome's dropdown also offers × end workflow -- pick it to terminate the workflow on that branch instead of routing to another stage. A branch that ends the workflow draws no onward link in the builder, so you can see where a path stops.
Under a ⚡ Trigger workflow group, the dropdown also lists the other workflows in your project. Pick one to have this outcome launch that workflow instead of continuing to a stage -- useful for keeping concerns separate yet connected (for example, a lightweight workflow that kicks off a heavier one). When you select a workflow, an optional input to pass field appears, so you can hand the launched workflow a starting message (like a company name). The launched workflow runs, then this branch ends. On the canvas the target shows as a violet ⚡ node.
The input supports dynamic values with {{ key }} placeholders -- for example company_name: {{ name }}. At run time, {{ name }} is replaced with a value produced by an earlier stage in the same run (a stage output). Placeholders whose key wasn't produced are left as-is. This lets one run launch another and pass along data it computed, rather than a fixed value.
Outcomes without explicit routing default to the next stage in position order.
4. Set the default target (optional)
At the top of the Routing tab, the stage-level Default control sets where any unmatched outcome goes -- a specific stage, another workflow, or × end workflow. Leave it on next stage (linear flow) to keep the position-order fall-through, or point it somewhere explicit so nothing routes by accident.
If an outcome has no target and no default is set, the builder notes that the outcome will simply advance to the next stage by position -- a reminder in case you meant to route it somewhere.
5. Set up a loop guard
When routing creates a backward loop (e.g., from Review back to Draft), set a Loop Guard to prevent infinite loops.
The loop guard specifies the maximum number of times a stage can loop back before the workflow forces forward progression. It lives in the Limits group on the Main tab of the stage drawer, next to Max Cycles -- the two together bound how much work a stage can do: Max Cycles caps how many tool-calling turns a single agent takes within the stage, while Loop Guard caps how many times routing can re-enter the stage.
Always set a loop guard when creating backward routes. Without one, a workflow can loop indefinitely if the outcome condition is never met.
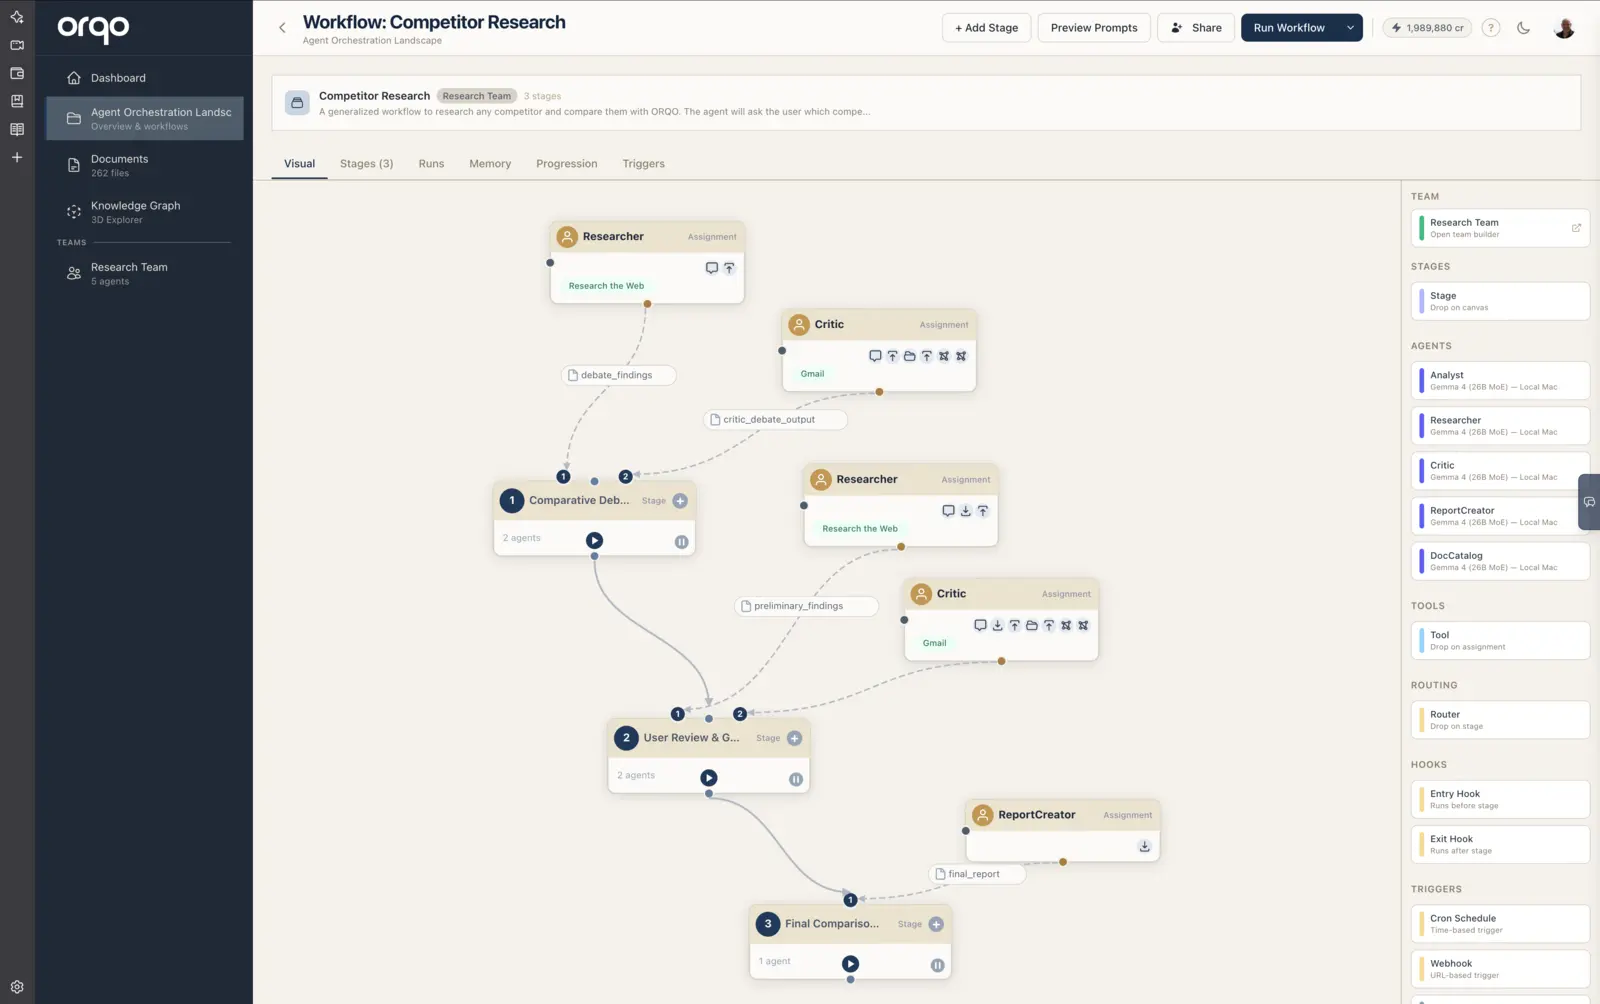
6. View routing in the Visual Builder
After saving, the Visual Builder shows routing visually:
- A diamond node (decision point) appears below the stage
- Labeled dashed links branch from the diamond to target stages, each showing the outcome name as an amber pill badge
- When a stage fans out to several stages, the builder arranges each branch as its own subtree, side by side, rather than stacking everything in one column
- Backward routes (to earlier stages) use manhattan routing with curved connectors along the right side of the canvas
7. Add routing via drag-and-drop
Alternatively, drag a "Router" card from the Routing section of the sidebar palette onto a stage node. This opens the stage drawer with the Routing tab selected.
8. Click diamond or outcome links to edit
In the Visual Builder:
- Click a diamond node to open the stage's Routing tab
- Click an outcome label on a link to open the same tab
9. Common routing patterns
Linear pipeline (default): No outcomes defined. Stages execute in position order.
Quality gate:
A review stage with approved and needs_revision outcomes. Approved content advances; rejected content loops back.
Multi-path branching:
A classification stage routes to different processing stages based on content type (e.g., text goes to stage A, image goes to stage B).
Retry with escalation: First attempt loops back on failure, but after the loop guard limit, the workflow falls through to an error-handling stage.
Triggering another workflow from an outcome
An outcome can route to a workflow instead of a stage. Instead of a stage name, provide a dict with a workflow key:
outcome_routing:
  "approved": { workflow: "Deploy to Production", then: "_end" }
  "rejected": "Archive"
When the "approved" outcome fires, the "Deploy to Production" workflow runs as a separate run, and the parent workflow follows the "continue at" directive after it completes.
This is covered in detail in the Workflow Triggering reference.
What's next
- Build a Self-Correcting Loop to route a stage back to itself on a deterministic check
- Configure Hooks to add pre/post processing
- Create a Trigger to schedule the workflow
- Run a Workflow to test routing behavior