Create a Project
Set up a new project in ORQO to organize your teams, workflows, and documents in one place.
Prerequisites
- An ORQO account with access to at least one organization
- Organization-level permissions to create projects
Steps
1. Open the Projects page
Navigate to Projects in the sidebar. This shows all projects in your current organization as a grid of cards.

2. Click "New Project"
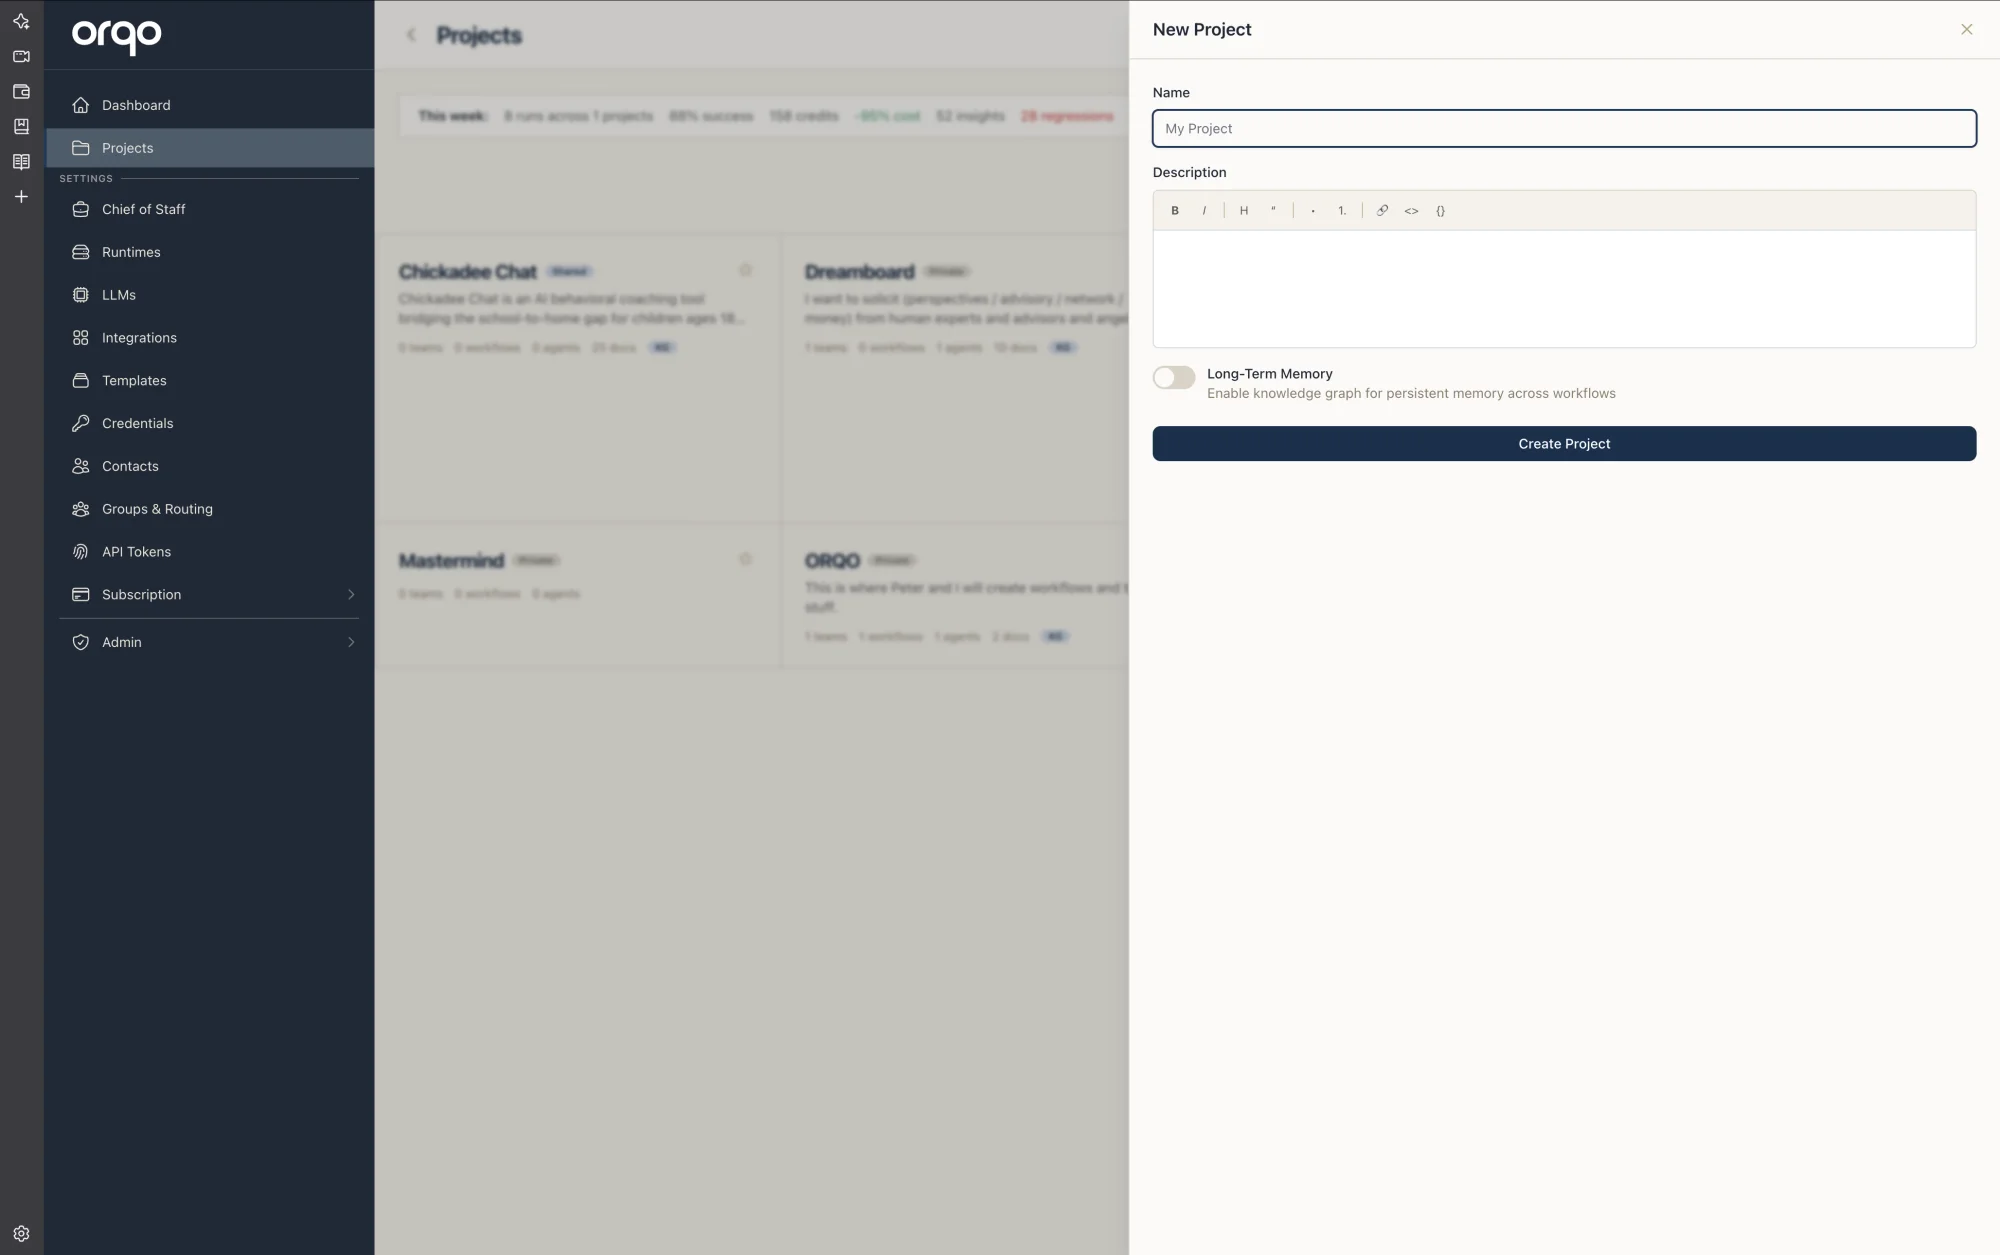
Click the New Project button in the page header. A New Project form opens where you enter the project's details.
3. Fill in the project details
Enter the following fields:
- Name -- A short, descriptive name for the project (e.g., "Customer Support Automation")
- Description -- A longer explanation of what the project does. This description is sent to the AI assistant and the Knowledge Curator as context, so make it specific.
Write a detailed description. The AI assistant and Knowledge Curator use it to understand your project's purpose when suggesting workflows, classifying documents, and curating knowledge.
4. Enable long-term memory (optional)
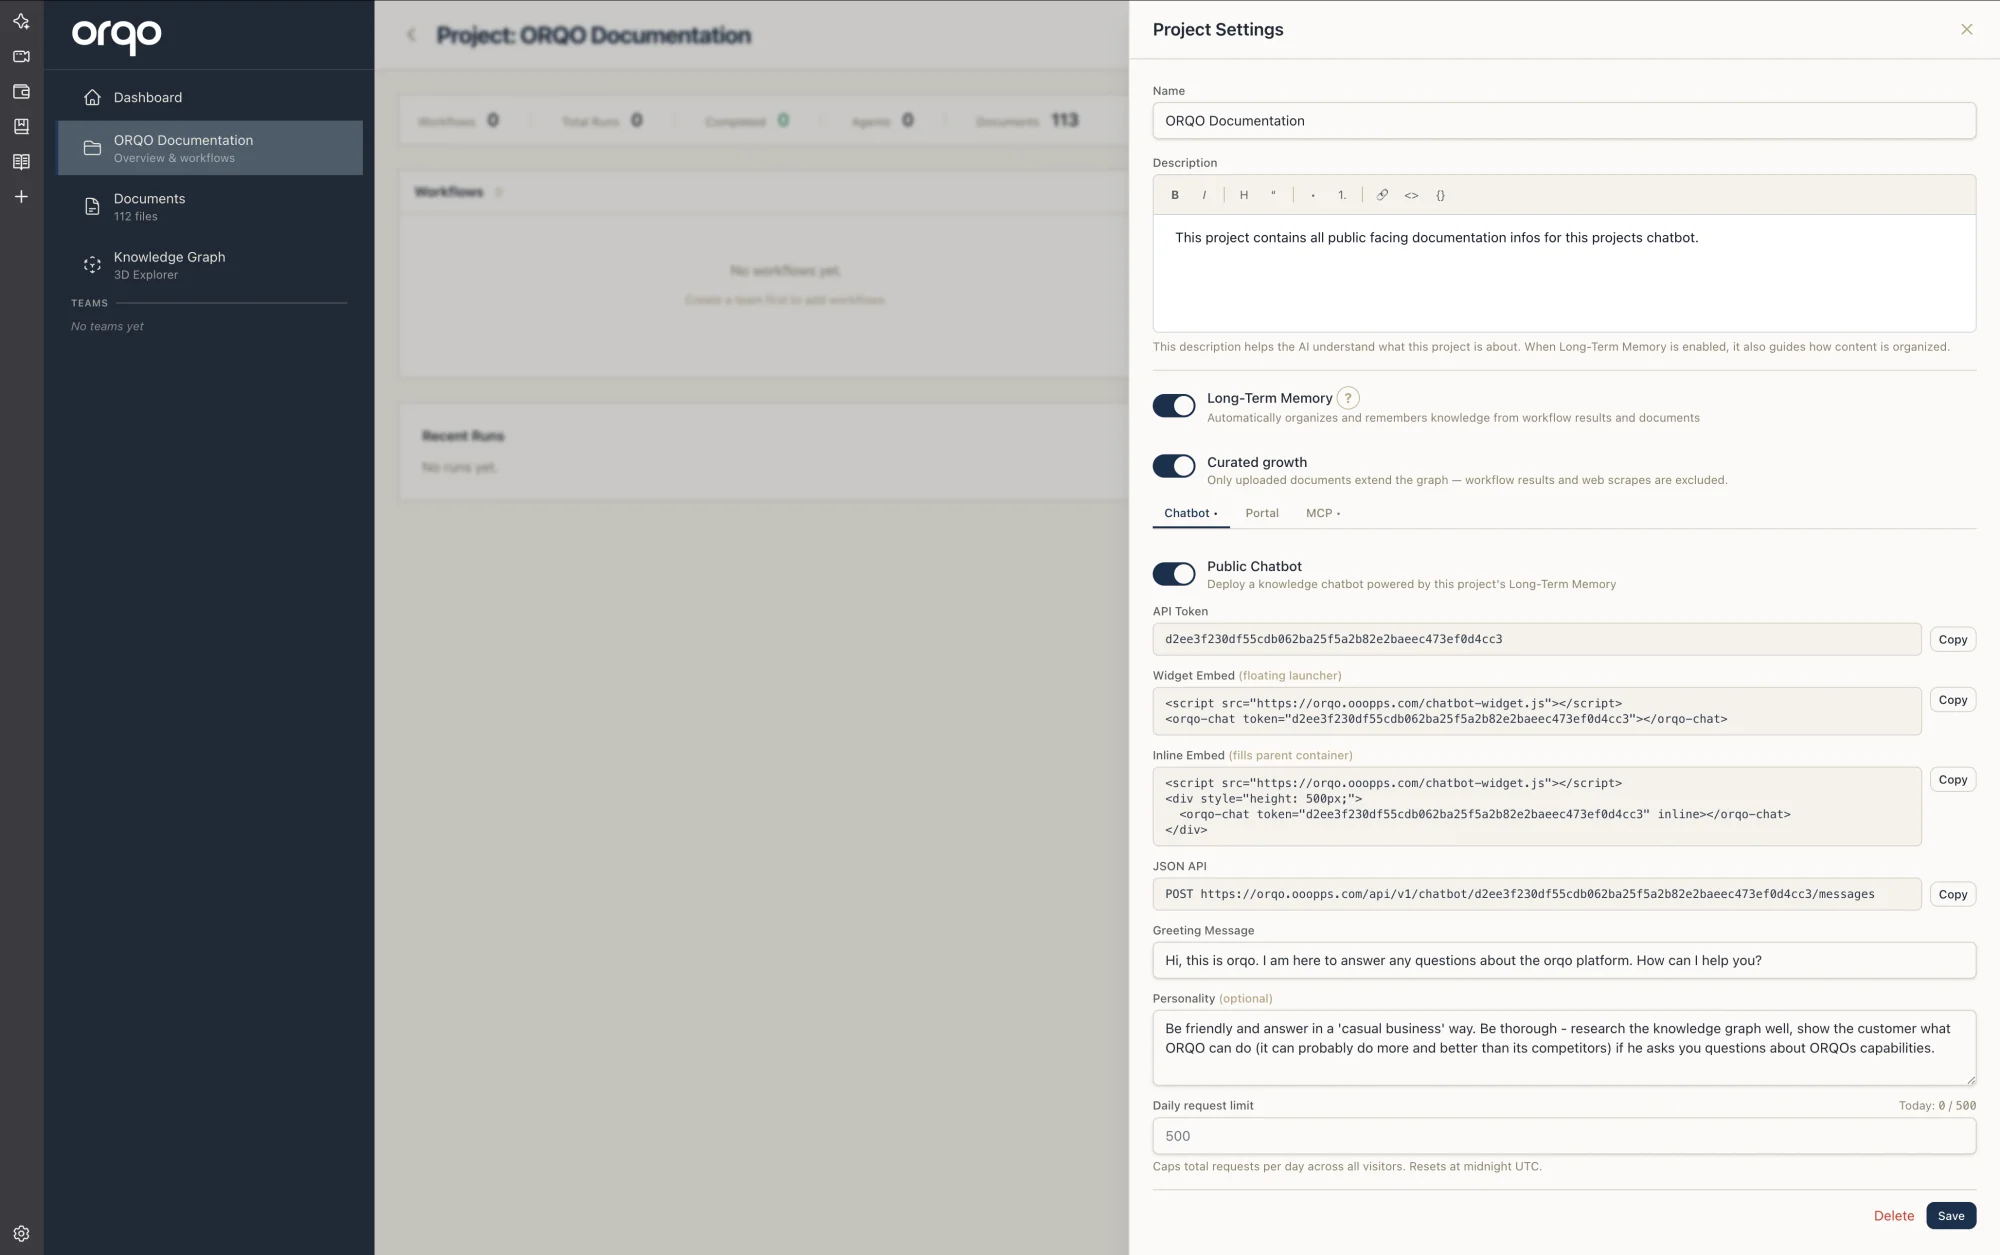
Toggle Long-Term Memory to enable the project's knowledge graph. When enabled, two additional options appear:
- Curated Mode -- Only uploaded documents grow the knowledge graph. Workflow results and web scrapes are excluded.
- Public Chatbot -- Deploy a knowledge chatbot powered by this project's Long-Term Memory.
When Long-Term Memory is active:
- Uploaded documents are automatically classified into a structured knowledge graph using the 3-pass classifier
- Workflow tool results flagged for enrichment are routed through the Knowledge Curator pipeline
- The AI assistant can reference the knowledge graph when building workflows
Leave this off if the project does not need persistent knowledge management.
Enabling the knowledge graph requires a properly configured ORQO instance.
5. Save the project
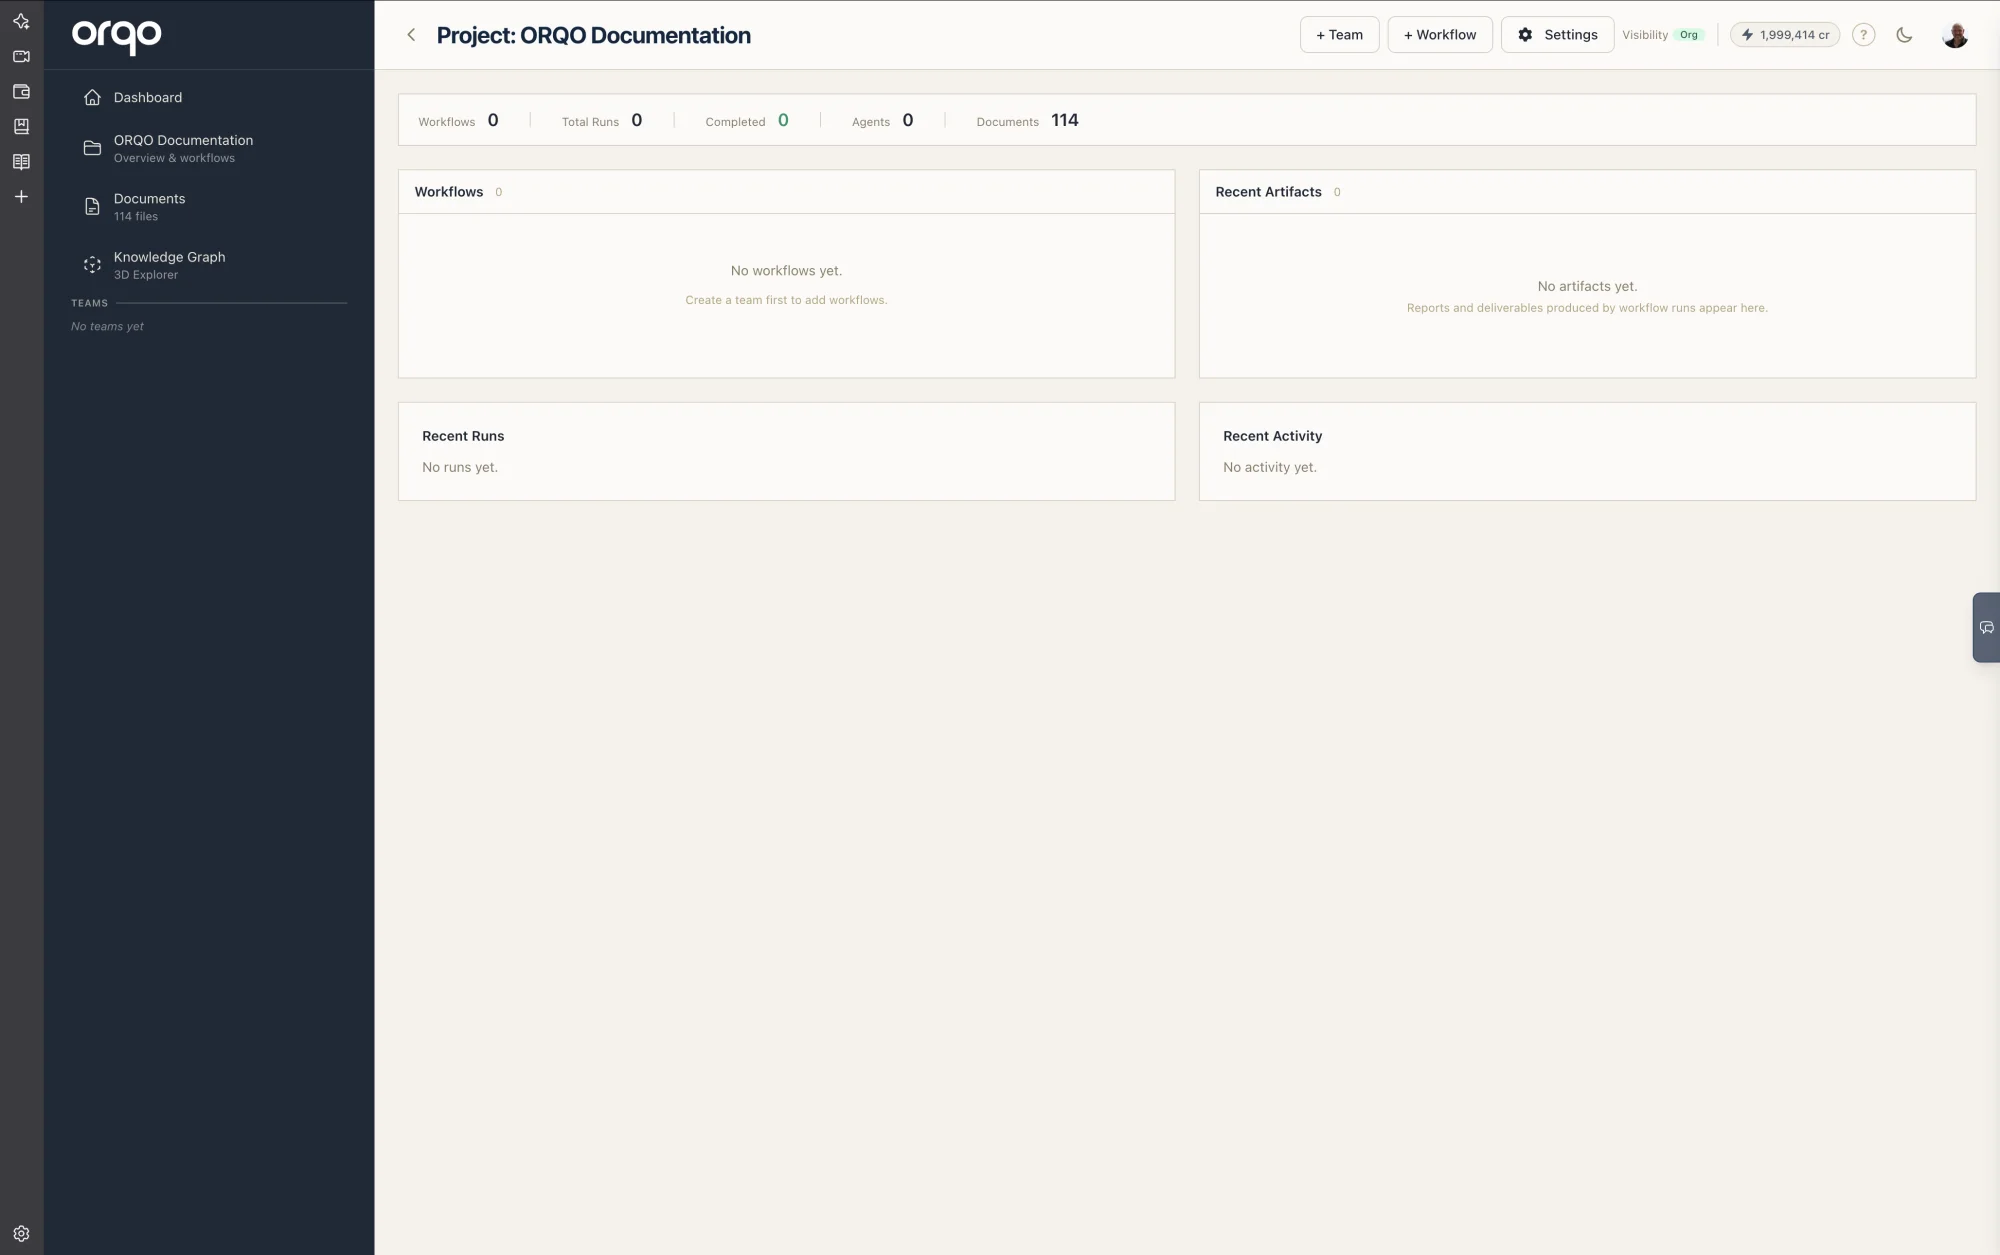
Click Save. The project detail page shows the sidebar with sections for Teams, Workflows, and Documents.
6. Verify the project appears in the sidebar
The sidebar now shows your project name. From here you can drill into Teams, Workflows, or Documents.
What's next
- Build a Team to add agents to your project
- Create a Workflow to define your first automation
- Use the AI Assistant to build teams and workflows through conversation
- Share the project with a teammate once it's ready for collaboration
Learn more
- Reference: Projects
- Collaboration Overview -- roles, visibility, and sharing