Set Up Assignments
Assign agents to workflow stages with task directives, capabilities, and tool selections. Each assignment tells the platform which agent works on a stage and what it should do.

This page shows how to do it manually. The faster, more common way is to describe what you want to the Workflow Assistant — it builds the team, stages, agents, and assignments for you, then you fine-tune by hand using the steps below.
Prerequisites
- A workflow with at least one stage (see Add Stages)
- A team with configured agents (see Build a Team)
Steps
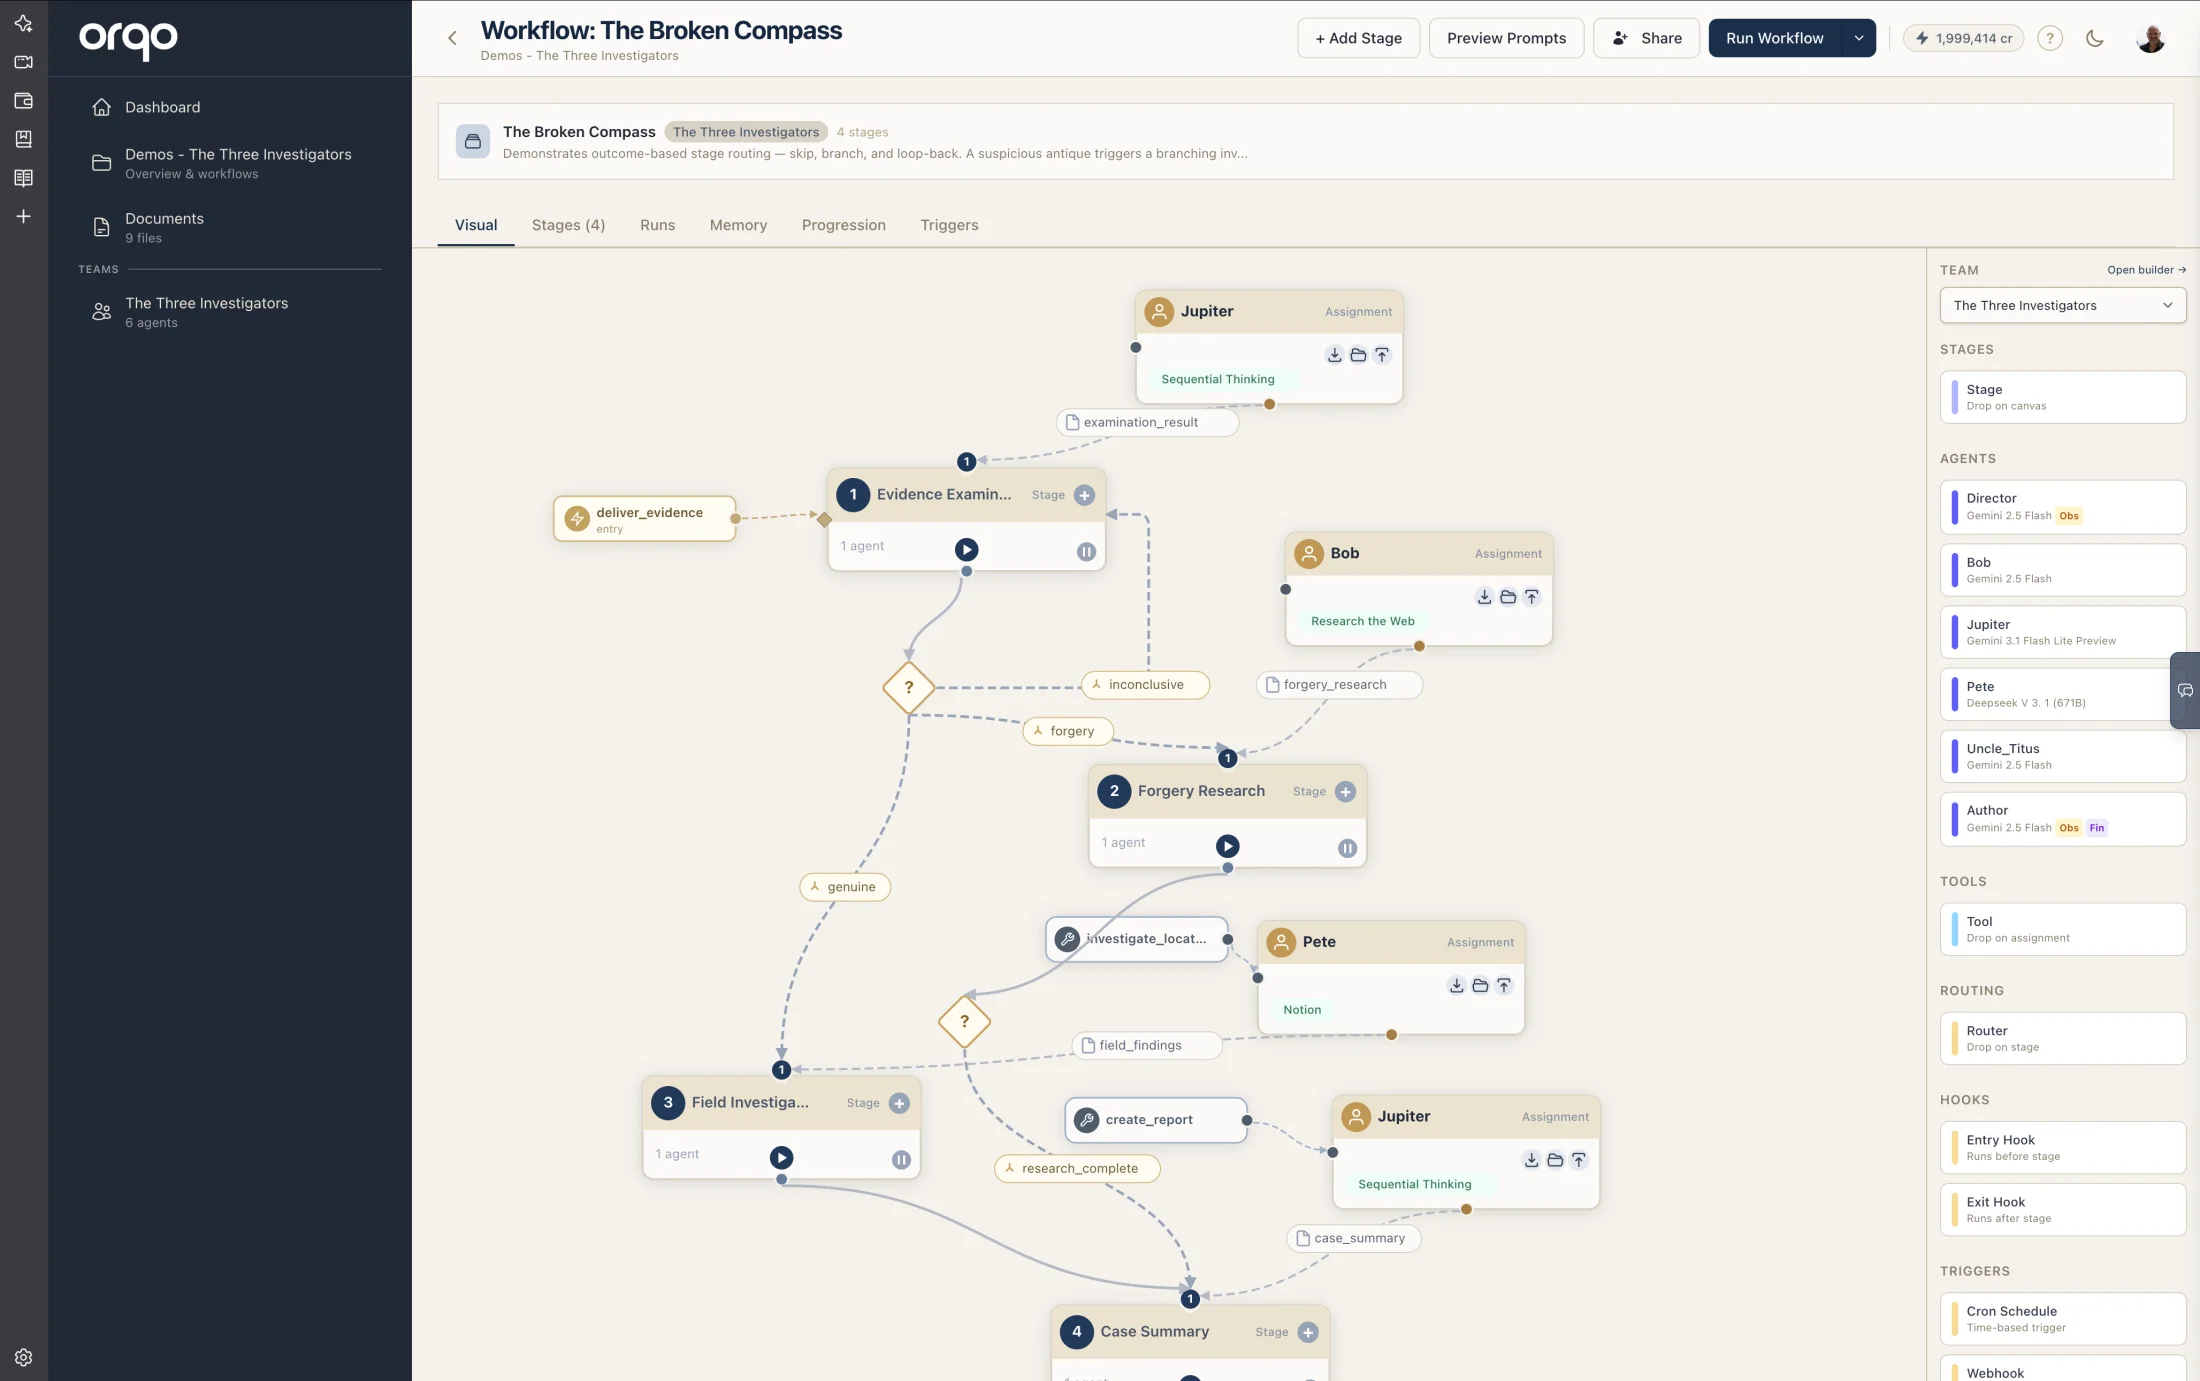
1. Open the Visual Builder
Navigate to your workflow and switch to the Visual tab. The sidebar palette shows agents from the workflow's assigned team.
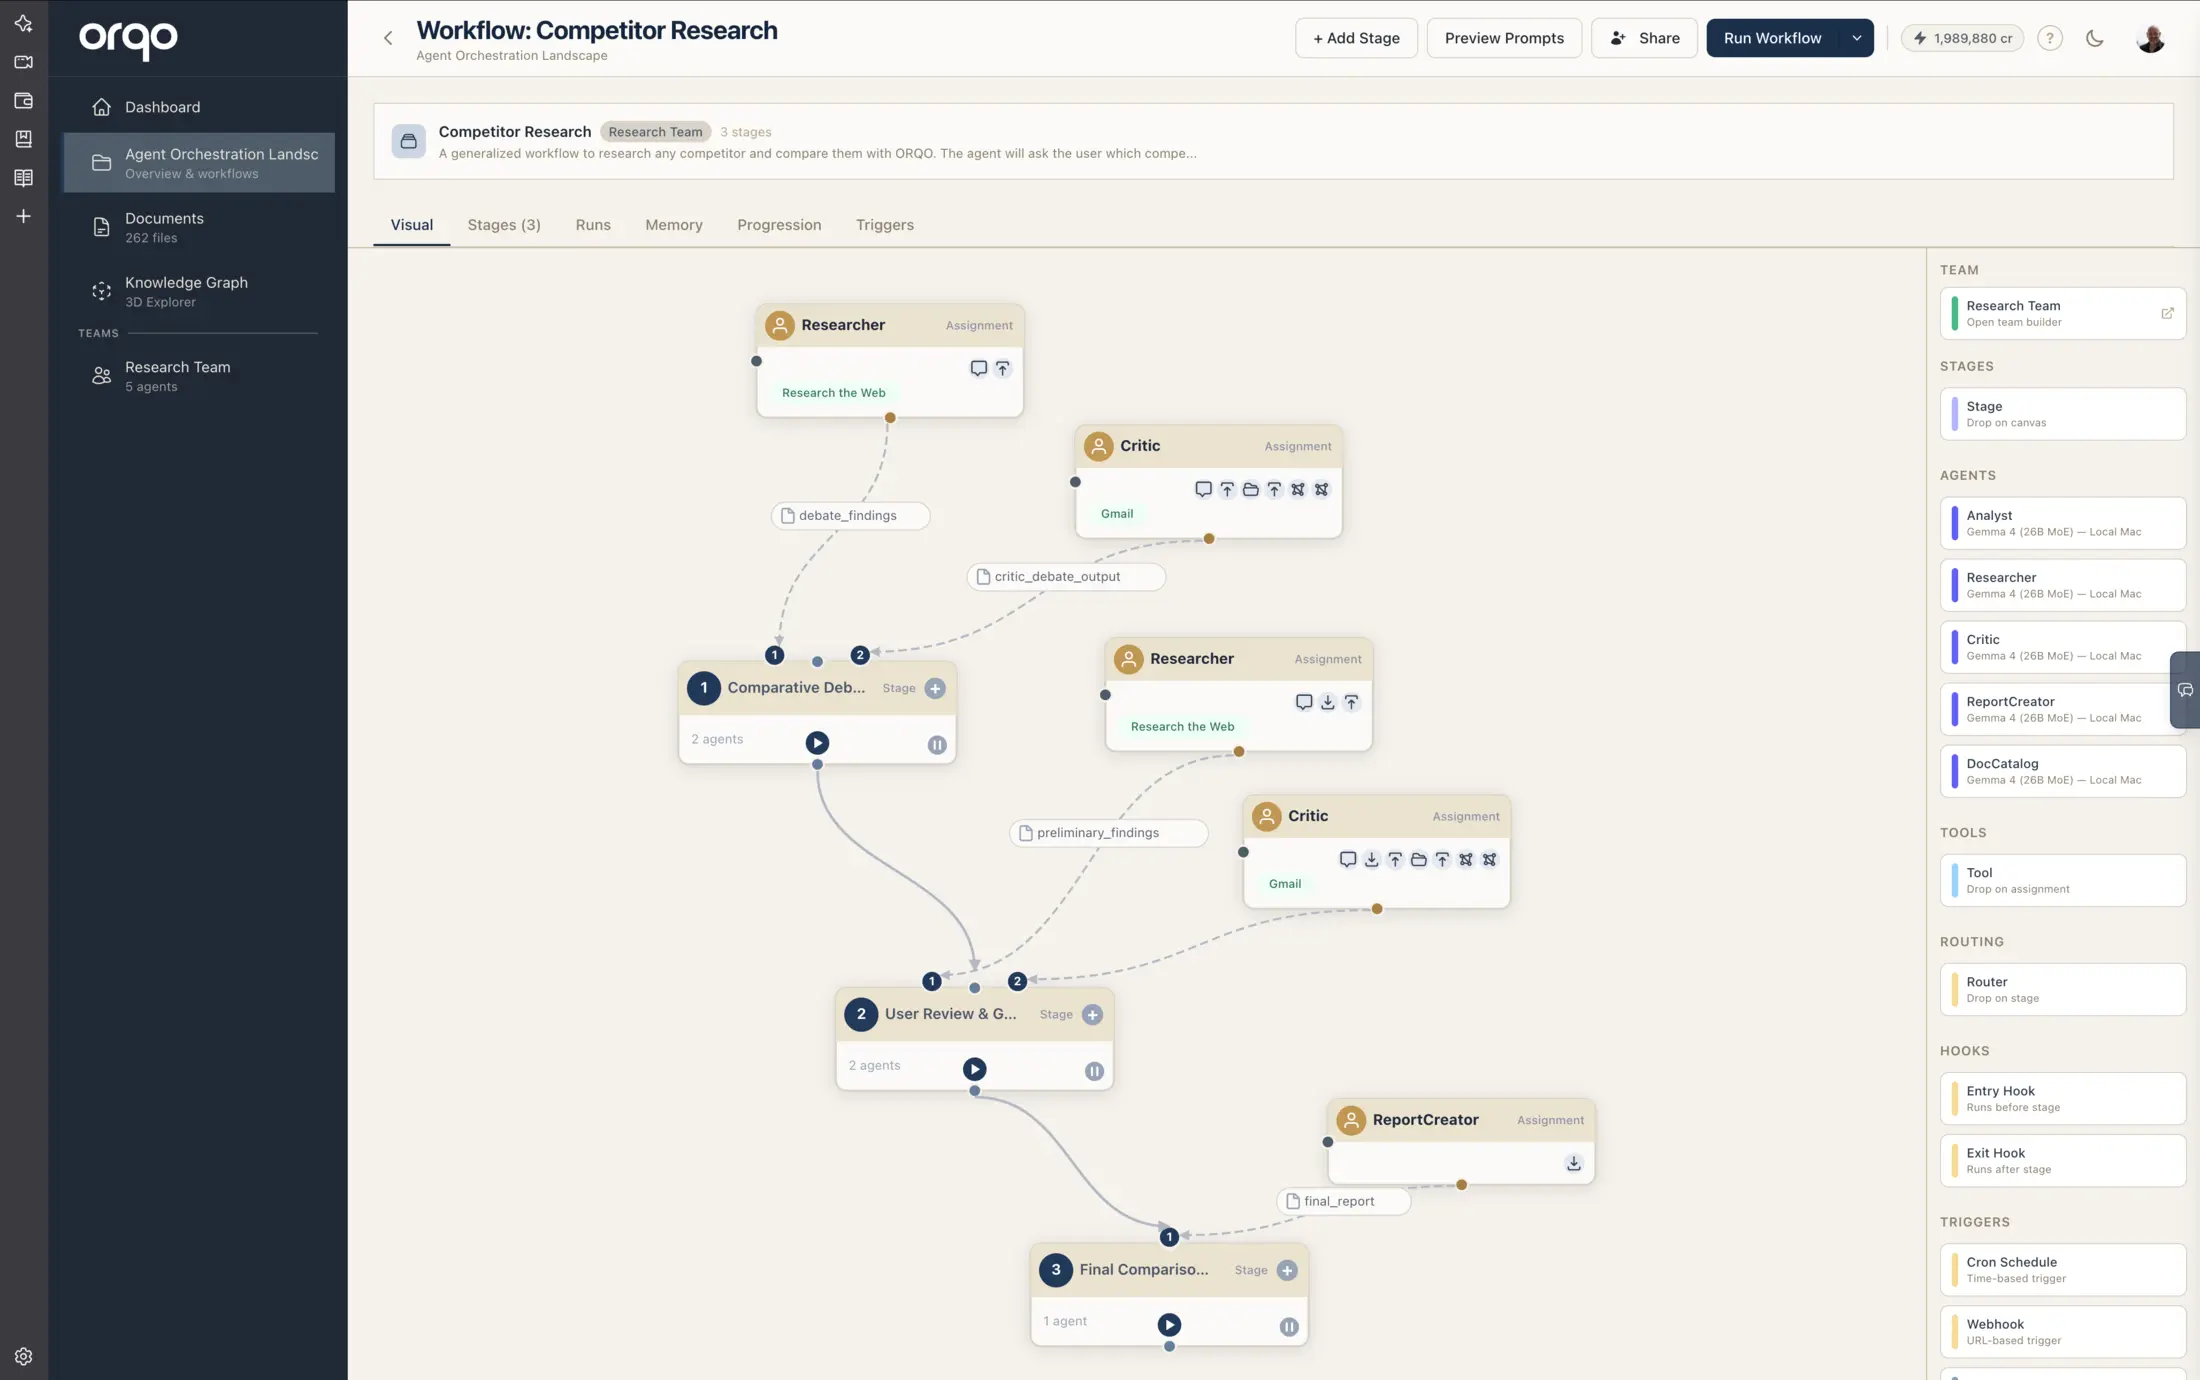
2. Drag an agent onto a stage
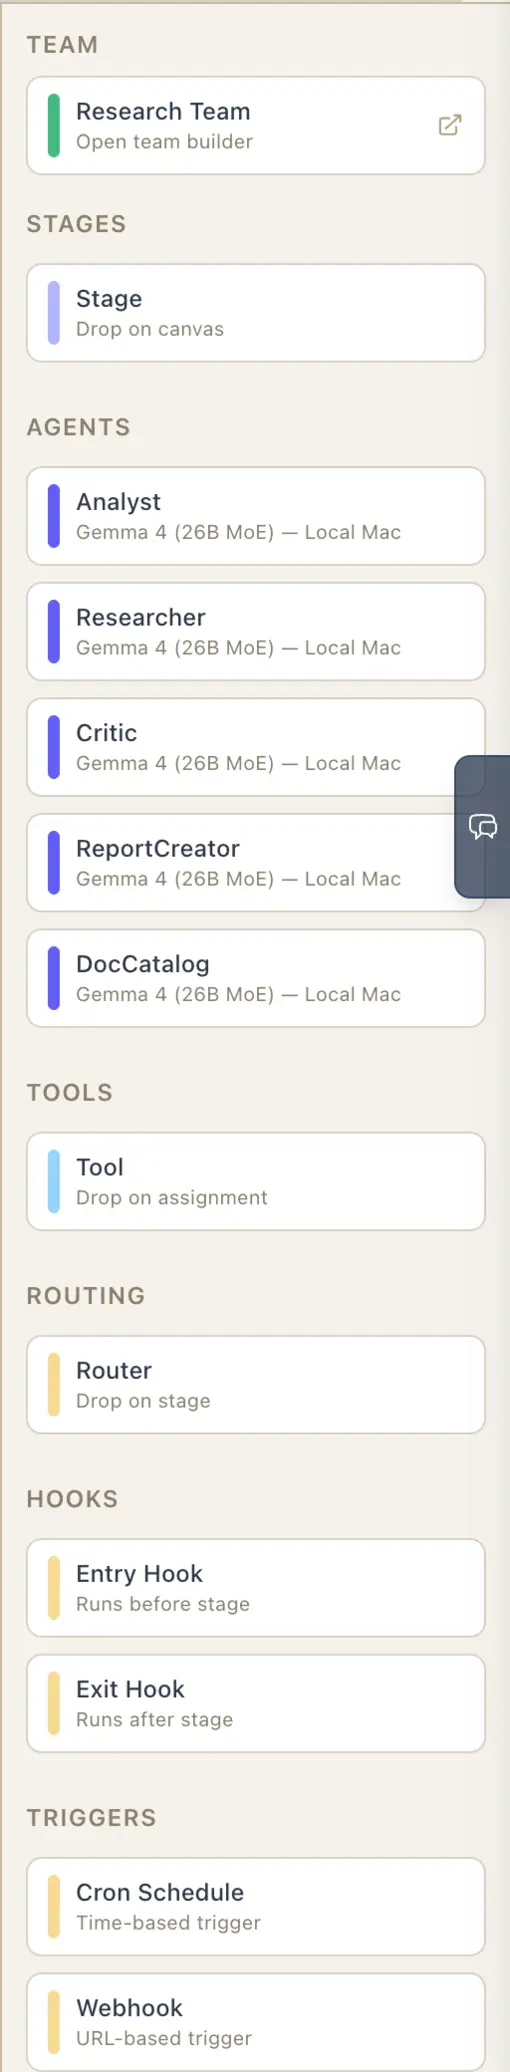
Find the agent in the Team / Agents section of the sidebar palette. Drag the agent card onto a stage node.
This creates a stage assignment: the agent is now assigned to that stage. An assignment node appears above the stage, connected by a dashed line to a numbered port on the stage.
The palette lists the agents of the workflow's assigned team. To work with a different set of agents, change the workflow's team in Workflow Properties, or open the team itself from the Team button at the top of the palette.
3. Open the assignment drawer
Click the assignment node to open the edit drawer. The drawer shows two sections:
- Agent summary (read-only) -- The agent's name, LLM, perspective, skills, and badges
- Assignment form -- Configuration specific to this stage assignment
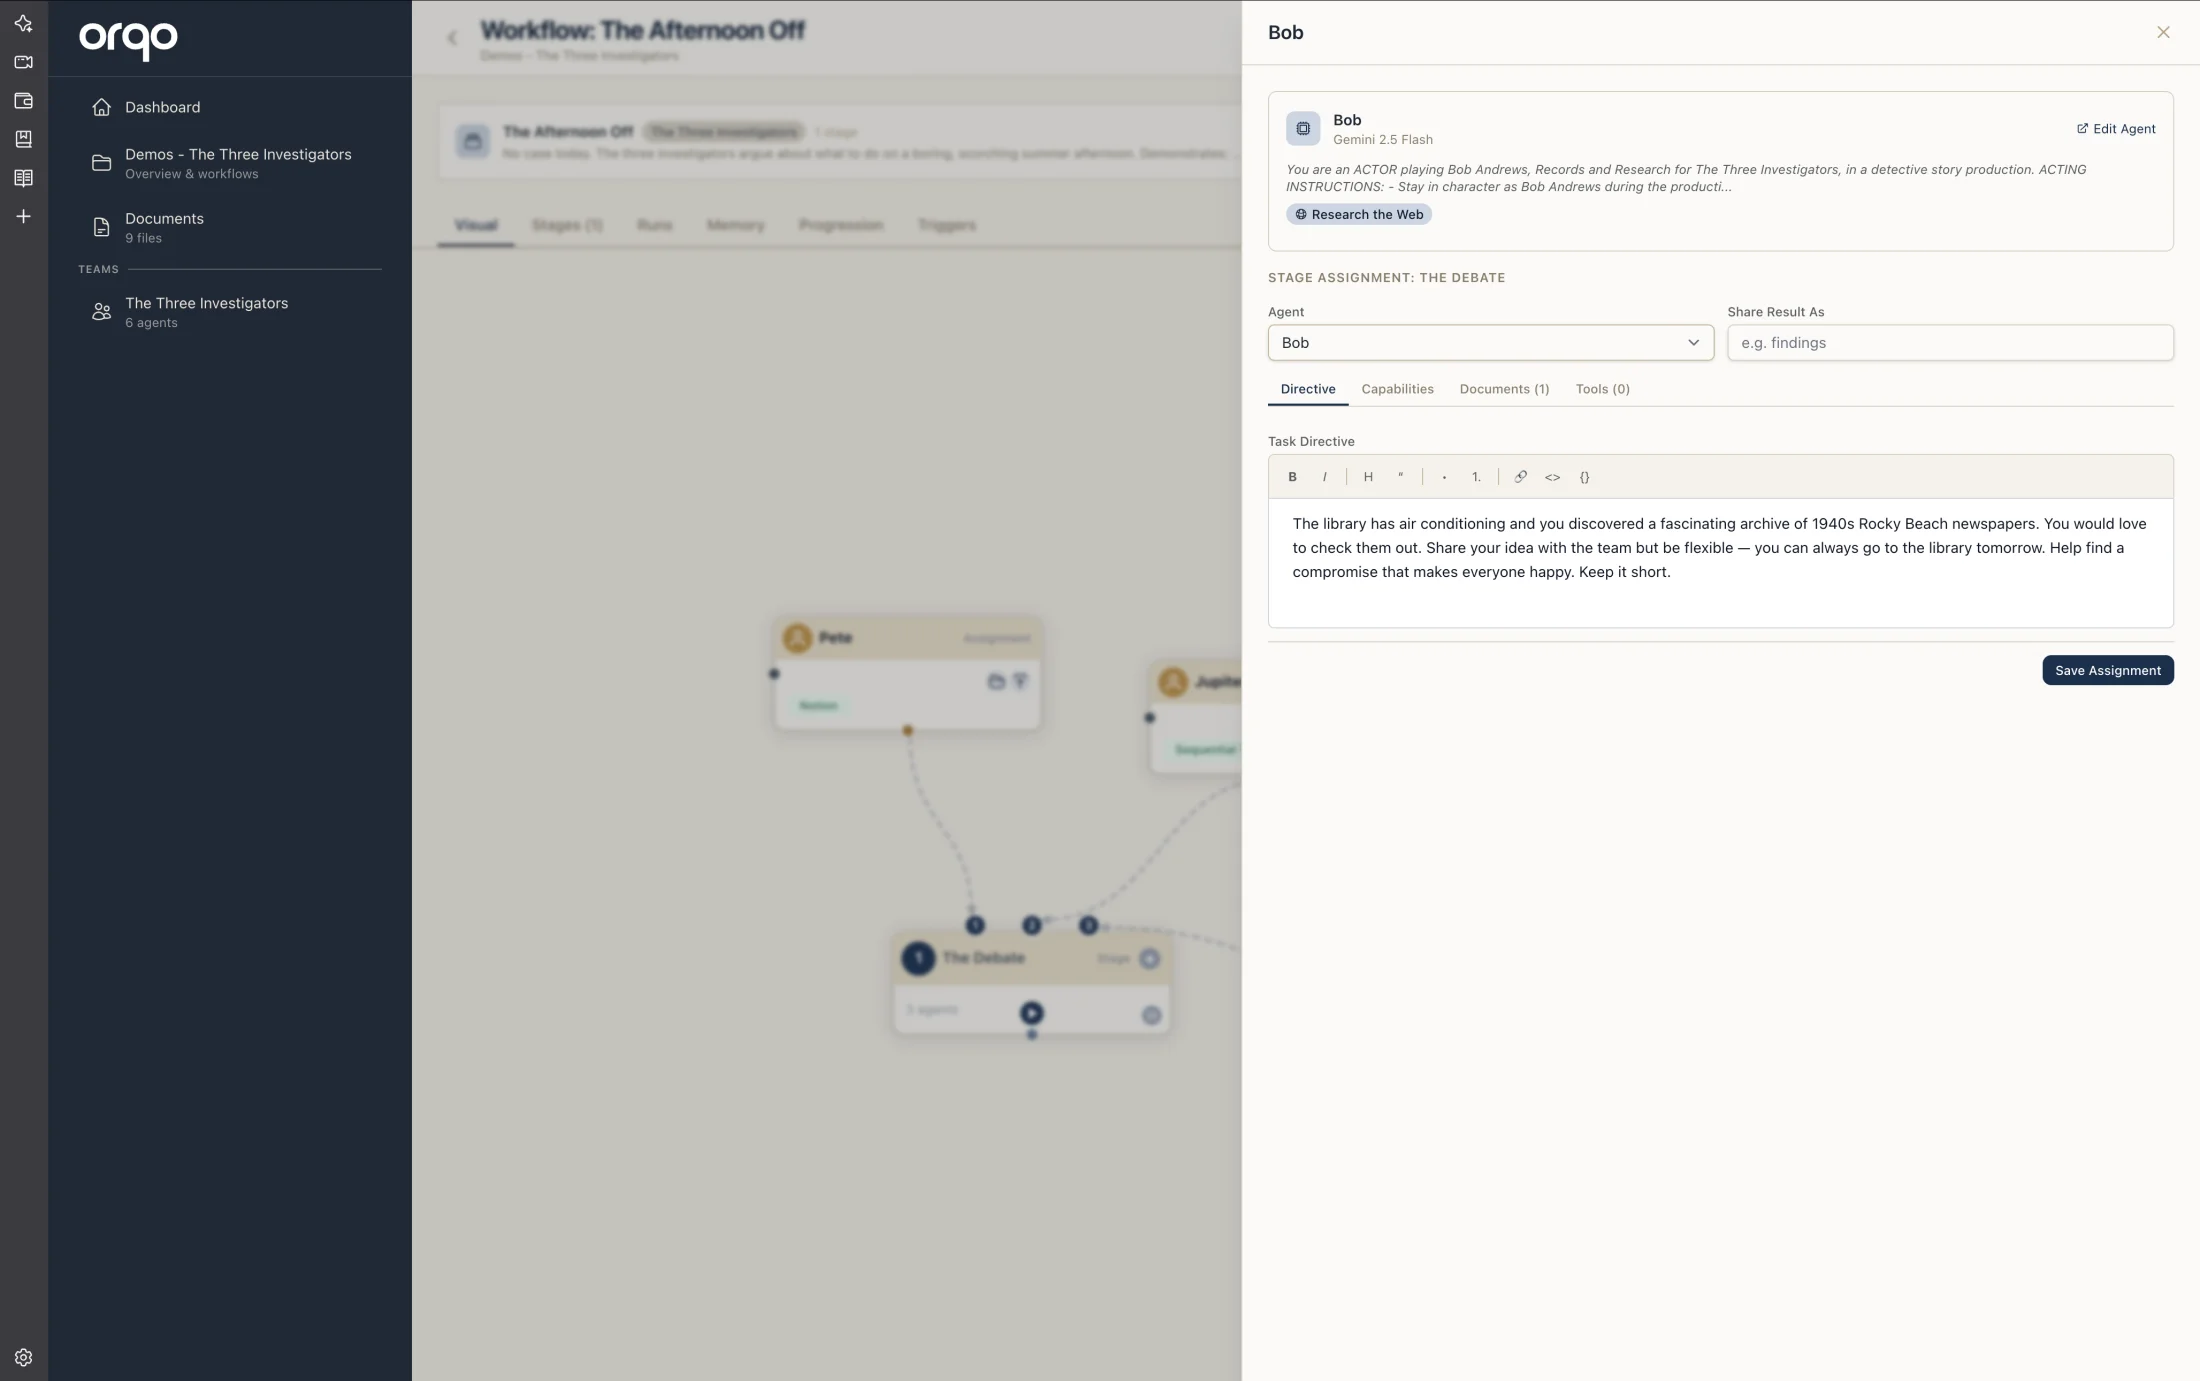
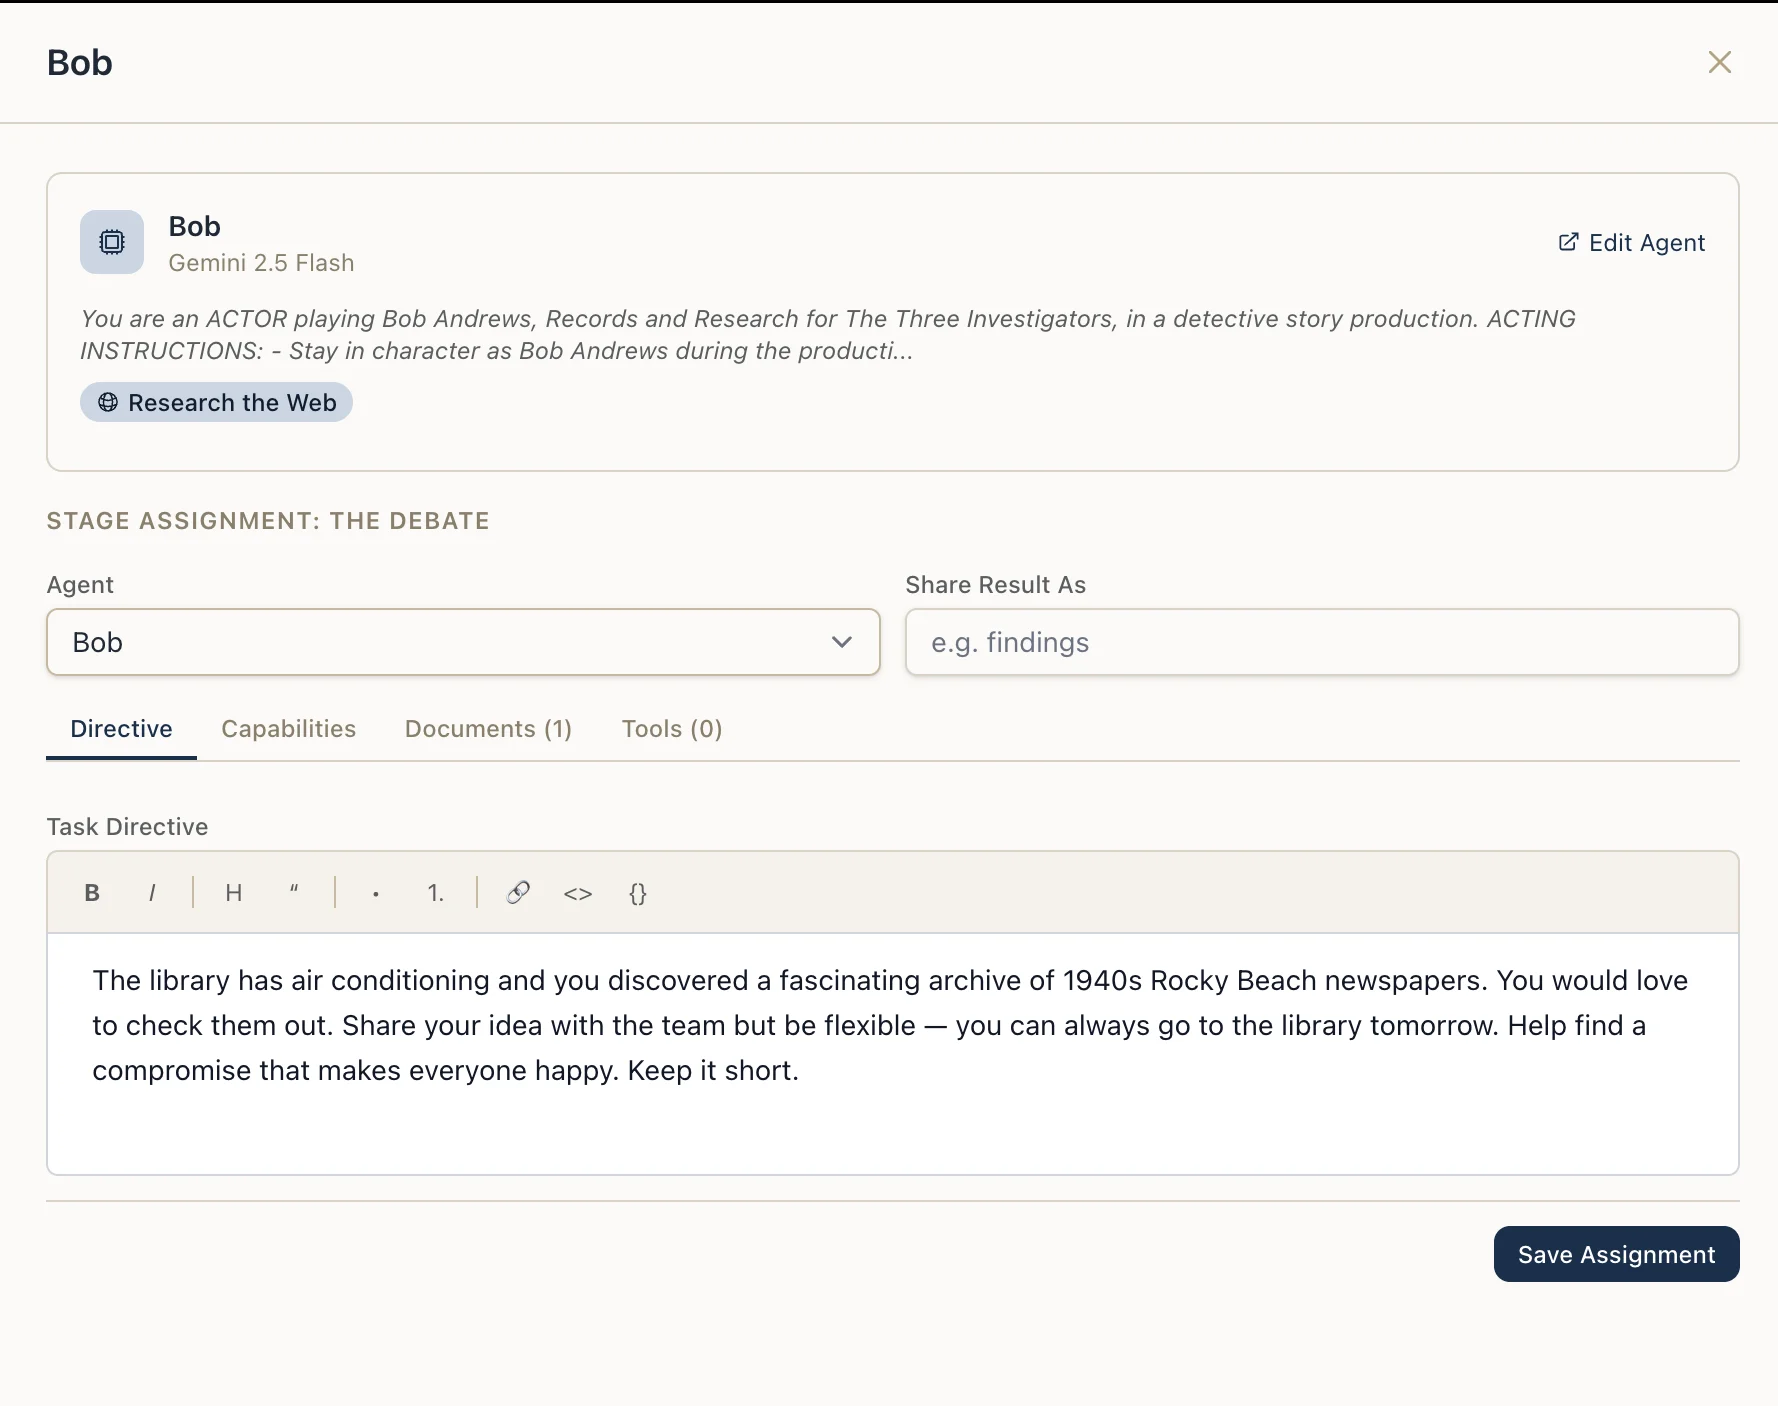
4. Write the task directive
The Task Directive is the most important field. It tells the agent exactly what to do in this specific stage. Unlike the agent's perspective (which is constant across all stages), the task directive is stage-specific.
Example task directives:
- "Search for recent academic papers about the given topic. Focus on papers from the last 2 years. Return a structured list with titles, authors, publication dates, and key findings."
- "Review the draft content from the previous stage. Check for factual accuracy, grammar, and formatting consistency. Provide a numbered list of issues found."
Be specific and concrete in task directives. Include expected input format, desired output structure, and any constraints. The task directive is injected into the agent's context alongside its perspective.
Reference past runs. For workflows that run repeatedly (for example on a schedule), agents in the first stage automatically receive a list of recent runs with their completion times and statuses. You can write directives like "process new records since the last run" -- the agent uses the most recent completed run's timestamp as the cutoff. See Schedule Workflows for details.
5. Configure capabilities
Toggle the assignment's capability flags to control what the agent can do during execution:
| Capability | What it allows |
|---|---|
| Communicates with user | The agent can send messages to and receive responses from human users |
| Can read stage data | The agent can read data produced by other agents in the same stage |
| Can write stage data | The agent can write data that other agents or downstream stages can access |
| Can spawn subagents | The agent can create lightweight subagent tasks |
| Trigger workflows | The agent can trigger other workflows in the project and wait for their results |
| Can create artifacts | The agent can produce structured documents (reports, dashboards, briefs) and preview them visually. See Use Artifacts |
Active capabilities appear as icons in the assignment node on the canvas.
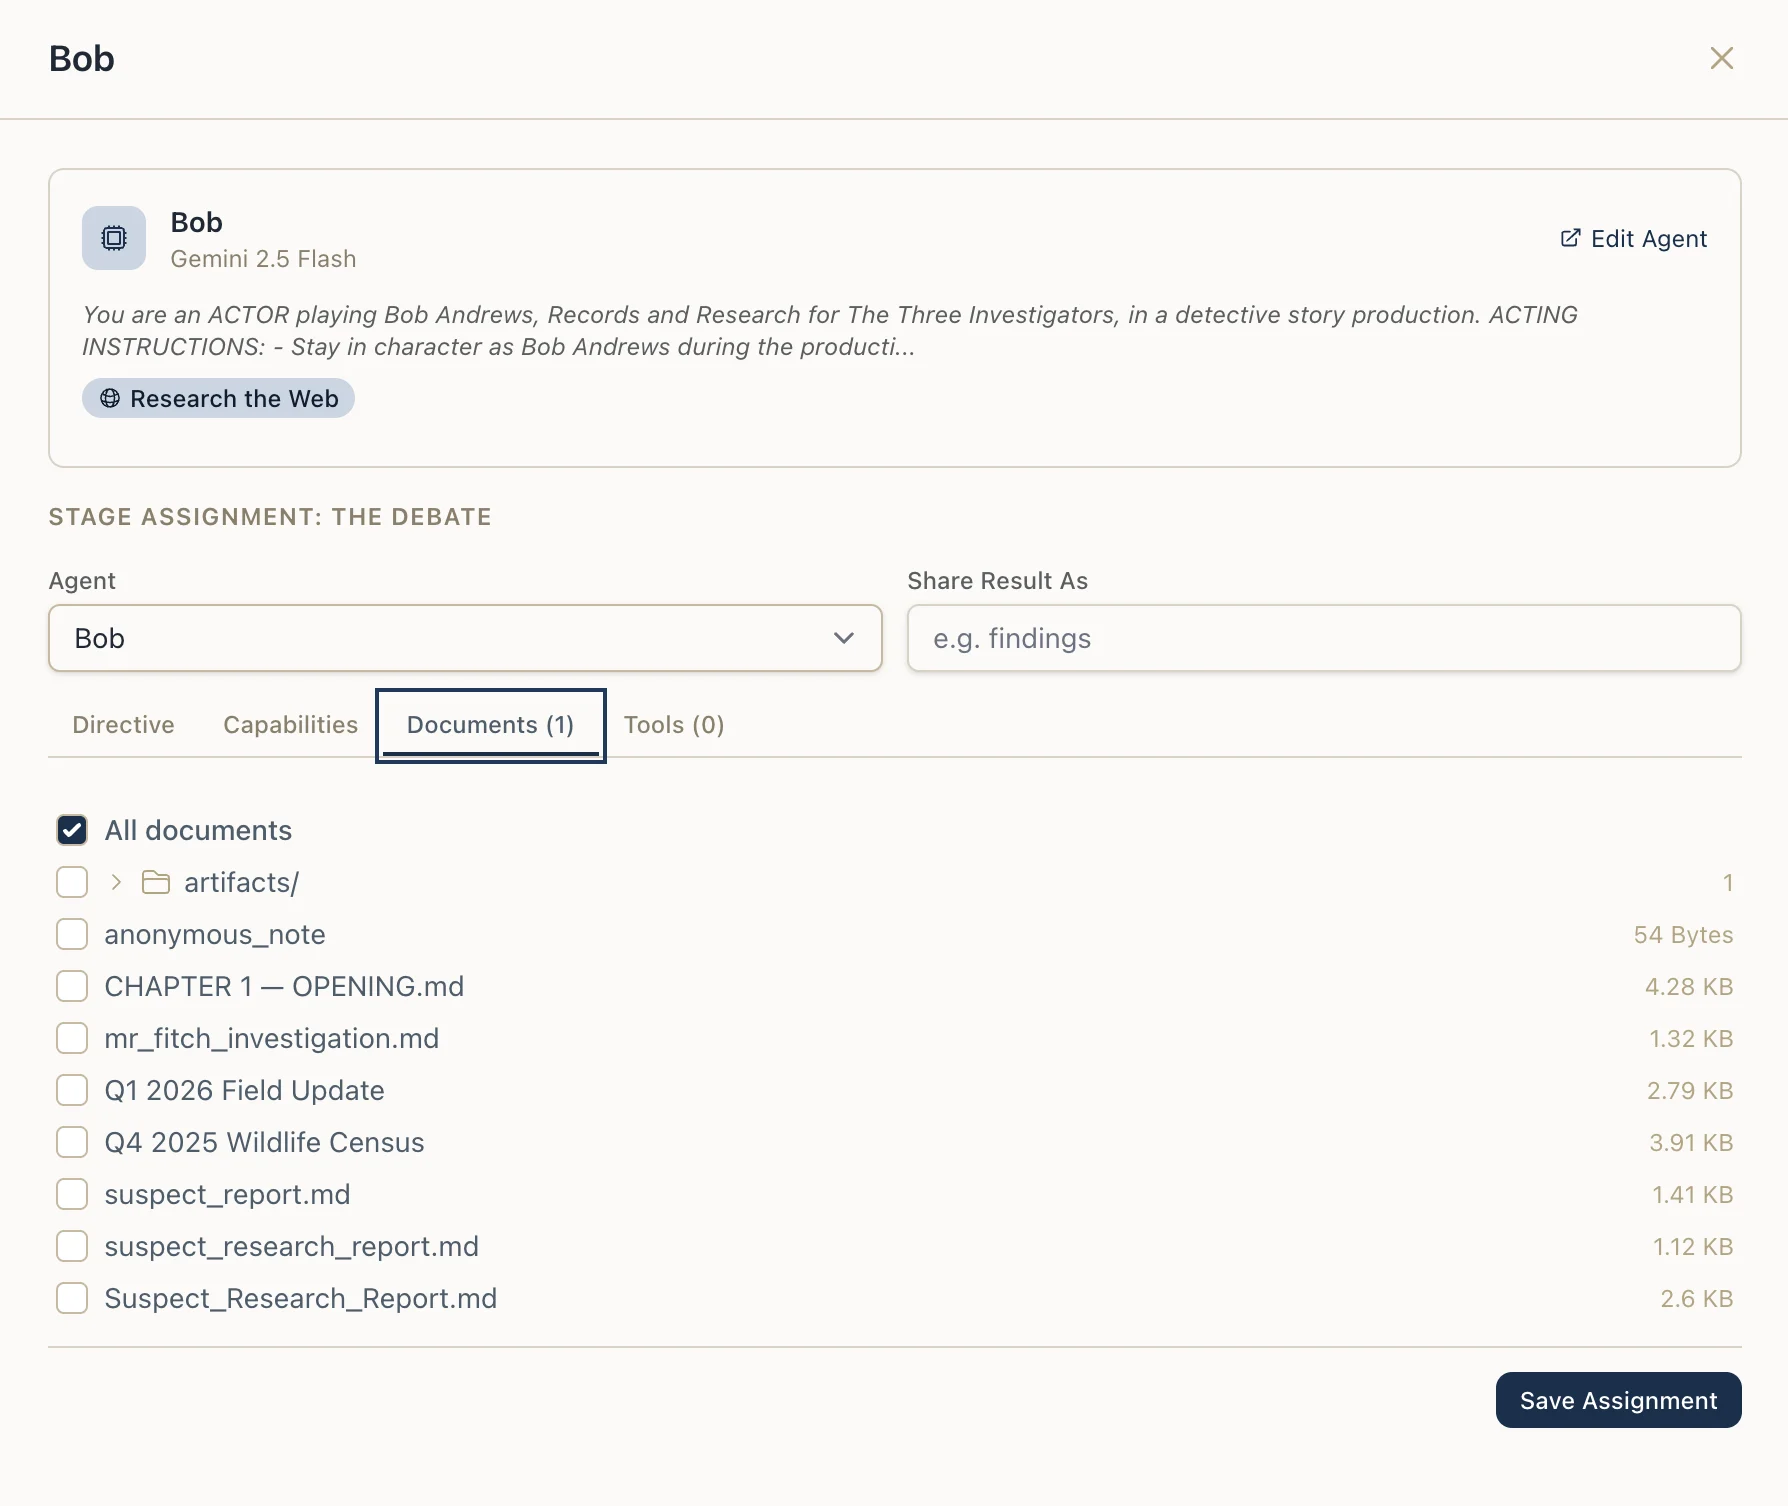
The Documents tab lets you choose which of the project's documents this agent can read during the stage — the matching document tools are added automatically.
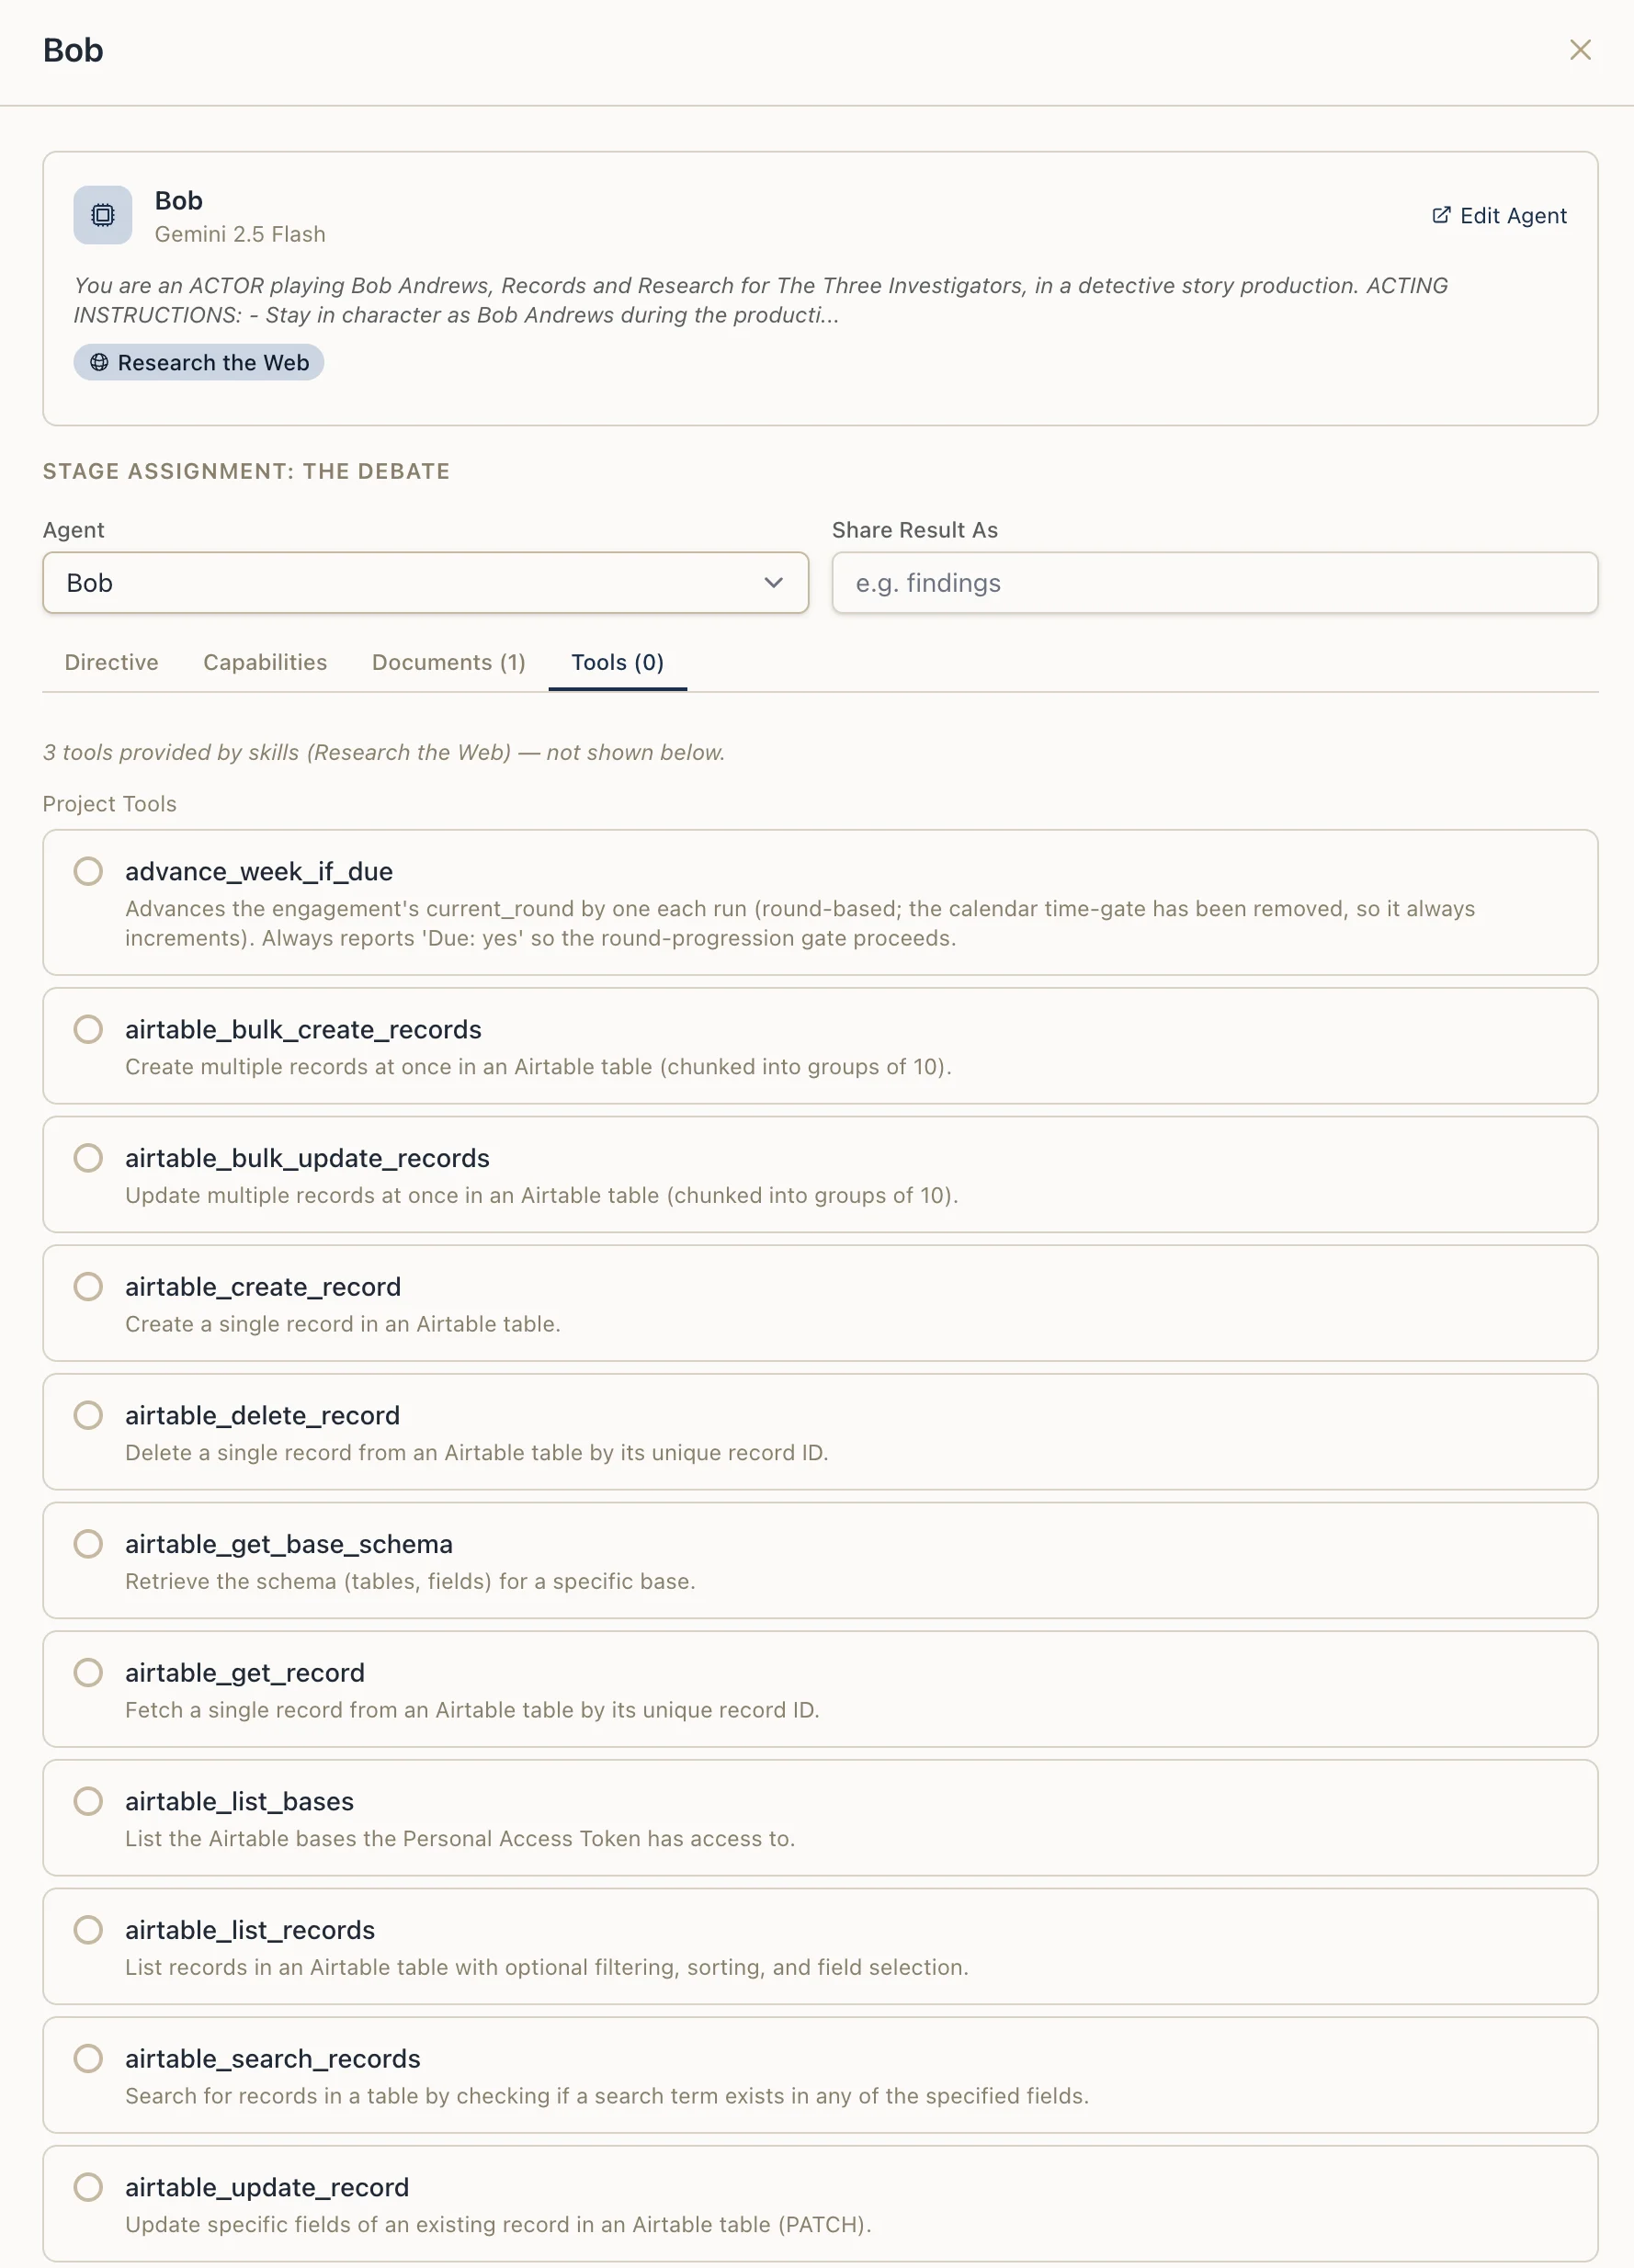
6. Select tools
Switch to the Tools tab in the assignment drawer. Here you see all tools available to the agent (from its skills and the project's tool definitions).
Select which tools the agent should have access to in this specific stage. This allows you to give the same agent different tool sets in different stages.
7. Set the share result key (optional)
The Share Result Key field allows the agent's output to be explicitly referenced by downstream stages. Set a key name (e.g., research_results) and downstream assignments can read this data by name.
Share result key labels appear on the assignment-to-stage connection line in the Visual Builder.
8. Add multiple assignments to a stage
A single stage can have multiple agent assignments. Agents within a stage work according to their phase:
- Default phase agents run in parallel during the main execution
- Finalizer phase agents run after all default agents complete
Drag additional agents onto the same stage node. Each gets its own numbered port and assignment node.
9. Reorder assignments
Assignment order (position) determines the port number on the stage. To reorder assignments, use the Assignments section at the top of the stage edit drawer or drag and reposition in the Visual Builder.
What's next
- Configure Hooks to add pre- and post-processing to stages
- Use Outcome Routing to branch between stages
- Run a Workflow to execute the workflow