Build a Team
Create a team within a project, assign a default LLM configuration, and use the visual Team Builder to manage agents and skills.

This page shows how to do it manually. The faster, more common way is to describe what you want to the Workflow Assistant — it builds the team, stages, agents, and assignments for you, then you fine-tune by hand using the steps below.
Prerequisites
- An existing project (see Create a Project)
- At least one LLM configuration in your organization (see Configure an LLM)
Steps
1. Navigate to your project
Open the sidebar and drill into your project. You see sections for Teams, Workflows, and Documents.
2. Create a new team
Click New Team in the Teams section. Enter a name for the team (e.g., "Research Team" or "Content Pipeline"). Click Create.

3. Assign a default LLM configuration
Every team needs a default LLM. Open the team and switch to the Builder tab to see the visual Team Builder canvas.
The sidebar palette on the left shows two sections:
- LLM Library -- All LLM configurations in your organization, grouped by provider. Each card shows the model's price tier (the colored dot), its input/output pricing, and a row of capability chips so you can pick the right model for each agent at a glance: the context-window size plus any of
vision(reads images),audio,files(e.g. PDFs),reasoning(extended thinking), andcache(prompt caching). Only the capabilities a model actually has are shown. - Skill Library -- All available skills
Drag an LLM card from the palette onto the Team node (the large card at the bottom of the canvas). This assigns the LLM as the team's default.
The team's default LLM is used by all agents that do not have their own LLM override. You can assign a different LLM to individual agents later.
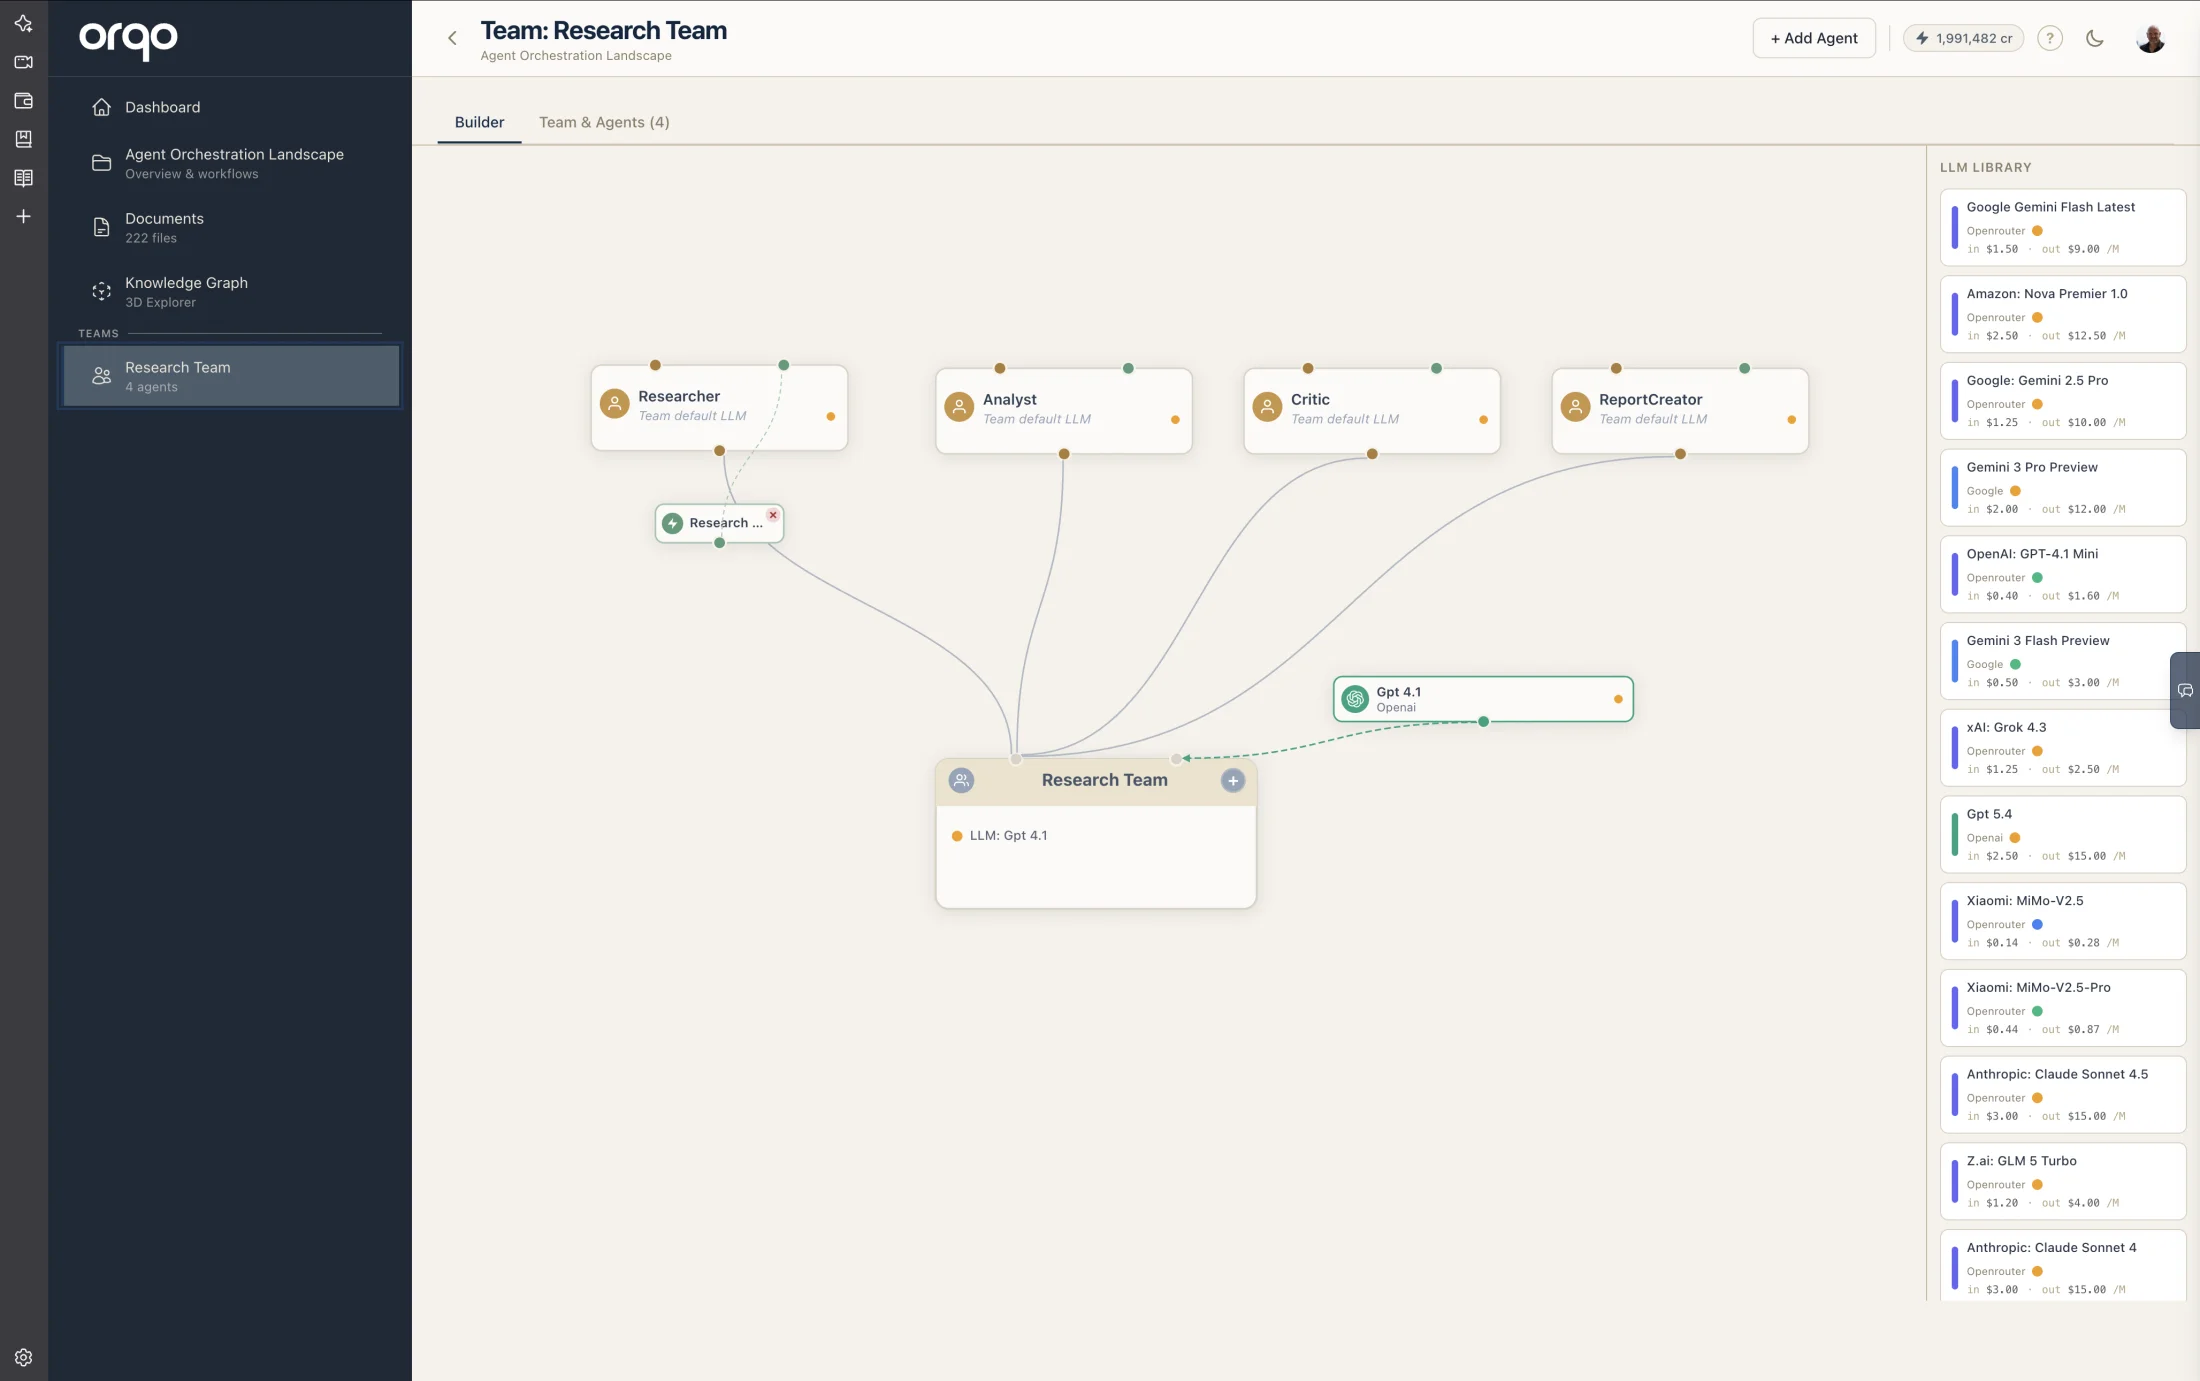
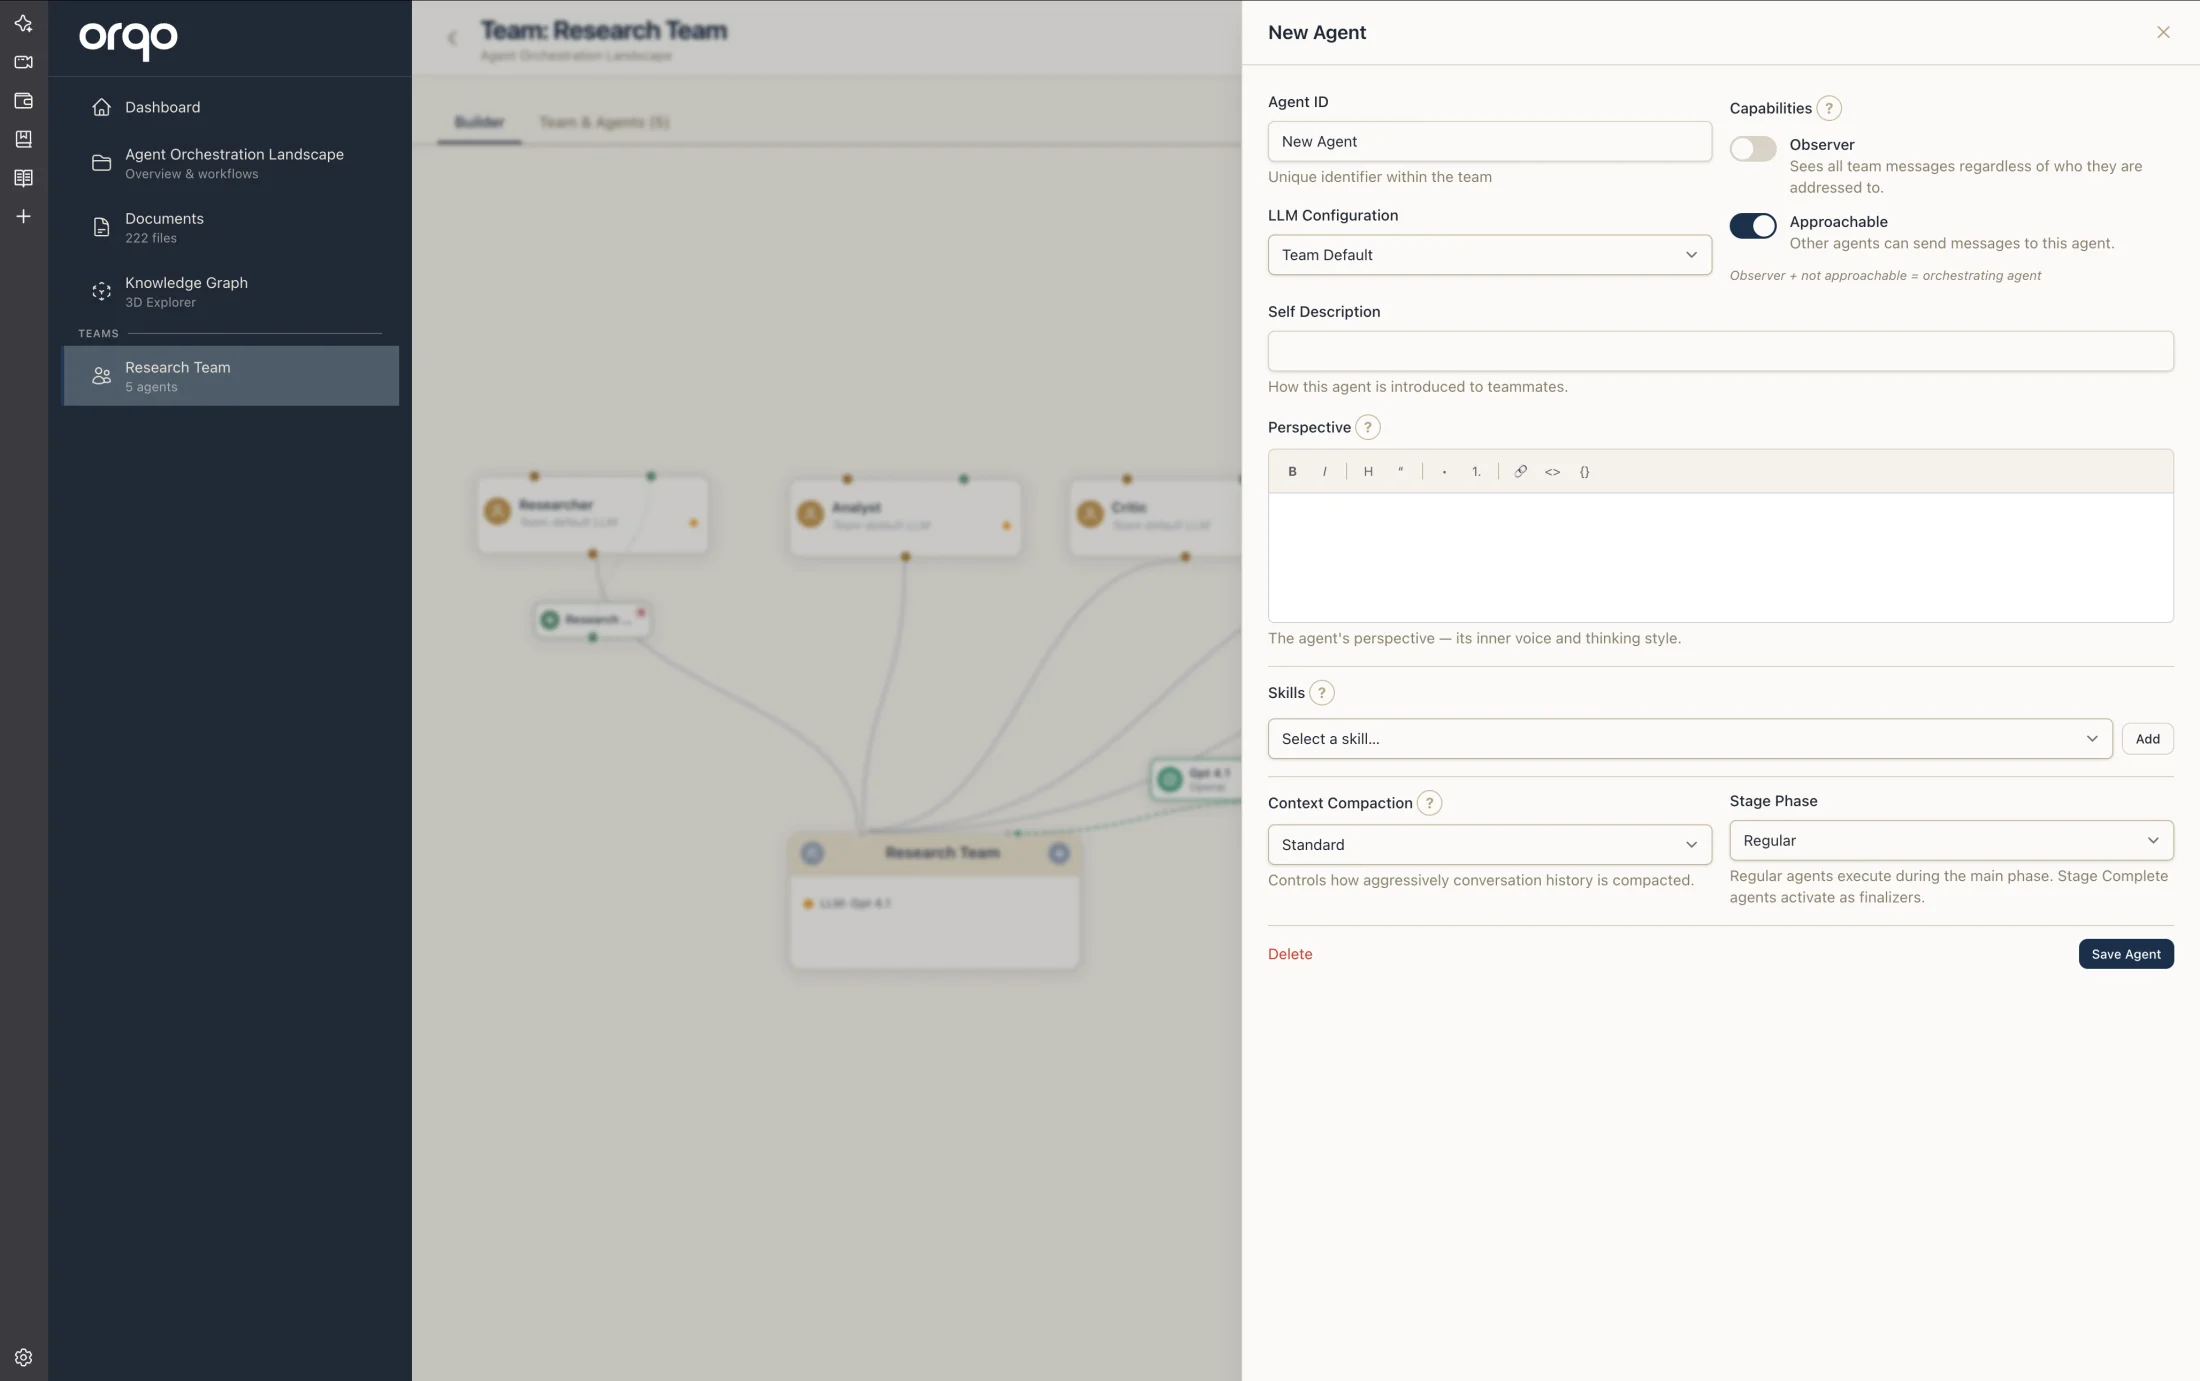
4. Add agents to the team
Click the + button on the team node to create a new agent. A new agent node appears in the middle row of the canvas. The agent is created with a default name -- click the node to open the drawer and configure it.
Repeat this step for each agent you need on the team.
5. Configure agents via the drawer
Click any agent node to open the slide-in drawer. Here you can set:
- Agent ID -- A unique name (e.g.,
Researcher,Anna,Editor) - Role -- The agent's function on the team
- Description -- What this agent does
- Observer mode -- Whether the agent observes other agents' work
- Stage phase -- Whether the agent acts as a finalizer
See Configure an Agent for detailed agent configuration.
6. Assign skills to agents
Drag a skill card from the Skill Library section in the sidebar palette onto an agent node. This assigns the skill's tools and credentials to that agent.
Skill nodes appear below the agents, connected by dashed lines to show which agents have which skills.
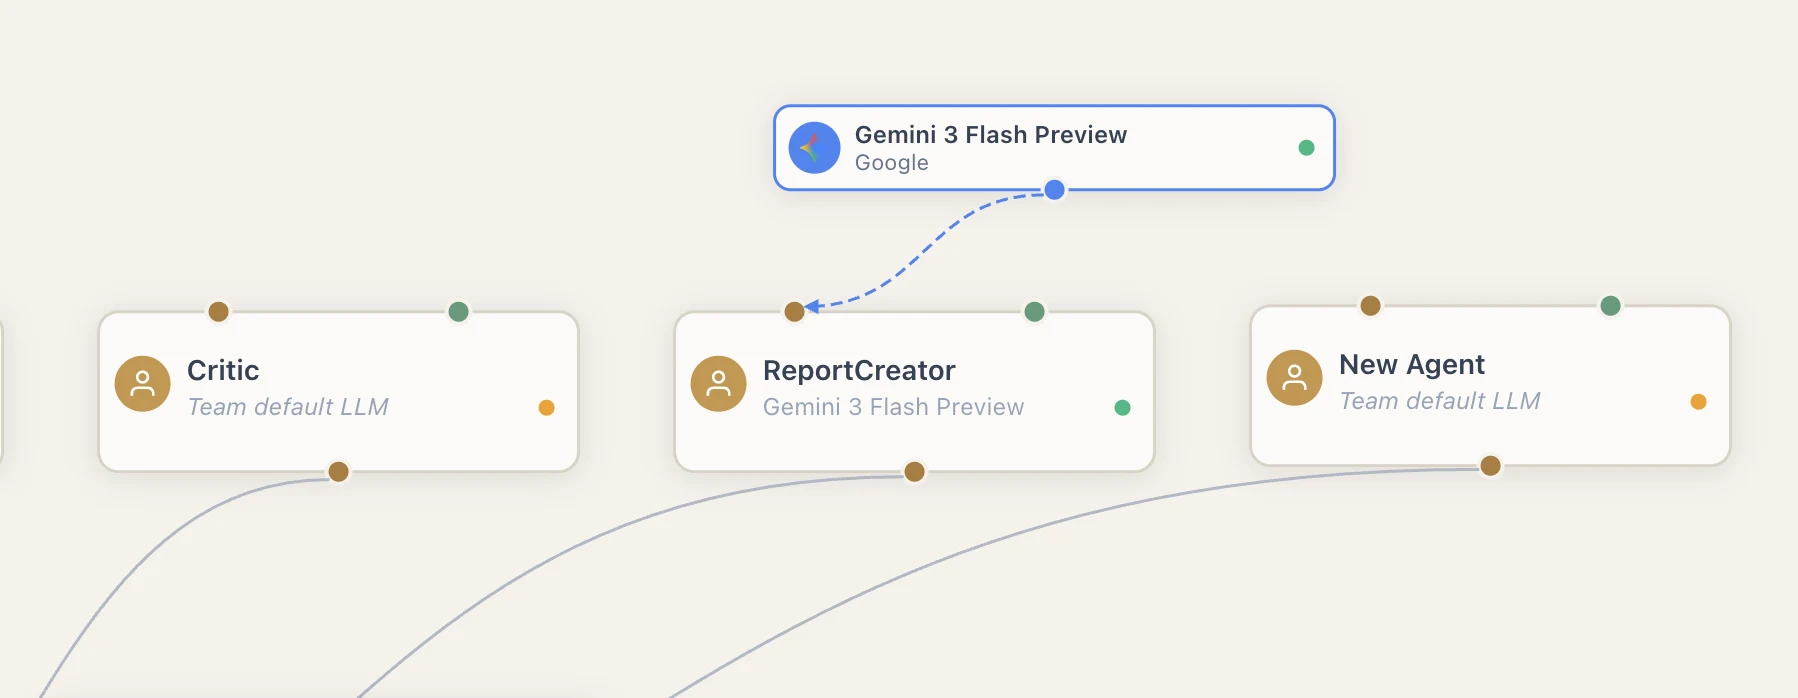
7. Override agent LLMs (optional)
If a specific agent needs a different LLM than the team default, drag an LLM card from the palette onto that agent's node. An LLM node appears in the top row, connected to the agent.
LLM nodes are shared -- if two agents use the same LLM configuration, they connect to the same node.
8. Review the team graph
The Team Builder shows your complete team structure:
- Top row -- LLM configurations in use
- Middle row -- Agents, evenly spaced
- Below agents -- Skills assigned to agents
- Bottom -- The team node
Use the toolbar buttons (top-right) to zoom in, zoom out, or fit the entire graph to the viewport. You can drag nodes to reposition them -- positions are saved automatically.

9. Jump to the workflows that run this team
A team can power many workflows. When the team is assigned to one or more workflows, the team page header shows a Workflows button. Open it to see every workflow that runs this team and jump straight back to any of them -- handy after editing the team from a workflow's palette.
What's next
- Configure an Agent to fine-tune agent settings
- Assign Tools via Skills to give agents capabilities
- Create a Workflow to put the team to work