Assign Tools via Skills
Skills are reusable packages that bundle tools, credentials, and knowledge into a single unit you can assign to agents. This guide shows you how to browse, install, and assign skills.

This page shows how to do it manually. The faster, more common way is to describe what you want to the Workflow Assistant — it builds the team, stages, agents, and assignments for you, then you fine-tune by hand using the steps below.
Prerequisites
- An existing team with at least one agent (see Build a Team)
- Tools or MCP servers configured in your organization (see Connect an MCP Server)
Steps
1. Open the Integrations browser
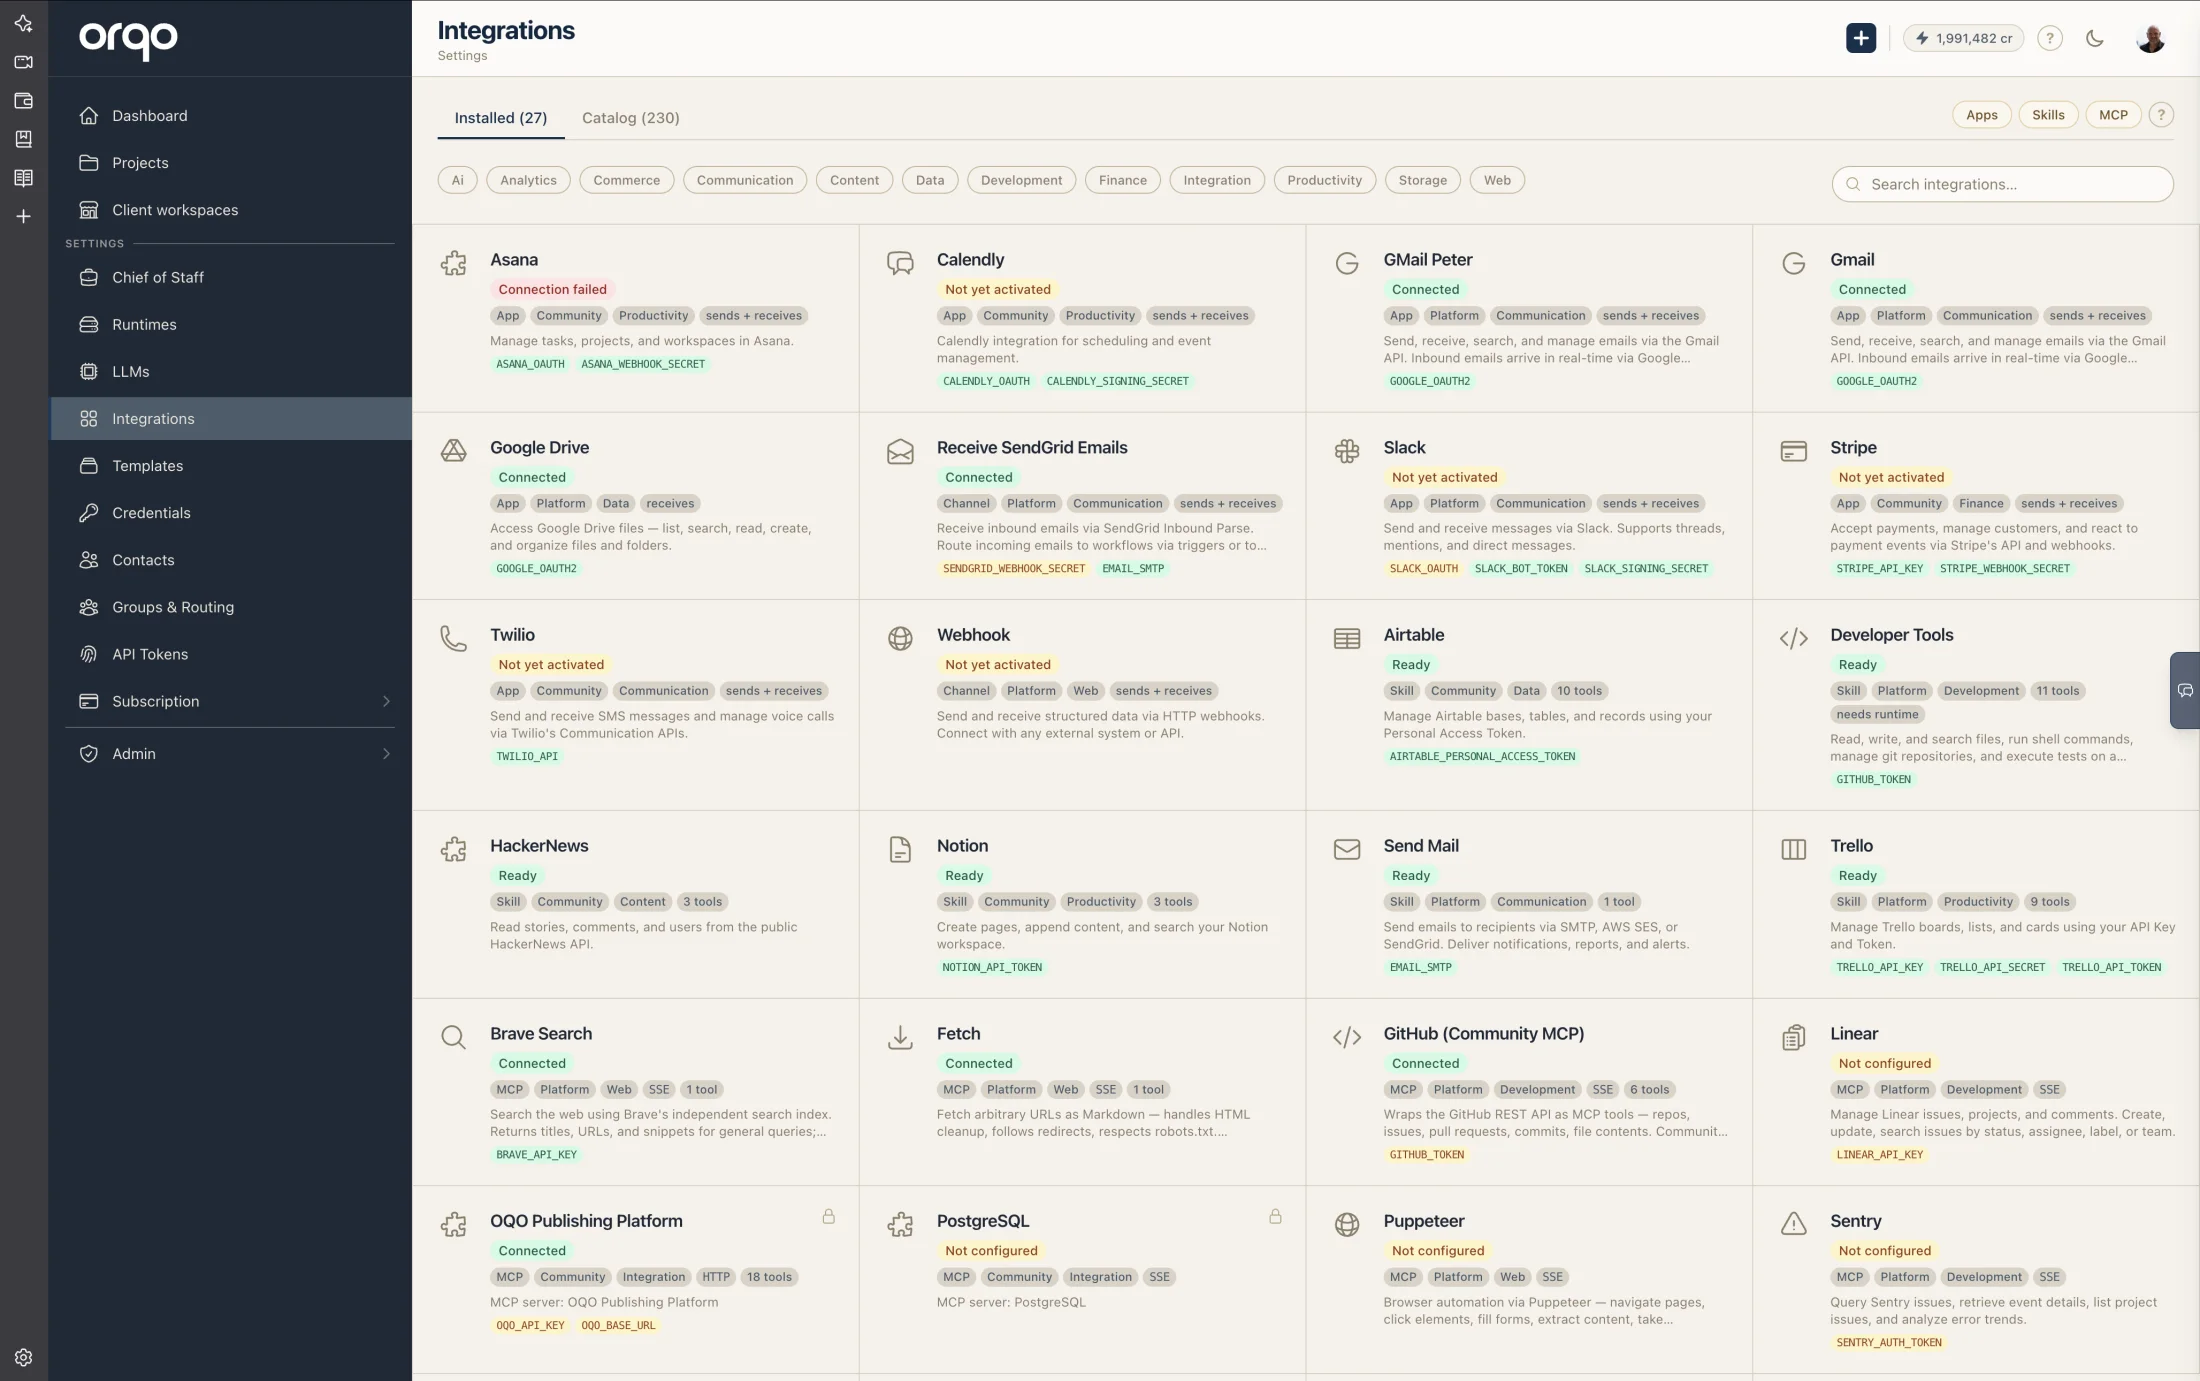
Go to Settings > Integrations in the sidebar. Apps, Skills, and MCP servers all live in one searchable browser — switch to the Skills filter (or search by name) to see every skill available in your organization.
2. Browse available skills
Skills are displayed as cards. Each card shows:
- Name -- The skill's display name
- Tool count -- How many tools are included
- Icon -- A visual identifier
If a skill catalog is available, you also see templates you can install with one click.
Open a skill to see its full anatomy: the tools it bundles, the credentials it requires (e.g. an API token), and any setup instructions for connecting it.
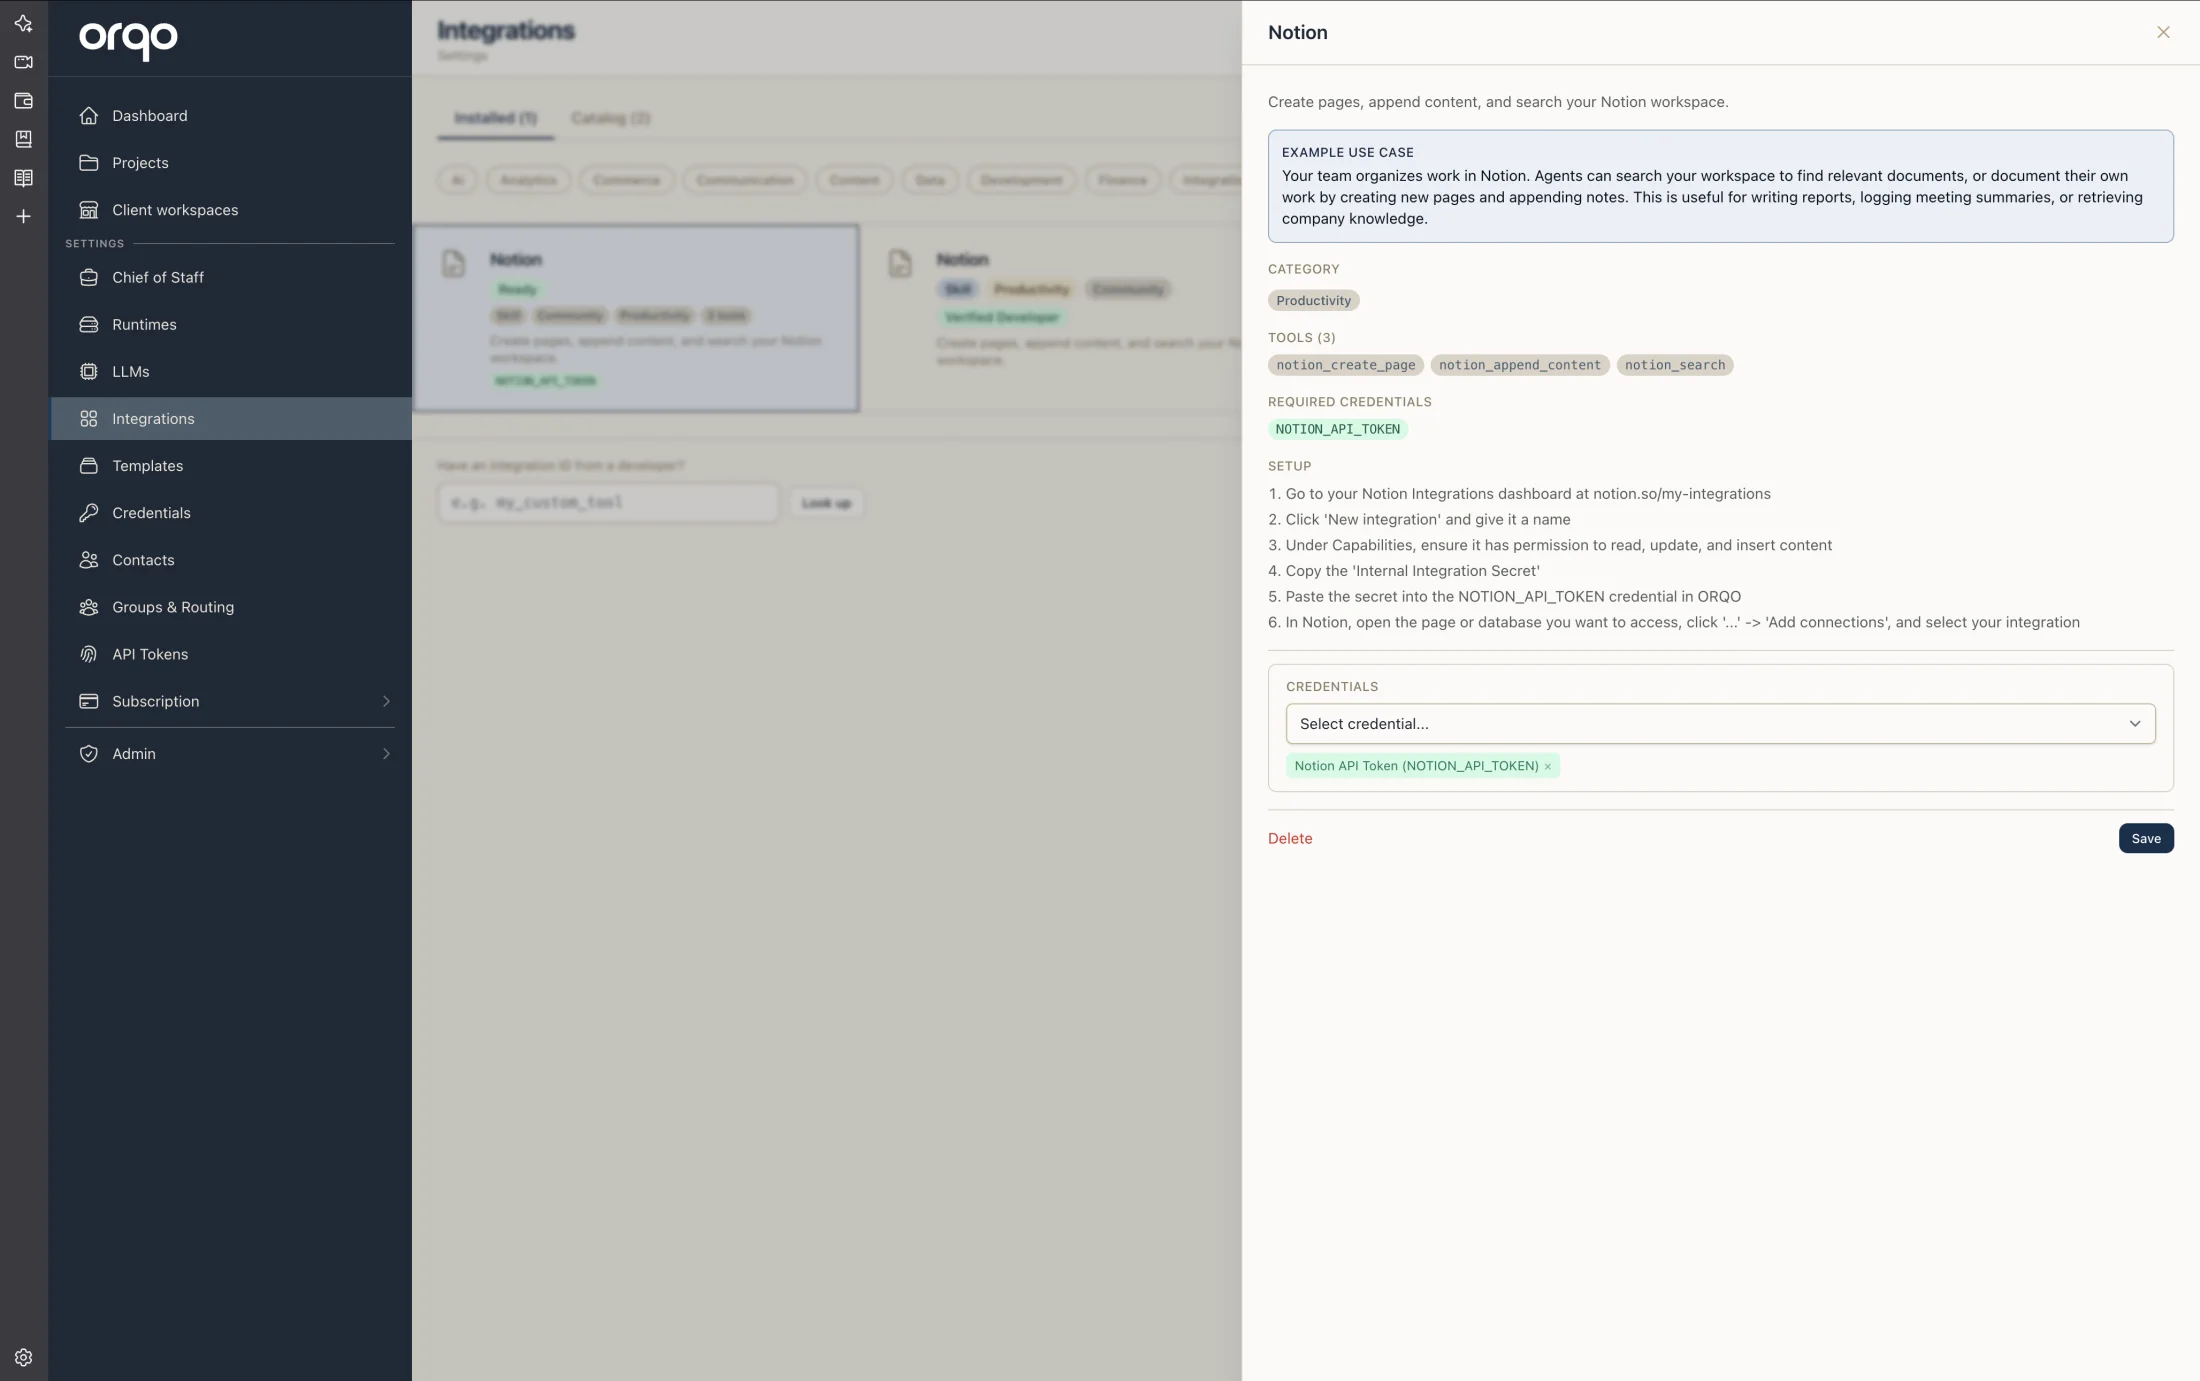
This is the moment to check credentials. The drawer lists exactly what the skill needs, with a status badge for each: green when the credential is satisfied, orange when it's still missing. An orange badge means the skill's tools will fail at runtime — add the missing credential under Settings > Credentials before assigning the skill, and the badge turns green.
Skills declare their credential requirements via credential_keys. If a required credential (e.g., GITHUB_TOKEN) does not exist in your organization, the skill's tools will not have access to the necessary API keys at runtime.
3. Create a custom skill (optional)
If no existing skill matches your needs, click New Skill to create one. See Create a Skill for the full process.
4. Open the Team Builder
Navigate to your project, open the team, and switch to the Builder tab.
The sidebar palette has a Skill Library section listing all organization skills. Each skill card is draggable.
5. Drag a skill onto an agent
Assigning a skill is a drag-and-drop gesture: press on a skill card in the Skill Library palette, drag it across the canvas, and drop it onto the target agent node. There's no form or dialog — the drop is the assignment. A skill node then appears below the agents row, connected to the agent by a dashed line.
Dragging a skill card onto an agent node is the only step needed to create the assignment — no form, no dialog. In the example below, Jupiter has been given the Sequential Thinking skill and Pete the Notion skill, each connected by its own dashed line. Drop the same skill on more agents to share it across the team.
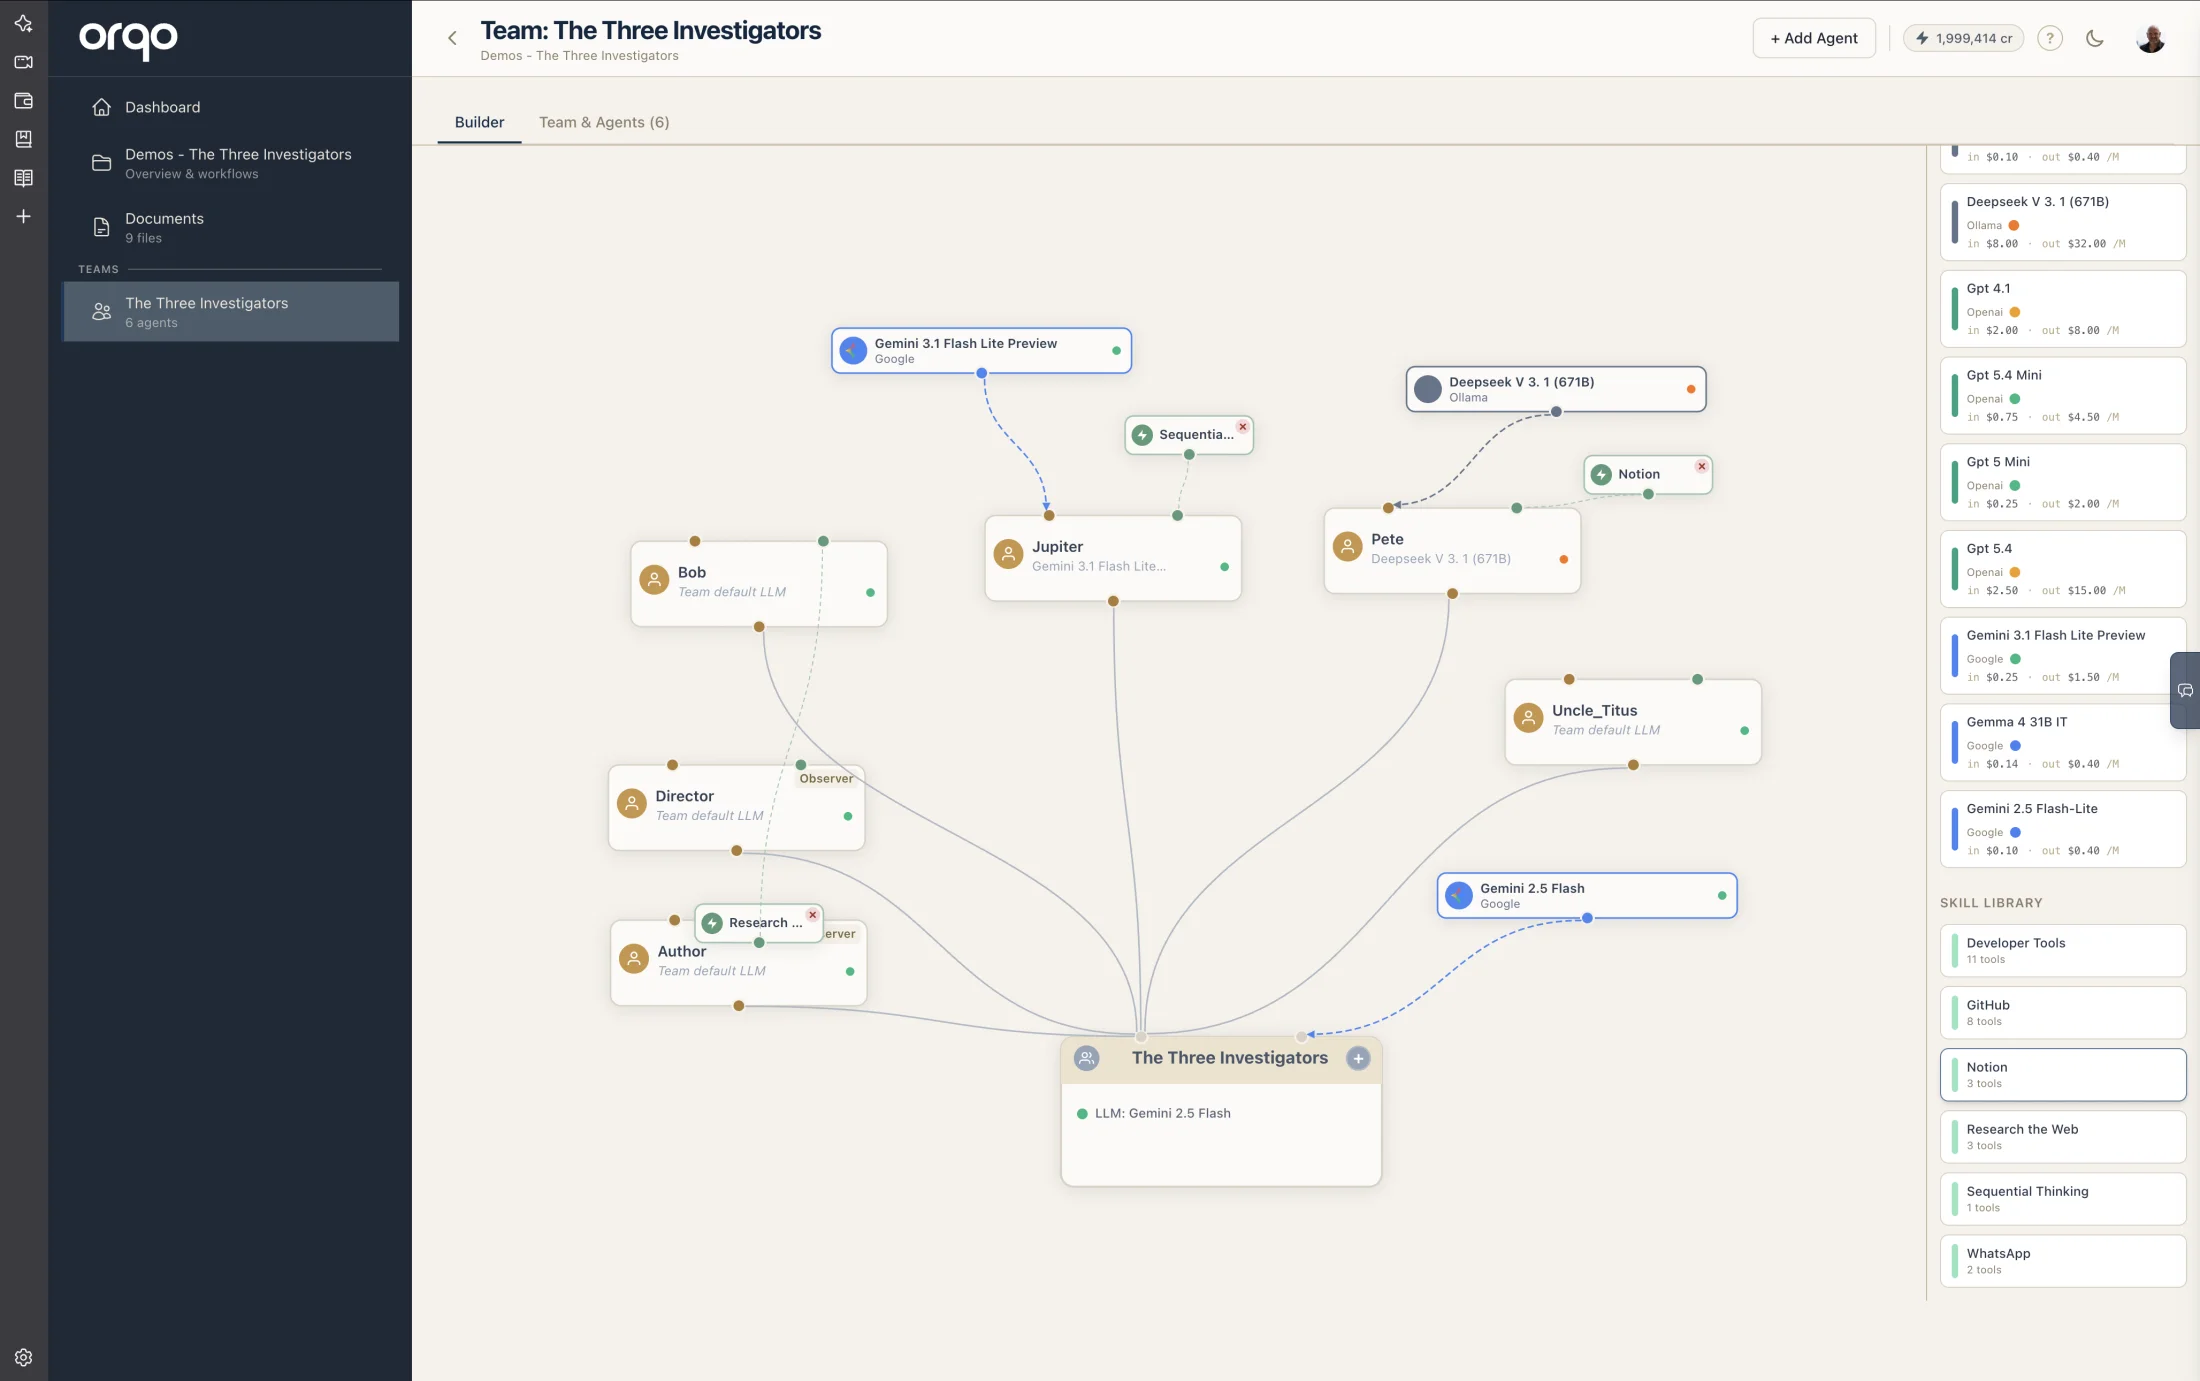
A single skill can be assigned to multiple agents. The skill node is shared on the canvas -- multiple dashed lines connect it to each assigned agent.
6. Pick which connected account the agent uses
If a skill is installed more than once — for example, two Gmail accounts connected to the same skill — the assignment lets you pick a named install so the agent uses a specific connected account. Choose the install that this agent should act through.
This makes multi-account setups explicit: each agent is pinned to one connected account, so a "support" agent and a "sales" agent can send from two different Gmail inboxes through the same skill.
7. Verify the assignment (optional)
There's nothing to confirm — the dashed line on the canvas is the assignment. If you want to see the detail, click the agent node to open the drawer: its skill assignments are listed there, showing the tools each skill provides and, where set, the named install the agent uses.
8. Remove a skill assignment
To remove a skill from an agent, click the x button on the skill node in the canvas. This removes the assignment for all agents connected to that skill.
Alternatively, manage assignments through the agent's edit form in the card-based tab.
What's next
- Configure an Agent to adjust agent settings
- Set Up Assignments to assign agents with skills to workflow stages
- Create a Skill to build custom skill packages