Connect an MCP Server
Add an external Model Context Protocol (MCP) server so its tools become available to your agents during workflow execution.
Connecting a raw MCP server is a developer task. The MCP Servers view lives in the Developer Portal and is visible only to accounts with the developer flag.
If you're a standard user, you don't need it. Browse and install tools from Integrations instead — MCP-backed integrations appear there alongside Apps and Skills, tagged MCP. And if the tool you need isn't in the catalog, ask the Integration Builder to set it up: it can stand up an MCP server for you and wrap it as an installable Skill, no code required.
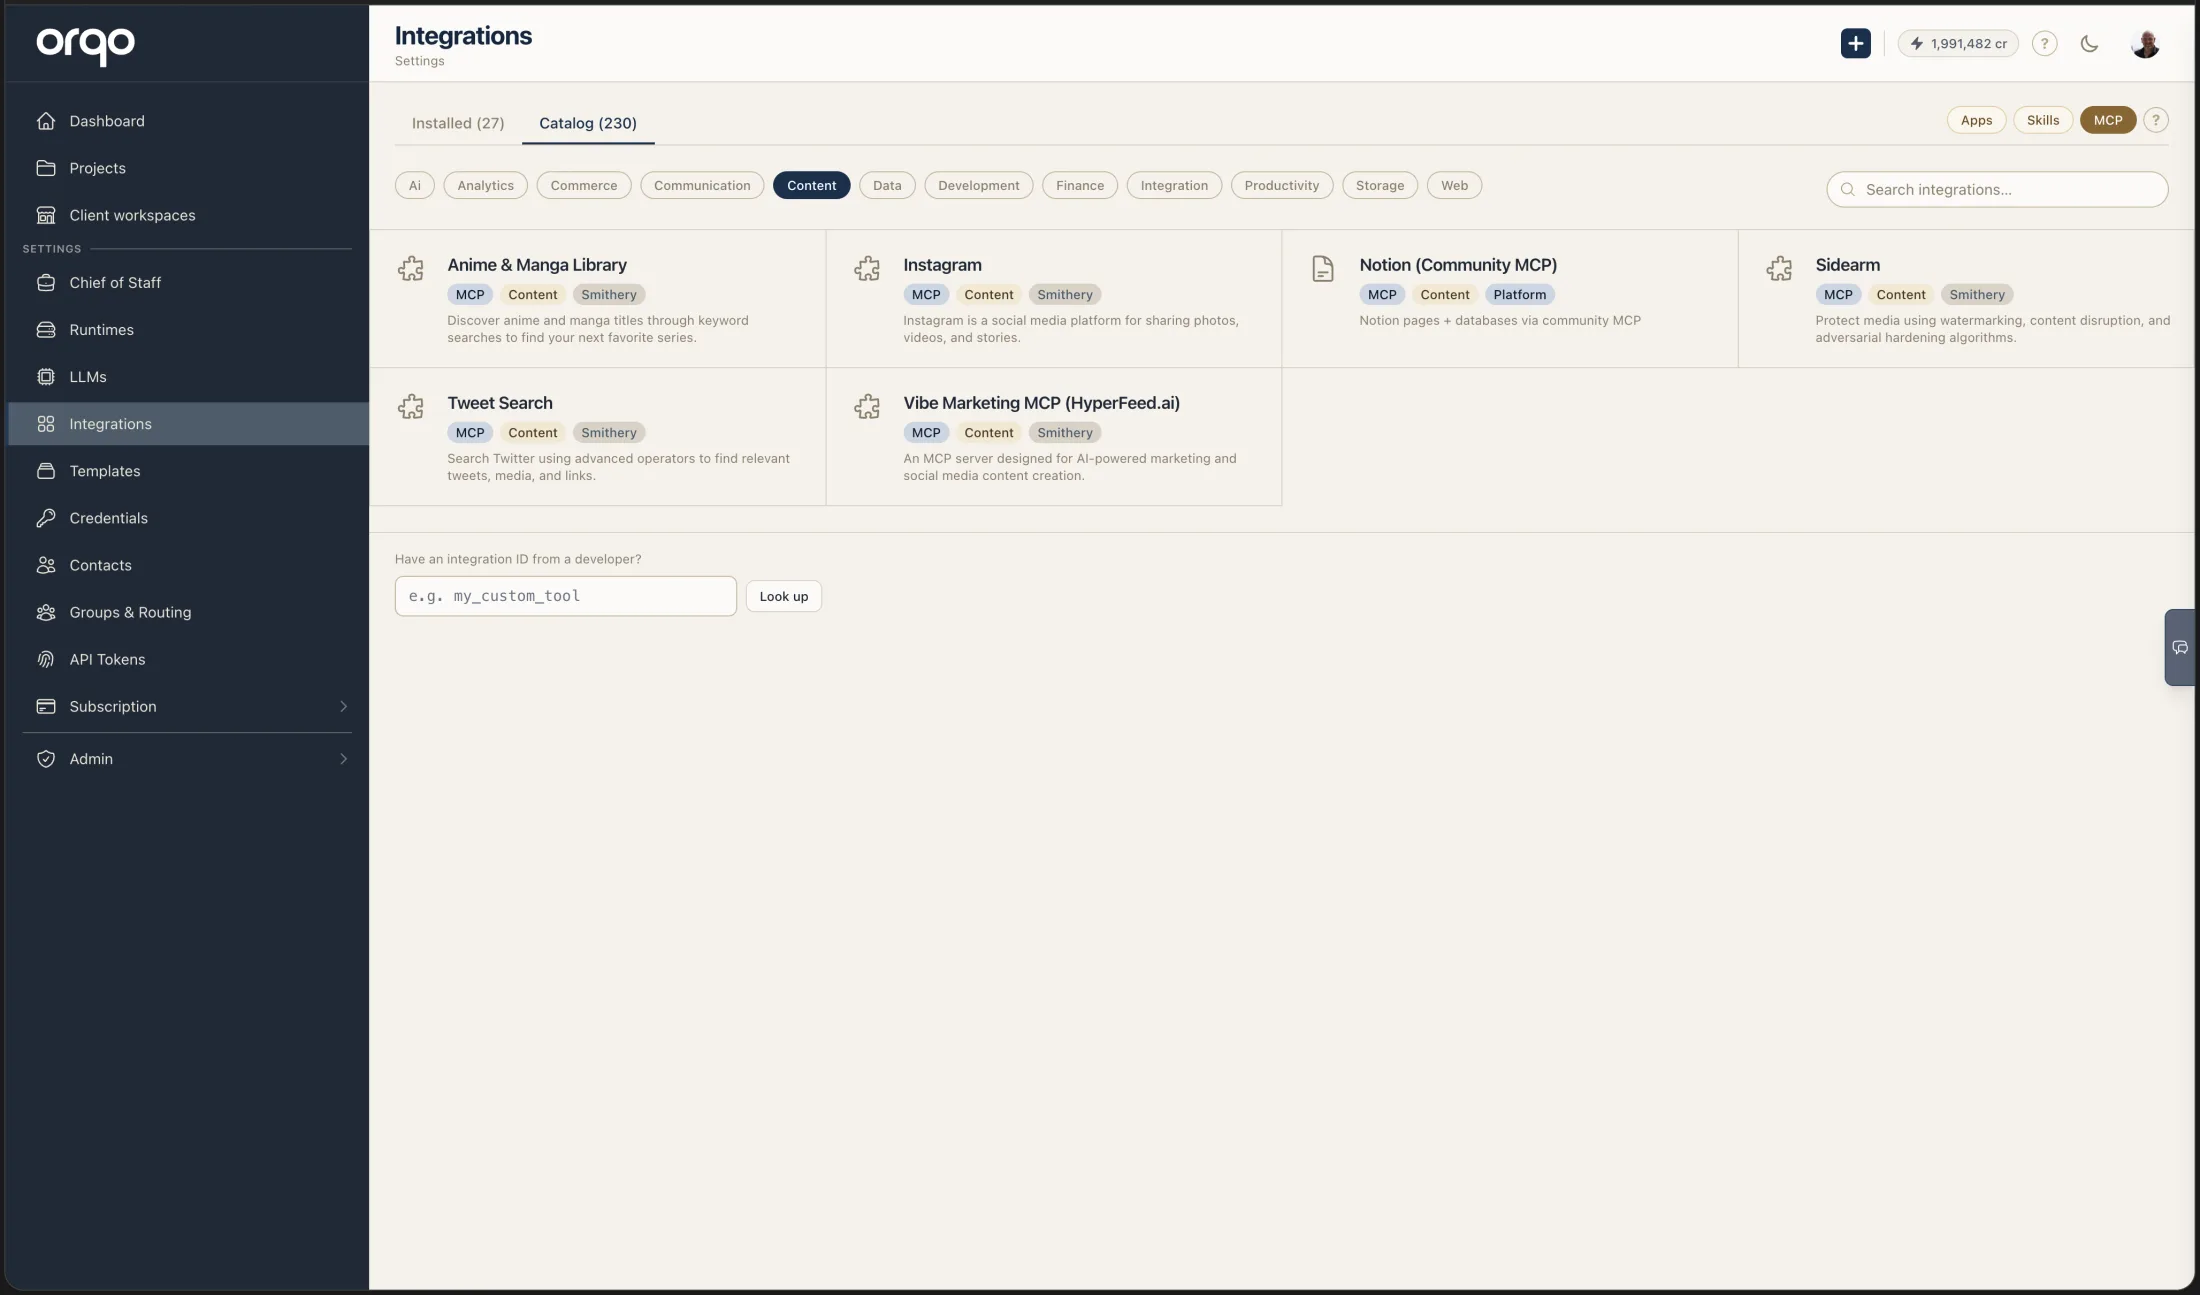
The rest of this page is the developer flow for connecting an MCP server by hand.
Prerequisites
- A running MCP server accessible via HTTP
- Any credentials the server requires (see Add a Credential)
Steps
1. Open the MCP Servers view
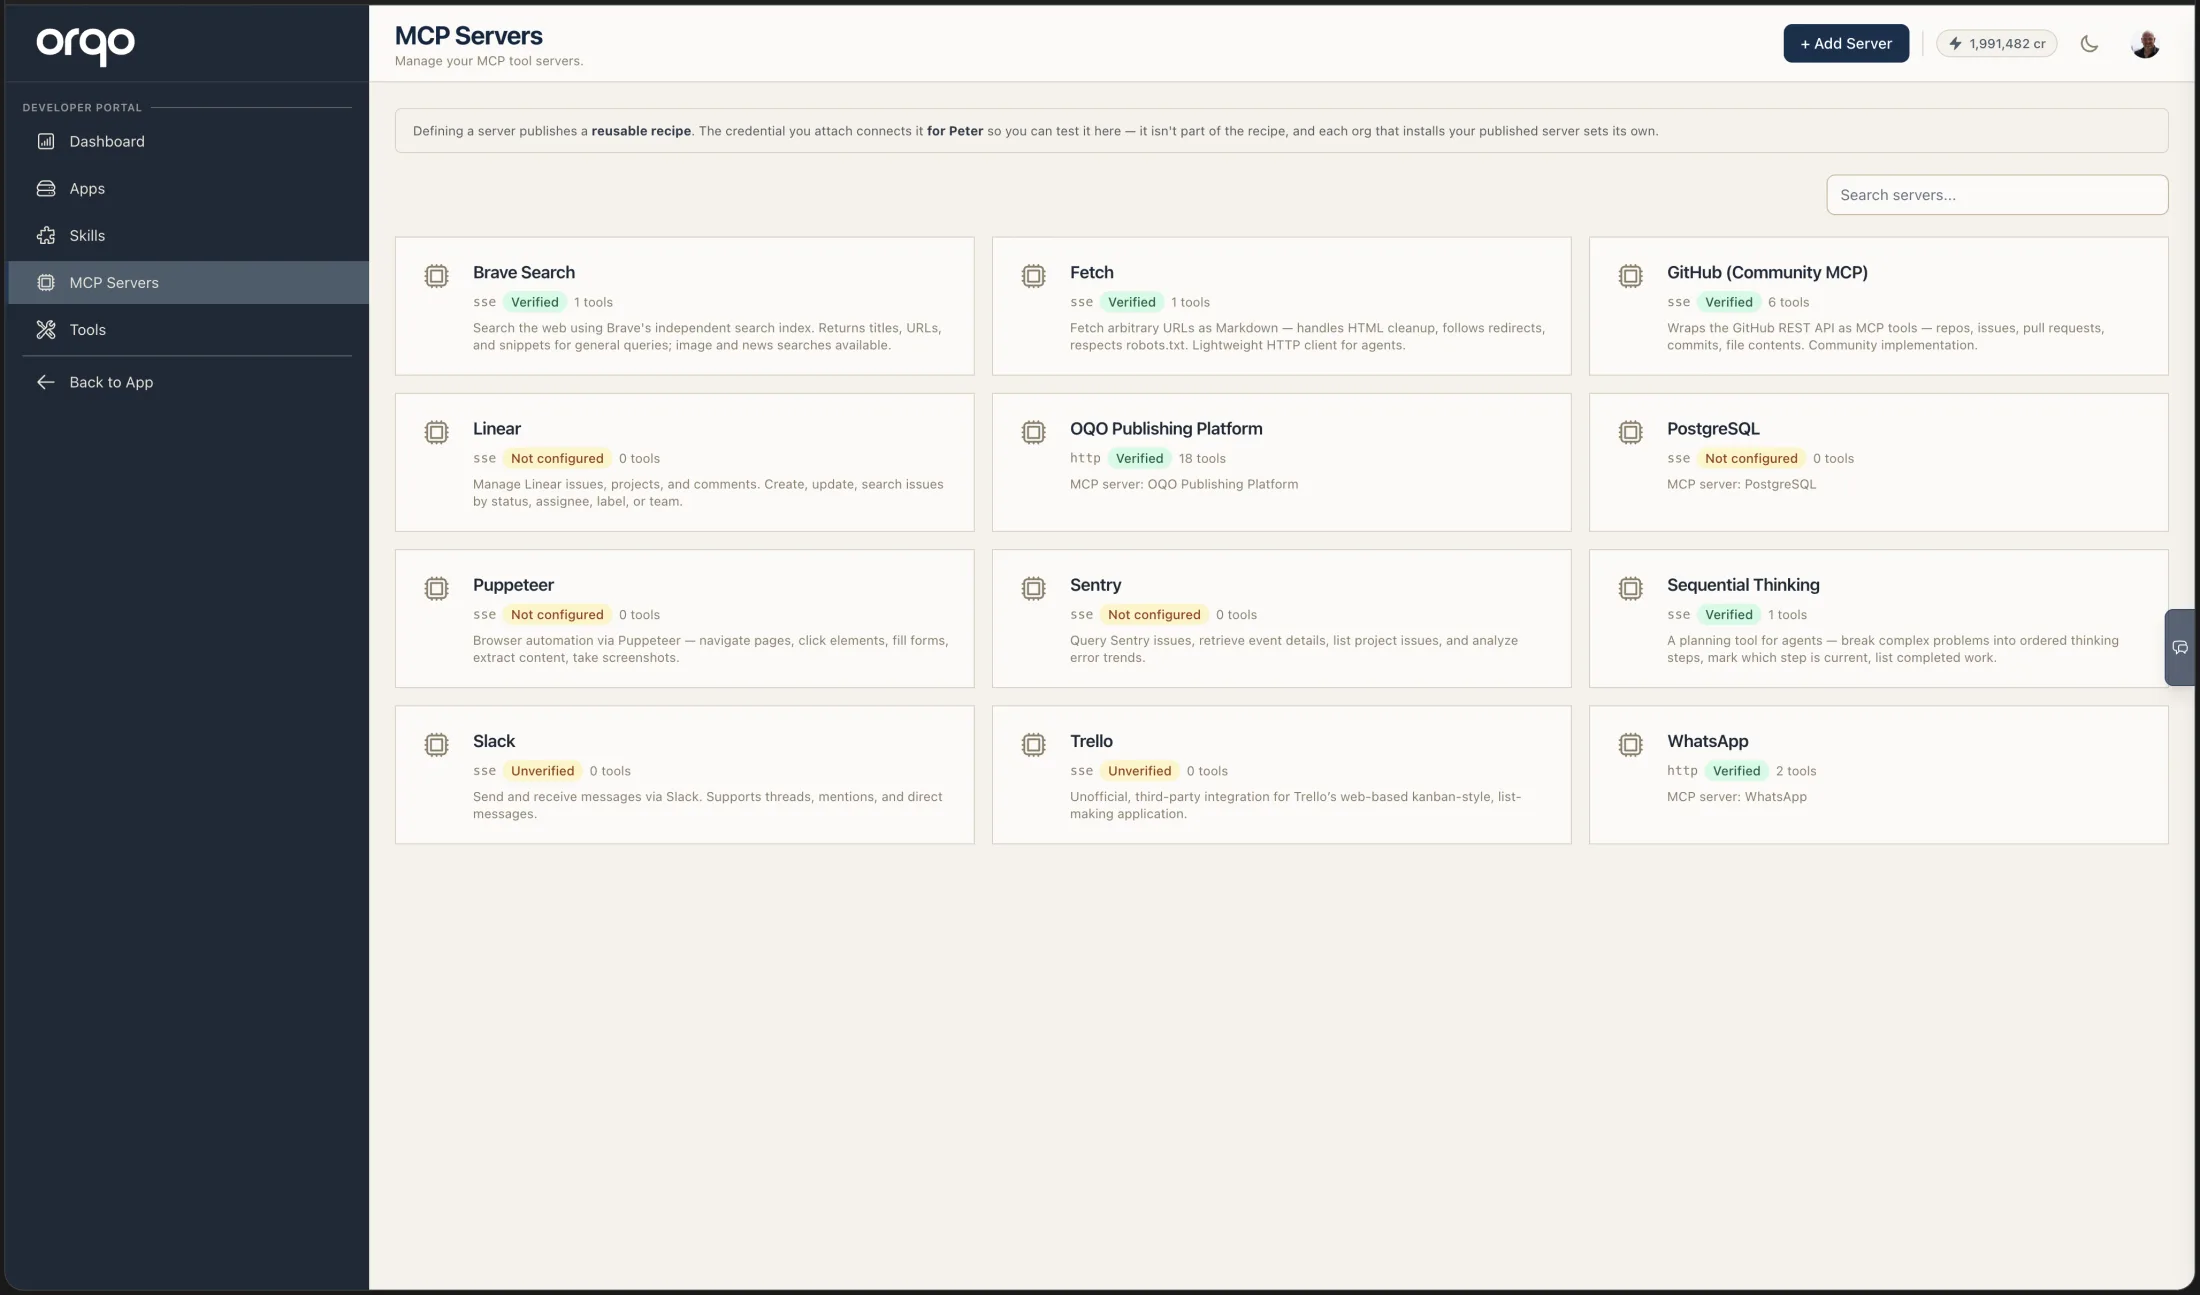
In the Developer Portal, open MCP Servers. You see a grid of server cards — each showing its transport, verification status, and the number of tools it exposes.
2. Click "Add Server"
Click + Add Server. A drawer opens with the connection form.
3. Enter the server name and description
Give the server a descriptive name (e.g., "Brave Search", "GitHub Tools", "Sentry"). This name appears in the UI when browsing available tools.
Optionally, add a description to explain what the server provides. The description appears on the server's card tile in the grid view.
Servers added from the "Popular MCP Servers" catalog come with a name and description already filled in.
4. Choose the transport and enter the server URL
Pick the transport the server speaks — SSE or HTTP — then provide the full URL where the MCP server is reachable. This is the endpoint that implements the MCP protocol.
https://mcp.example.com
http://localhost:8080
The URL must be reachable from the ORQO server at connection time and from the ORQO server at workflow execution time. For local development, use localhost or Docker service names.
5. Assign credentials (if required)
If the MCP server requires authentication, assign the appropriate credential from the credential selector. The credential is passed to the server during tool discovery and execution.
6. Save and verify the connection
Click Save. ORQO connects to the server and attempts to discover its available tools via the MCP protocol. If the connection succeeds:
- The server card shows a verified status
- Discovered tools appear as a list on the server card
If the connection fails, the card shows an error status with details about what went wrong (network error, authentication failure, protocol mismatch).
7. Review discovered tools
After a successful connection, the server drawer lists all discovered MCP tools. Each tool shows:
- Name -- The tool's identifier (used in agent configurations)
- Description -- What the tool does
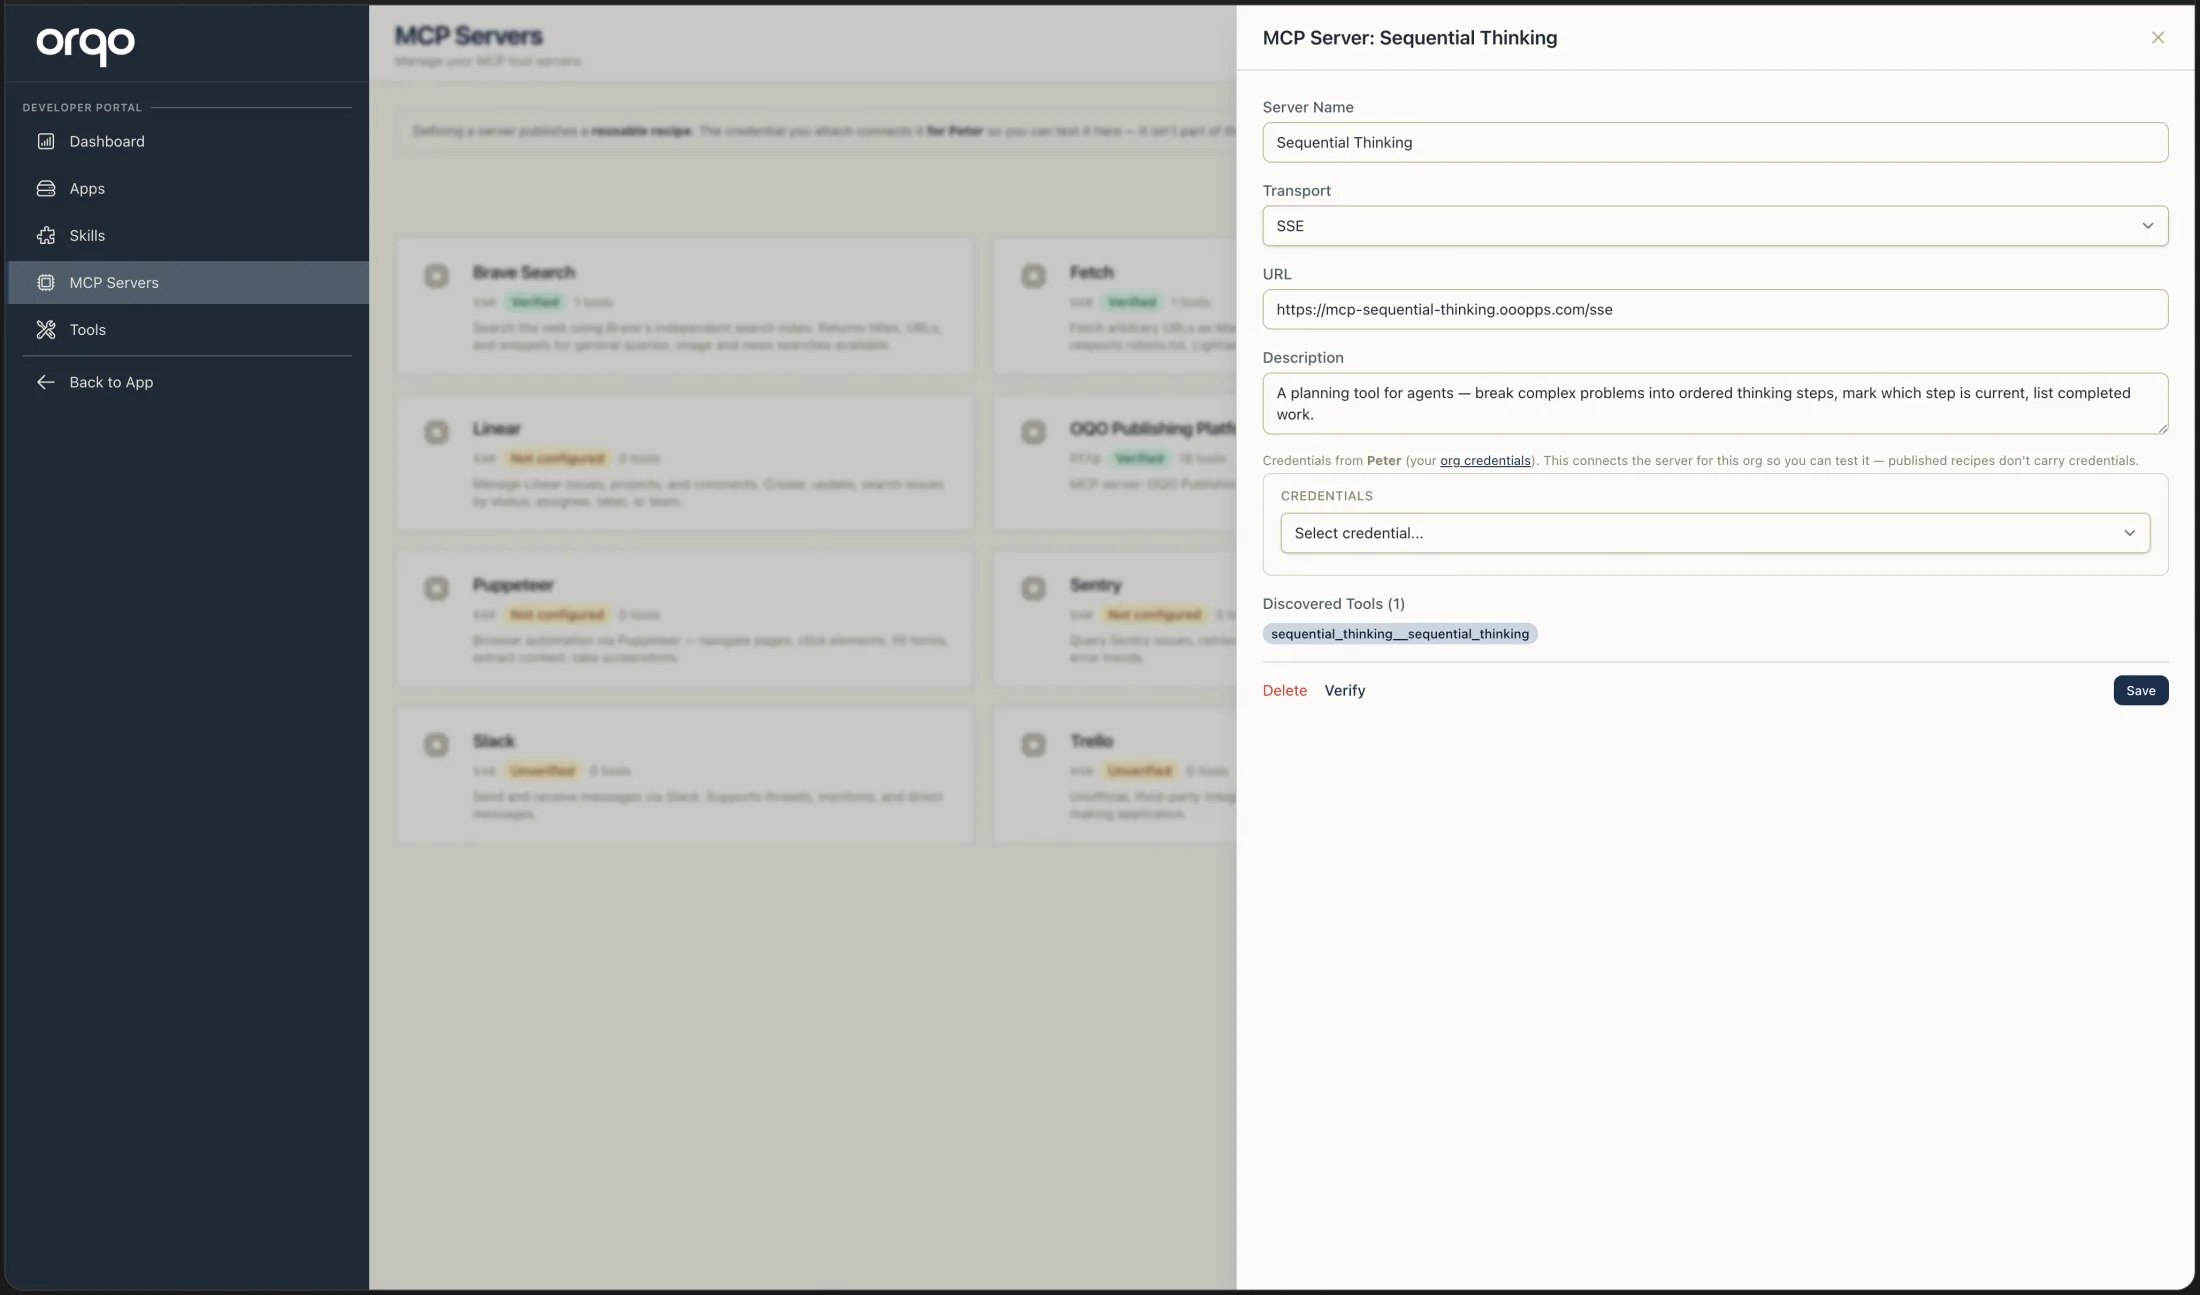
These tools are automatically bundled into a linked Skill that ORQO creates for the server. The Skill appears on the Integrations page and in the Team Builder, ready to be assigned to agents.
You don't need to manually create a Skill — ORQO auto-creates one when you connect an MCP server. Just assign the Skill to your agents in the Team Builder.
8. Update or reconnect
If the MCP server's tool set changes (new tools added, tools removed), click the server card and trigger a re-discovery. ORQO refreshes the tool list from the server.
9. Delete an MCP server
Click the server card and then Delete. This removes the server and all its discovered tools from your organization. Any skills or agents referencing these tools will lose access to them.
MCP servers created by an App (e.g., Slack, GitHub) are locked. They show a "Locked" badge and cannot be edited or deleted. To remove them, uninstall the parent App from Settings → Integrations.
What's next
- Build a Team and drag the auto-created Skill onto your agents
- Configure an Agent to give an agent access to specific tools
- Create a Skill if you want a custom Skill that selects only some of the server's tools