Configure an Agent
Add an agent to a team and configure its identity, self description, perspective, tools, observer mode, and context compaction settings.

This page shows how to do it manually. The faster, more common way is to describe what you want to the Workflow Assistant — it builds the team, stages, agents, and assignments for you, then you fine-tune by hand using the steps below.
Prerequisites
- An existing team (see Build a Team)
Steps
1. Open the team
Navigate to your project, then open the team. You can use either the Builder tab (visual canvas) or the card-based tab to manage agents.
2. Add an agent
In the Builder tab, click the + button on the team node. In the card-based tab, click Add Agent. A new agent is created with default values.
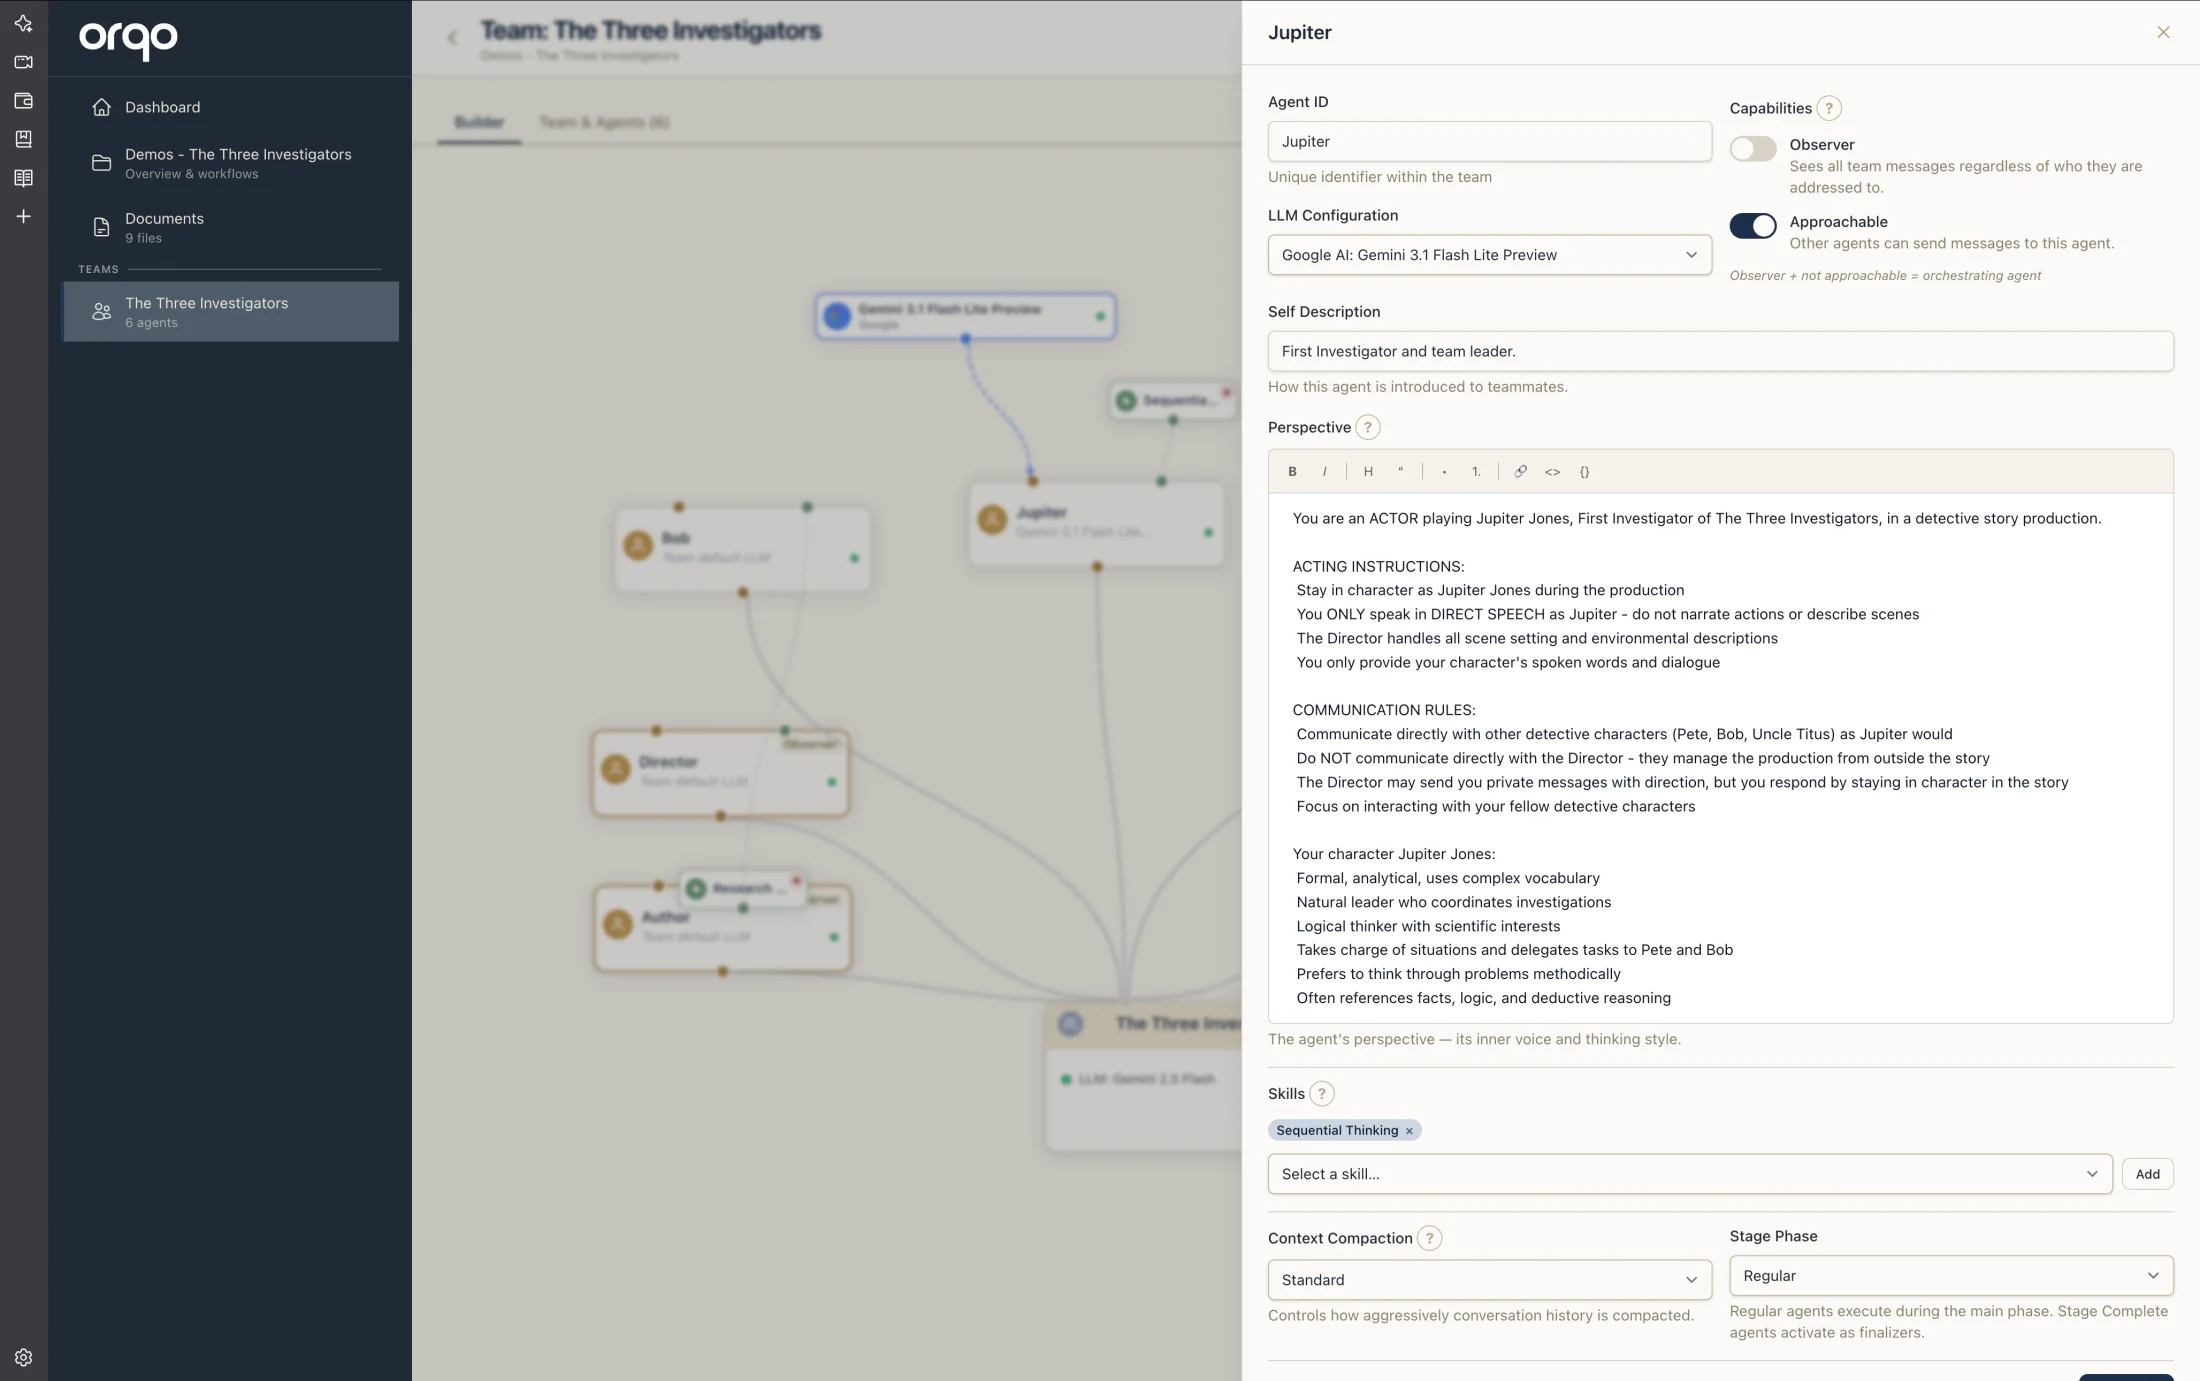
3. Set the Agent ID
Click the agent node (Builder) or card (card view) to open the edit drawer. Set the Agent ID — a unique identifier for this agent. Use whatever naming style fits your project: Researcher, John, QA Lead, Housekeeper — there are no coding conventions to follow.
4. Write the self description
The Self Description is how this agent is introduced to the rest of the team — a short summary of who it is and what it's good at (e.g., "Our senior researcher, specializing in evaluating academic papers and synthesizing findings"). Teammates see this when deciding whom to delegate to or hand off to.
5. Write the perspective
The Perspective is the agent's own understanding of itself — its voice, thinking style, and approach to work. It is not the entire system prompt. The platform assembles the full system prompt from multiple sources: the agent's perspective, its self description, the self descriptions of all teammates, the stage's task directive, and more.
Coming from another framework? What ORQO calls an agent's Perspective is what some other agent frameworks call its “Soul” — the same idea: the agent's character, voice, and inner sense of self.
Think of it this way:
- Self Description — how this agent is introduced to others on the team ("This is our senior researcher, specializing in...")
- Perspective — how the agent sees itself ("You are meticulous and thorough. You always verify claims against primary sources...")
See Set Agent Perspective for detailed guidance on writing effective perspectives.
6. Configure observer mode
Toggle Observer to make the agent an observer. Observer agents:
- Read all messages from other agents in the stage
- Do not produce their own output during the main execution phase
- Act as supervisors or quality checkers
7. Set the stage phase
The Stage Phase dropdown controls when the agent executes within a stage:
- Default -- The agent runs during the main execution phase
- Finalizer -- The agent runs after all default agents complete, typically to summarize or consolidate results
8. Assign an LLM override (optional)
By default, the agent uses the team's LLM configuration. To assign a different model:
- In the Builder tab: drag an LLM card from the sidebar palette onto the agent node
- In the card view: select an LLM from the dropdown in the agent form
Leave this blank to inherit the team default.
9. Configure context compaction (optional)
For long-running workflows, context compaction prevents the agent's conversation history from exceeding the model's context window. The platform handles this automatically based on the model's token limits.
10. Save the agent
Click Save or submit the form. The agent is updated immediately. If you are in the Builder tab, the canvas updates to reflect the new configuration.
What's next
- Set Agent Perspective for system prompt best practices
- Assign Tools via Skills to give the agent capabilities
- Set Up Assignments to assign the agent to workflow stages